
Lawn
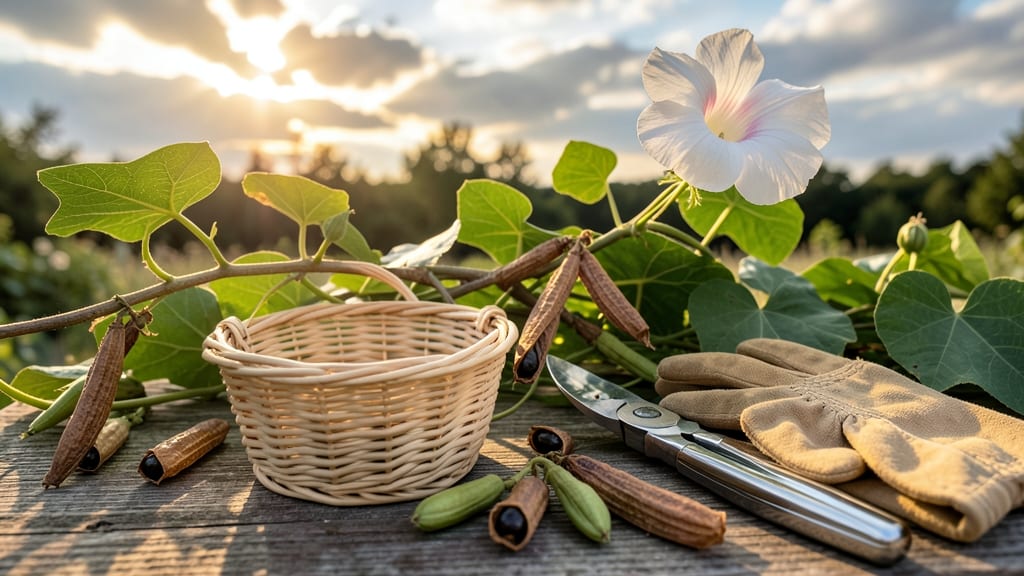
Moonflower vine seed pods hold the secret to growing these magical night-blooming beauties—if you know how to break their dormancy. 🌙 I’ve struggled with slow germination until I discovered these simple tricks that get seeds sprouting within 10-14 days instead of weeks.
The key is patience and the right timing: harvest mature pods when they turn brown and papery, then dry them completely before extracting the seeds. Store them in a cool, dark place until planting season, and you’ll avoid the frustration of waiting months for growth.
Once you plant them, keep the soil consistently moist but not soggy, and watch as those first tiny leaves push through the soil. Within a few weeks, you’ll have vigorous vines ready to climb and produce stunning white blooms that open only under moonlight.
This method works for both beginners and experienced gardeners—just follow the steps, and you’ll have moonflowers thriving in your garden year after year.
📚 In This Guide
- What you need
- Instructions
- Tips and common mistakes
- Wrapping up and next steps
What you need
- ● Moonflower vine seed pods: 5–10 fresh, mature pods (harvested in late summer/fall or purchased from a reputable supplier). Pro tip: 💡 Ensure pods are fully dry but still pliable—overly brittle pods may be past their prime.
- ● Scissors or pruning shears: Sharp, clean pair for carefully slicing open pods.
- ● Paper towels or coffee filters: 2–3 sheets (unbleached, seed-safe).
- ● Plastic zip-top bags: 1–2 quart-sized bags with a resealable closure.
- ● Spray bottle with water: Fine mist setting to avoid crushing seeds.
- ● Small planting pots or seed trays: 3–4" deep with drainage holes (biodegradable pots work too!).
- ● Seed-starting mix: Lightweight, sterile potting soil (avoid garden soil—it’s too dense!).
- ○ Heat mat (optional but helpful): Germination mat set to 75–85°F to mimic tropical conditions.
- ● Label markers: To tag pots with seed variety and planting date.
- ● Fine-mesh screen or cheesecloth: For sifting soil if you prefer a finer texture.
- ● Humidity dome or plastic wrap: To create a mini greenhouse effect (remove once sprouts appear!).
- ○ Grow lights (optional): LED or fluorescent bulbs (12–16 hours/day) if natural light is limited.
- ● Patience! ⏳ Moonflower seeds can take 2–4 weeks to germinate—stay consistent with care.
Step-by-step instructions for germinating moonflower vine seed pods
Here's how to break dormancy and coax those stubborn moonflower seeds to sprout reliably.
🌱 Step 1: Harvest and Dry the Seed Pods Properly
Collect fully mature moonflower seed pods when they turn brown and papery—this usually happens in late fall after the first frost. I like to leave them on the vine until they open naturally, then gently shake out the seeds into a paper bag. Never store damp pods; they'll mold before germination.
Spread the seeds and pods on a screen or paper towel in a dry, shaded spot for 3-5 days to complete drying. You'll know they're ready when the pods crumble easily between your fingers and the seeds inside feel dry to the touch. This drying step mimics winter's natural dormancy period and prevents rot during stratification.
💧 Step 2: Perform Cold Stratification for 6-8 Weeks
Place the dried seeds in a sealed plastic bag with a damp paper towel—just enough moisture so the towel feels like a wrung-out sponge. I keep mine in the vegetable crisper of my refrigerator at 35-40°F for 6-8 weeks. This cold treatment mimics winter's freeze-thaw cycles and breaks the seed's dormancy.
Check the bag weekly. If you see mold or an unpleasant smell, discard those seeds and start fresh. You'll know stratification is working when the seeds begin to soften slightly and lose their hard outer shell. This is the critical step that makes the difference between fast germination and months of waiting.
☀️ Step 3: Sow Stratified Seeds in Warm, Moist Soil
Fill small pots with a mix of 50% potting soil and 50% perlite to improve drainage. Moonflowers hate soggy roots, so I always use containers with drainage holes. Plant the stratified seeds ½ inch deep—deeper planting delays germination because the seedling must push through more soil.
Water gently until moisture reaches the bottom of the pot, then place the pots in a warm spot (70-75°F) with indirect light. You'll see sprouts in 10-20 days—much faster than unstratified seeds, which can take months. Keep the soil consistently moist but never waterlogged during this stage.
🌿 Step 4: Transplant Seedlings to a Permanent Location
Once seedlings develop 2-3 true leaves (the second set after the initial seed leaves), they're ready for transplanting. I harden them off by placing them outside in a shaded spot for 1-2 hours daily for 5-7 days before moving them to their permanent location.
Moonflowers need a sturdy trellis or fence to climb—plant them near a support structure at least 6 feet tall. Choose a spot with full sun (6+ hours daily) and well-draining soil. Water deeply after transplanting to help roots establish. You'll see the first blooms in 60-90 days, but the real magic happens at night when the flowers open wide.
Tips & tricks for perfect moonflower vine germination
Here's what nobody tells you about getting those stubborn moonflower seeds to sprout reliably—tricks that cut weeks off your waiting time.
Harvesting Matters: Don't rush the harvest! Wait until pods turn completely brown and papery after the first frost—this ensures full maturity. I've learned the hard way that premature pods yield seeds that either won't germinate or take months to sprout. The natural frost actually helps break dormancy, so embrace that first cold snap instead of fighting it.
Stratification Success: The 6-8 week cold stratification at 35-40°F is non-negotiable for moonflowers. I keep a small notebook by my fridge to track progress—marking when seeds soften slightly is your best indicator they're ready. Pro tip: If you're short on time, you can extend stratification to 10 weeks (clearly marked as optional) but don't rush it—this is where patience pays off for fast germination later.
Soil Mix Secrets: That 50% potting soil to 50% perlite mix is crucial for preventing root rot. I add a handful of coarse sand to the mix for even better drainage—moonflowers despise soggy conditions. When planting those ½-inch deep seeds, use your finger to make small holes rather than pressing them in, which can damage the seed coat and delay sprouting.
Lighting Strategy: The warm 70-75°F spot with indirect light is key—direct sunlight at this stage can scorch delicate seedlings. I place my seedling trays on a north-facing windowsill or under grow lights on a timer for 12 hours daily. Watch for those first sprouts in 10-20 days, but don't be surprised if some take longer—patience is part of the process!
Pro Tips for Moonflower Vine Seed Pods
- Here's what nobody tells you about getting those stubborn moonflower seeds to sprout reliably—tricks that cut weeks o...
- Harvesting Matters: Don't rush the harvest! Wait until pods turn completely brown and papery after the first frost—th...
- Stratification Success: The 6-8 week cold stratification at 35-40°F is non-negotiable for moonflowers. I keep a small...
Frequently asked questions
Got questions about moonflower vine seed pods? You’re not alone! Here are some of the most common concerns—and straightforward answers to help you grow these stunning vines with confidence.
How long do moonflower vine seed pods take to germinate?
With the right dormancy-breaking tricks (like soaking or scarification), moonflower seeds typically sprout within 7–21 days. If you’re using fresh pods, germination can be even faster—sometimes in just 5–10 days under warm, moist conditions. Patience is key, though! Slow starters may still pop up after a few weeks.
Do moonflower seed pods need cold stratification?
Yes! Moonflower seeds often require cold stratification (4–8 weeks in the fridge) to break dormancy. For faster results, try scarification (nick the seed coat with sandpaper) or soaking in warm water for 24 hours. Without these steps, germination rates drop significantly—so don’t skip this prep!
Can I grow moonflower vine from seed pods I find in my garden?
Wild-harvested moonflower pods work great, but clean and dry them first to prevent mold. Store them in a cool, dark place until planting. Just note: seeds from hybrid varieties may not grow true to type, so expect surprises in flower color or vine vigor.
Why aren’t my moonflower seeds sprouting?
Common culprits include:
- Poor moisture: Keep soil consistently damp (not soggy) during germination.
- Wrong temperature: Ideal range is 70–85°F. Use a heat mat if your space is cooler.
- Old seeds: Moonflower seeds lose viability after 1–2 years. Test freshness with a viability check (soak in water—sinkers are good!).
- Lack of light: Once sprouted, move seedlings to bright, indirect light.
Are there alternatives to moonflower vine for fast-growing vines?
If moonflowers seem too finicky, try these easy-to-grow alternatives:
- Morning glory: Germinates in 5–10 days; loves trellises.
- Sweet pea: Cold-hardy and fragrant; great for cut flowers.
- Black-eyed Susan vine: Drought-tolerant with bold blooms.
- Honeysuckle: Fast-growing and attracts pollinators.
Wrapping up and next steps
Growing moonflower vine from seed pods is a rewarding journey—one that starts with patience and ends with a breathtaking display of nocturnal beauty! 🌙✨ By mastering dormancy-breaking techniques like stratification and soaking, you’ll unlock faster, more reliable germination, ensuring your vine thrives.
Whether you’re a seasoned gardener or a curious beginner, these tricks will turn your seed pods into lush, climbing vines in no time.
Ready to transform your space? Grab those seed pods, follow the steps, and watch your moonflower vine bloom under the moonlight! 🌱💚