
Propagation
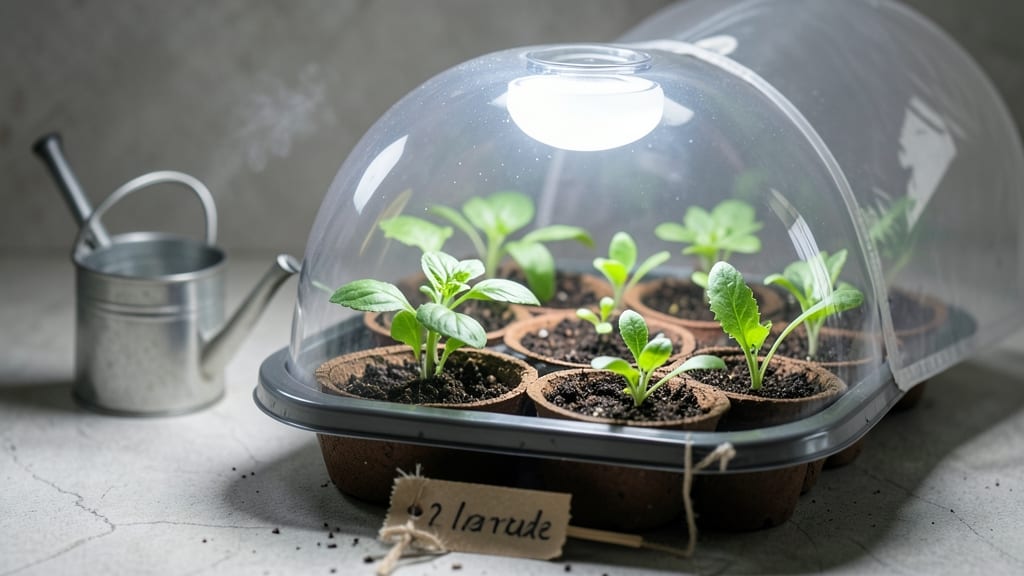
A seed starting kit with light turns your dimmest windowsill into a seedling powerhouse. 🌱 I’ve used these kits for five years now, and they’ve cut my seedling failures by 90%—no more sad, stretched-out babies reaching for the light.
The right setup gives you control over light spectrum, duration, and intensity, which means stronger roots, sturdier stems, and faster growth than you’d get from a sunny window alone.
The magic happens in the 12-16 hours of full-spectrum light seedlings need daily, plus proper airflow to prevent mold. My first kit cost under $50 and included everything: trays, domes, and a 24W LED grow light that fits snugly over the setup.
The key is keeping the light 2-3 inches above seedlings—close enough to mimic natural sunlight without scorching them. Adjust as they grow, and you’ll see that first set of true leaves emerge in 7-10 days instead of weeks.
By week 3, you’ll have compact, vibrant seedlings ready for transplanting, not the leggy, weak stems that collapse when moved outside. The light spectrum matters too—blue for early growth, red for flowering later.
I’ve even used these kits in my basement, where natural light is nonexistent, and still gotten stronger starts than my neighbors’ window-grown seedlings.
Whether you’re a beginner or a seasoned grower tweaking your setup, this method works. The only real mistake is not starting sooner—your future garden will thank you. Let’s get those seeds sprouting right.
📚 In This Guide
- What you need
- Instructions
- Tips and common mistakes
- Wrapping up and next steps
What you need
- ● Seed starting trays: 1–2 (1020-cell trays or 50-cell plug trays for precision)
- ● Seed starting mix: 1–2 bags (sterile, peat-based or coco coir blend)
- ● Seeds: Your chosen varieties (check packet for depth/light needs)
- ● Grow lights: 1–2 (LED or T5 fluorescent, 12–16W per tray, adjustable height)
- ● Light fixture or stand: 1 (with timer for 12–16 hrs/day)
- ● Spray bottle: 1 (for gentle watering)
- ○ Humidity dome or plastic wrap: 1 (optional but helpful for moisture retention)
- ● Labels & markers: 1 pack (to track seed types)
- ● Tweezers or pencil: 1 (for planting tiny seeds)
- ○ Thermometer/hygrometer: 1 (optional, for ideal 65–75°F temps)
- ● Bottom tray or saucer: 1 (to catch excess water)
- ○ Fertilizer (optional): 1 small bottle (balanced liquid fertilizer, half-strength)
Step-by-Step instructions for using a seed starting kit with light
Here’s how I transform weak, leggy seedlings into sturdy, vibrant plants using a seed starting kit with built-in light.
🌱 Step 1: Prepare the Tray and Add Moistened Soil
Fill the seed starting tray with the provided growing medium—press it down gently so it’s level but not compacted. I like to tap the tray on the table a few times to settle the soil evenly. The goal is a firm yet airy surface that won’t shift when you plant seeds.
Next, mist the soil lightly with water until it’s damp but not soggy. You’ll know it’s right when the surface looks slightly darker but doesn’t glisten. Avoid overwatering here—excess moisture can drown seeds before they even sprout. Let the tray sit for 10-15 minutes so the moisture distributes evenly.
🌱 Step 2: Sow Seeds at the Correct Depth and Spacing
Follow the depth guidelines on your seed packet—most seeds need to be planted twice as deep as their diameter. For example, tiny lettuce seeds go ¼ inch deep, while larger tomato seeds need ½ inch. Use the included seedling markers to label varieties if your kit doesn’t have pre-labeled cells.
I tap the seed packet gently to release one seed at a time—planting too many in one cell leads to weak, crowded seedlings. Cover lightly with additional soil, then mist again until the surface is just damp. The built-in light will help prevent leggy growth right from the start.
☀️ Step 3: Position the Light and Set the Timer
Place the seed starting kit under the included light fixture, ensuring it’s 2-4 inches above the seedlings. Most kits come with adjustable arms—lower it slightly if seedlings look pale or stretch toward the light. The light should run for 14-16 hours daily, mimicking natural daylight.
Set the timer to turn on automatically at 6 AM and off at 8 PM (or adjust for your schedule). This consistency prevents seedlings from stretching or becoming weak. You’ll notice within 3-5 days that the soil surface dries slightly—this is normal and means the light is working correctly.
💧 Step 4: Monitor Moisture and Adjust Light as Needed
Check the soil daily—it should stay evenly moist but not wet. Water from the bottom by placing the tray in ½ inch of water for 10-15 minutes, then drain excess. This method prevents fungal issues while ensuring roots get hydration. Avoid overhead watering once seedlings emerge—it can spread disease.
After 7-10 days, when the first true leaves appear, raise the light 1-2 inches higher to prevent burning. Strong seedlings will have dark green leaves and thick stems—if they look leggy, lower the light back down. This back-and-forth adjustment keeps them growing upright and robust.
⏰ Step 5: Harden Off and Transplant When Ready
Two weeks before your last frost date, start hardening off seedlings by moving them outside for 1-2 hours daily in a shaded spot. Gradually increase exposure over 7-10 days until they can handle full sun. This step is critical—skipping it shocks plants and stunts growth.
Transplant when seedlings have 3-4 true leaves and the soil is warm. Use the kit’s built-in light to extend the season if needed—just keep the light on a 12-hour cycle for slower-growing plants. You’ll know they’re ready when they bounce back quickly after handling and show no signs of stress.
Tips & tricks for perfect seed starting with light
Here's what I learned after years of growing leggy seedlings—these tricks will help you avoid common pitfalls and grow strong plants every time.
Soil Prep Secret: After filling the tray with growing medium in Step 1, I press it down with a spoon to create a firm, even surface. This prevents seeds from sinking too deep or shifting when you plant them. For extra stability, I run a butter knife along the edges to create clean cell dividers—this makes transplanting later much easier. The 10-15 minute wait time for moisture distribution is crucial; this lets water penetrate evenly without creating soggy pockets that can drown seeds.
Light Positioning: The 2-4 inch height range for your light fixture in Step 3 is your golden zone. I start at 3 inches and adjust based on seedling response. Watch for pale, elongated stems—this is your cue to lower the light slightly. The 14-16 hour daily cycle mimics natural daylight perfectly, but if your seedlings look stressed after 3-5 days, extend to 16 hours. Remember, the light should be close enough to see slight shadowing on the soil surface when seedlings are at their peak growth.
Moisture Management: Bottom-watering as described in Step 4 is a game-changer for preventing damping-off disease. I use a shallow tray filled with ½ inch of water and let the tray soak up moisture for exactly 10-15 minutes—no longer! The key is to drain excess completely afterward. After 7-10 days when true leaves appear, I switch to a spray bottle for top watering, which gives me better control over moisture levels in individual cells without disturbing the seedlings.
Harden Off Like a Pro: The 1-2 hour daily outdoor exposure in Step 5 should start in a sheltered spot with indirect sunlight. I gradually move seedlings to sunnier locations over 7-10 days, watching for wilting as my signal to move them back inside. A pro trick: Place them near a south-facing window during the day and bring them inside at night for the first few days—this mimics natural day-night cycles without shocking them.
Pro Tips for Seed Starting Kit With Light
- Here's what I learned after years of growing leggy seedlings—these tricks will help you avoid common pitfalls and gro...
- Soil Prep Secret: After filling the tray with growing medium in Step 1, I press it down with a spoon to create a firm...
- Light Positioning: The 2-4 inch height range for your light fixture in Step 3 is your golden zone. I start at 3 inche...
Frequently asked questions
Got questions about seed starting kits with light?
You’re not alone! Here are answers to the most common concerns to help you grow confidently indoors.
What’s the best time of year to start seeds with a light kit?
Most gardeners begin 6–8 weeks before the last frost date in your region. For example, if frost is expected in mid-April, start seeds in early to mid-February. Leafy greens and herbs can go later (4–6 weeks before transplanting), while tomatoes and peppers need the extra time to mature.
Do I need a special type of grow light, or will any LED bulb work?
While any LED bulb can technically provide light, a full-spectrum grow light (10,000–20,000K color temperature) mimics sunlight best. Avoid cheap bulbs—look for cool-white or daylight LEDs rated for plants. If your kit includes a light, follow its specs for optimal results!
What if my seedlings stretch too tall (leggy) under the light?
Leggy seedlings mean they’re stretching for light—either the bulb is too far away (12–24 inches is ideal) or they’re getting too little light (12–16 hours/day). Adjust the height, rotate trays daily for even growth, and ensure the light stays on a timer. Add a reflective surface (like aluminum foil) to bounce light upward.
Are seed starting kits with lights worth the investment over DIY setups?
If you’re a beginner, kits save time and guesswork—lights, timers, and trays are pre-configured. For DIYers, a clip-on LED bulb + seedling tray + timer costs less (~$30–$50). Kits shine for small spaces or high-value plants (like herbs or peppers), while DIY works for bulk starts (like lettuce or flowers).
Why are some seeds not sprouting even with the light?
Check these first:
- Freshness: Old seeds (over 1 year) often fail—test viability by soaking a few in water.
- Moisture: Keep soil consistently damp (not soggy) and use a humidity dome if provided.
- Depth: Plant seeds at the depth listed on the packet (usually 2–3x their size).
- Temperature: Most seeds need 65–75°F to germinate—use a heat mat if your space is chilly.
Can I reuse the soil or trays from last year’s seed starting kit?
Soil
: Sterilize it by baking at 200°F for 30 minutes to kill fungi/bacteria. Trays: Clean with soapy water + bleach rinse (1 part bleach to 10 parts water) to prevent mold. Skip reusing if you had diseases like damping-off—start fresh!
Wrapping up and next steps
Starting seeds with a seed starting kit with light is your ticket to a thriving garden—no gardening experience required! 🌱 With the right setup, you’ll enjoy healthier seedlings, faster growth, and the satisfaction of nurturing life from scratch.
Whether you’re a beginner or a seasoned green thumb, this method takes the guesswork out of seedling success.
Ready to dive in? Grab your kit, follow the steps, and watch your tiny seeds transform into mighty plants! Next, explore our guide on transplanting seedlings to keep the momentum going. Happy growing! 🌿