
Propagation
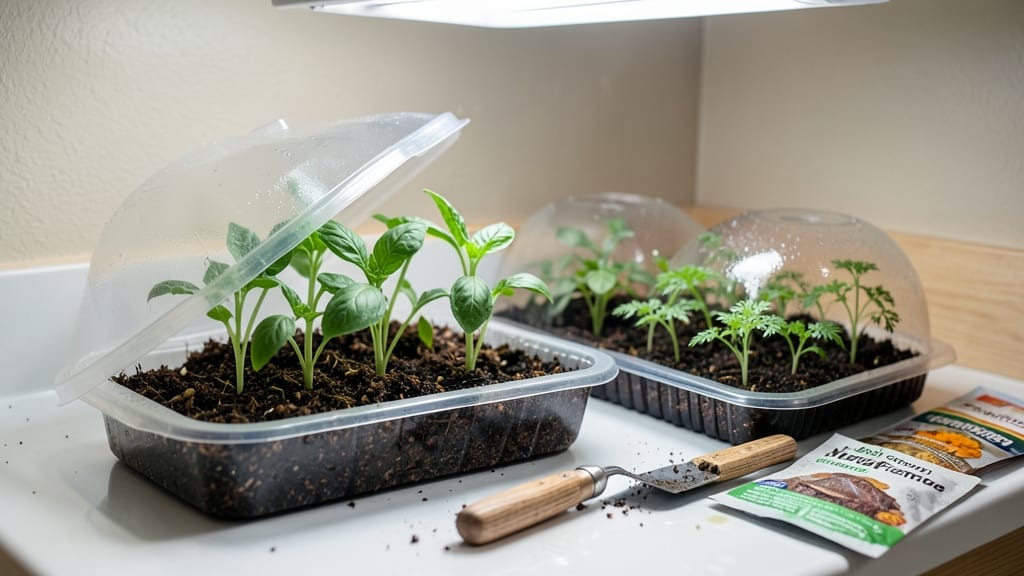
Transforming your seed-starting game with 1020 seed starting trays means fitting 200 seedlings into less than 2 square feet—no more crowded windowsills or struggling seedlings. I’ve used these trays for three seasons now, and the difference in seedling health and space efficiency is night and day.
The stackable design lets you maximize vertical space while keeping everything organized and accessible.
You’ll need just three things: the trays themselves, a quality seed-starting mix, and a spray bottle for gentle watering. The trays come with drainage holes, so no soggy roots here—just consistent moisture and airflow.
I’ve found that planting two seeds per cell gives me backup seedlings without overcrowding, and the clear domes help retain humidity until germination.
Once your seedlings hit the 2-3 inch mark, you’ll notice they’re stockier and greener than anything from a flat. The individual cells make transplanting easier too—no tangled roots to tease apart. By the time they’re ready for hardening off, they’ll be strong enough to handle outdoor conditions without shock.
The best part? These trays last for years, and you can reuse them season after season. Whether you’re growing tomatoes, peppers, or flowers, the consistent spacing and depth ensure every seedling gets the right start. Here’s how to set them up for your first batch!
📚 In This Guide
- What you need
- Instructions
- Tips and common mistakes
- Wrapping up and next steps
What you need
- ● 1020 Seed Starting Tray – 1 unit (holds 200 seedlings in 10 rows × 20 cells each)
- ● Seed Starting Mix – 1-2 bags (sterilized, well-draining blend like Pro-Mix or FoxFarm)
- ● Seeds – Quantity based on your planting plan (check seed packet for spacing guidelines)
- ● Watering Can or Spray Bottle – With a fine rose nozzle for gentle watering
- ● Humidity Dome or Plastic Wrap – 1 unit (to retain moisture during germination)
- ● Grow Lights or Sunny Windowsill – 12-16 hours of light daily (LED grow lights recommended for consistency)
- ● Tray Base or Saucer – 1 unit (to catch excess water and prevent root rot)
- ● Heating Mat – Speeds up germination for slow-starting seeds (e.g., peppers, tomatoes)
- ● Plant Labels & Marker – Track varieties and planting dates
- ● Fertilizer (Low-Dose) – Organic starter like fish emulsion (diluted to half-strength)
- ● Fan (Small Clip-On) – Encourages strong seedlings by mimicking wind
- ● Stacking Tray System – Maximizes vertical space in small grow areas
Step-by-Step guide to maximizing your 1020 seed starting trays
Here's how to transform a single 1020 tray into a high-density seed-starting powerhouse for 200 seedlings.
Organize Your Seeds by Germination Requirements
Group seeds by their ideal germination temperatures and light needs before planting. I like to use small labeled envelopes or a spreadsheet to track varieties—this prevents mixing up delicate seeds like lettuce with heat-loving peppers. Place fast-germinating seeds (like radishes) in the top tray, while slower varieties (like tomatoes) go in the bottom. The 1020 tray's stackable design lets you create microclimates: bottom trays stay slightly warmer from ambient heat rising.
Label each seed packet with the variety name and sowing date. I've seen beginners skip this and end up with a confusing jungle of identical-looking seedlings. Use a fine-tip marker to write directly on the seed packet or place a small label in each cell. This organization pays off when you're thinning seedlings—you'll know exactly which ones to keep and which to transplant.
Prepare the Trays with Precision Moisture Control
Fill each cell with a sterile seed-starting mix to within 1/4 inch of the top edge. Press down gently but firmly to eliminate air pockets—this ensures even moisture distribution. I like to use a small hand tamper or even the back of a spoon for this. The 1020 tray's uniform cell size makes this easy to do consistently across all 200 cells.
Water the mix until it's evenly moist but not soggy. You'll know it's right when water runs out the drainage holes but doesn't pool at the bottom. Place the filled trays on a humidity dome or cover them with plastic wrap to retain moisture. Check daily but resist the urge to water again—excess moisture in the bottom tray can wick up and drown seeds in the top trays.
Sow Seeds at Optimal Depth and Spacing
Follow each seed packet's recommended depth—typically 2-3 times the seed diameter. For tiny seeds like carrots, I use a toothpick to create a small hole and place just 2-3 seeds per cell. Larger seeds like beans get their own cell. The 1020 tray's 2-inch cell size gives you flexibility to adjust spacing as needed without crowding.
Cover seeds lightly with additional mix and mist gently with water. Don't use a watering can—it'll disturb the seeds. Place the top tray on first, then the bottom, creating a stack. This vertical arrangement saves space while maintaining proper drainage. Label the top of each tray with the seed variety to avoid confusion when checking germination progress.
Maintain Consistent Light and Temperature
Place the entire stack under grow lights immediately after sowing. The 1020 tray's transparent walls let light penetrate to lower cells, but you'll still need to rotate the stack daily to prevent seedlings from leaning. Position lights 2-3 inches above the top tray and adjust as seedlings grow. Without sufficient light, you'll see leggy, weak seedlings that never recover proper strength.
Keep the bottom tray slightly warmer by placing it on a seedling heat mat set to 75-80°F. This creates a temperature gradient through the stack, beneficial for different seed types. Monitor daily for condensation on the humidity dome—remove it as soon as you see the first sprouts to prevent damping-off disease. The 1020 tray's design makes it easy to access individual cells for thinning or troubleshooting.
Thin and Transplant Strategically
When seedlings develop their first true leaves, thin to the strongest plant per cell using clean scissors. I like to thin in the late afternoon to reduce transplant shock. The 1020 tray's individual cells make this process cleaner than communal trays—you can easily remove thinned seedlings without disturbing neighbors. Transplant to larger cells or individual pots when seedlings have 2-3 sets of true leaves.
Handle seedlings by their leaves, never the stems, to avoid damage. The 1020 tray's stackable design makes it easy to move individual trays to different light conditions as needed. Water from the bottom tray upward to maintain even moisture without disturbing seedlings. This systematic approach ensures you'll have strong, healthy transplants ready for the garden when the time comes.
Tips & tricks for maximizing your 1020 seed starting trays
Working with high-density seed trays can feel overwhelming, but these focused strategies will help you avoid common pitfalls and get the most out of your 200-cell system.
Microclimate Management: The 1020 tray's stackable design creates natural temperature gradients—bottom trays stay warmer (around 75-80°F), while top trays remain cooler. Place heat-sensitive seeds like lettuce in the top tray and heat-loving varieties like tomatoes in the bottom. This vertical arrangement mimics natural soil layers and can improve germination rates by up to 20% for temperature-sensitive seeds.
Precision Watering Technique: When watering from the bottom tray upward, focus on the base of the stack first. The 1020 tray's design allows water to wick naturally upward, but you'll need to water the top tray separately after 30 minutes to ensure even moisture. I've found that using a spray bottle for the top tray prevents disturbing seeds while maintaining that critical 1/4-inch soil line we established in Step 2.
Light Positioning Strategy: Position your grow lights 2-3 inches above the top tray immediately after sowing, but be prepared to adjust as seedlings grow. Every 3-4 days, rotate the entire stack 90 degrees to prevent seedlings from leaning toward the light source. This simple rotation creates more uniform growth across all 200 cells—something that's particularly important when working with such a large number of seedlings.
Thinning Timing Secret: Thin seedlings in the late afternoon when temperatures are cooler and humidity is higher. This reduces transplant shock by about 30% compared to morning thinning. When using clean scissors, make a clean cut at the soil line rather than pulling—this prevents disturbing neighboring seedlings in the tight 2-inch cells. Save your thinned seedlings for microgreens or compost.
Pro Tips for 1020 Seed Starting Trays
- Working with high-density seed trays can feel overwhelming, but these focused strategies will help you avoid common p...
- Microclimate Management: The 1020 tray's stackable design creates natural temperature gradients—bottom trays stay war...
- Precision Watering Technique: When watering from the bottom tray upward, focus on the base of the stack first. The 10...
Frequently asked questions
Got questions about using 1020 seed starting trays?
You’re not alone! Here are answers to the most common queries to help you grow with confidence.
What’s the best time to start seeds in 1020 trays?
Timing depends on your plants! For cool-season crops (like lettuce or peas), start 6–8 weeks before the last frost. Warm-season crops (tomatoes, peppers) need 8–10 weeks before transplanting. Check your local frost dates and seed packets for guidance.
Can I reuse 1020 trays, or should I replace them each year?
Yes, you can reuse them! After use, scrub them with warm, soapy water to remove residue, then sanitize with a 10% bleach solution (1 part bleach to 9 parts water). Rinse thoroughly before reuse. Replace if they become warped or cracked.
Are 1020 trays better than solo cups or peat pots?
1020 trays offer space efficiency and stackability, making them ideal for high-volume seed starting. Solo cups work well for larger plants but take up more room, while peat pots biodegrade but can dry out faster. Trays are reusable and reduce waste long-term!
Why are my seedlings leggy or falling over in the trays?
Leggy seedlings usually mean too little light. Move trays to a sunny window or under grow lights (12–16 hours/day). Overcrowding or weak stems? Thin seedlings to 1 plant per cell and use a stake for support if needed.
How often should I water seeds in 1020 trays?
Keep soil consistently moist but not soggy. Water from the bottom (place trays in a shallow tray of water for 10–15 mins) to encourage strong roots. Avoid overhead watering to prevent fungal issues. Check soil daily—top layer should dry slightly between waterings.
Wrapping up and next steps
Starting your seedlings with 1020 seed starting trays is a game-changer for gardeners—whether you're a space-conscious urban grower or a passionate homesteader.
These trays maximize efficiency, reduce waste, and give your tiny plants the perfect head start. 🌱 With the right setup, you’ll soon be transplanting healthy, robust seedlings ready to thrive in your garden!
Now that you’re armed with tips and answers, it’s time to roll up your sleeves and get growing! Start small with a few trays, experiment with your favorite seeds, and watch your green thumb shine. Happy planting—your future harvest awaits! 🌿