
Lawn
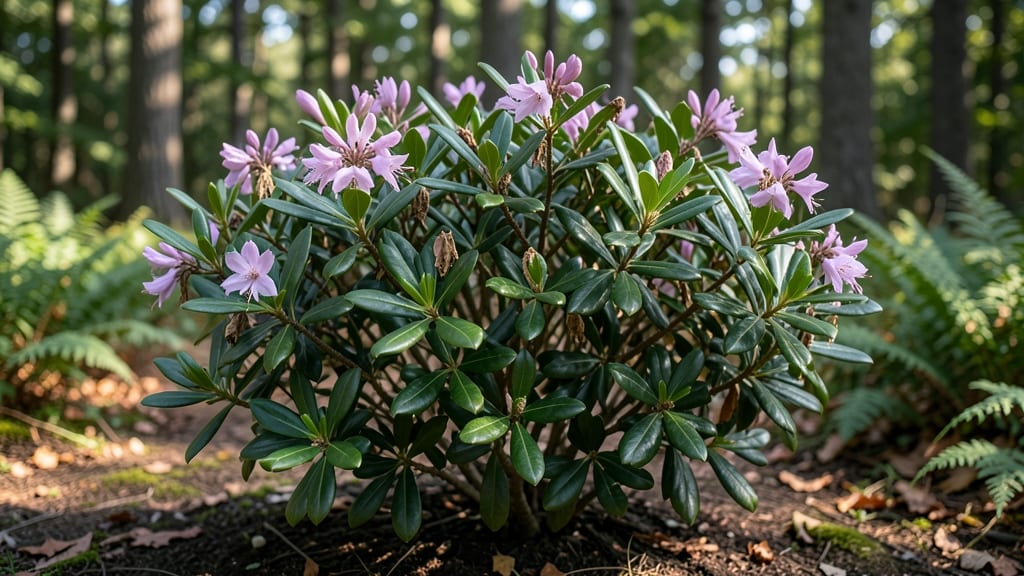
Mountain laurel seed pods are nature's stubborn treasure chest—🌿 cracking them open reveals tiny, glossy seeds that could grow into your yard's showstopper shrubs. I've wrestled with these twisty pods for years, and I'll show you how to extract every viable seed without losing patience (or your sanity).
The real secret lies in timing: collect pods when they're dry but not yet split open, then soak them overnight to soften the tough shell. After that, it's all about the right tools—a pair of pruners for cutting, a knife for prying, and a bit of elbow grease.
Most seeds need 90 days of cold stratification before they'll even think about sprouting. Once you've got those seeds germinating (yes, it takes time—sometimes up to a year), you'll nurture them into sturdy seedlings that can handle transplanting. The payoff?
A mountain laurel that'll thrive for decades with almost no care after establishment. This method works whether you're restoring a woodland garden or adding a native accent plant to your landscape. Let's get those seeds growing!
📚 In This Guide
- What you need
- Instructions
- Tips and common mistakes
- Wrapping up and next steps
What you need
- ● Fresh mountain laurel seed pods – Harvest only fully brown, dried pods (avoid green or partially ripe ones!). Aim for 5–10 pods to practice extraction techniques.
- ● Heavy-duty pruning shears or garden scissors – For safely snipping pods from branches (look for sharp, bypass-style blades to avoid crushing seeds).
- ● Thick work gloves – Mountain laurel pods are tough! Choose gardening gloves with reinforced palms (e.g., mechanics-grade leather or nitrile-coated).
- ● Hammer or mallet (8–16 oz) – A rubber-faced mallet is ideal to avoid damaging seeds while cracking open pods.
- ● Sturdy cutting board or anvil rock – Place pods on a hard, flat surface (like a wooden board or concrete slab) to protect your workspace.
- ● Tweezers or fine-tip pliers – For delicately extracting seeds from pod fragments (slotted or locking tweezers work best).
- ● Fine-mesh strainer (0.5mm or smaller) – To sift out seeds from debris after extraction (stainless steel lasts longest).
- ● Paper towels or coffee filters – For drying seeds (unbleached to avoid chemical exposure).
- ● Spray bottle with water – To moisten seeds for easier separation (if needed).
- ○ Seed viability test kit – Test germination rates before planting (optional but recommended for serious growers).
- ● Labeling tags & permanent marker – To track seed batches (e.g., harvest date, location).
- ● Safety goggles – Protects eyes from debris if pods shatter unexpectedly.
- ● Portable seed tray or small pots – For immediate post-extraction planting (2–3 inch pots work well).
- ● Vinegar or citrus juice – A natural softener to pre-treat pods (soak for 10–15 mins) if they’re extra stubborn.
How to extract and grow mountain laurel seeds from pods
Mountain laurels grow from stubborn seeds—here's how to crack open those twist-resistant pods and get them sprouting.
🌱 Step 1: Harvest and Prepare the Seed Pods
Collect mature pods when they turn brown and begin splitting open naturally, usually in late summer or early fall. I look for pods that have started to crack but still hold their shape—these are ripe enough to yield seeds but not so dry they crumble. Place them in a paper bag and let them dry indoors for 1-2 weeks at room temperature.
Once fully dry, gently twist and pull the pods apart by hand. The seeds will stick to the inner walls—don't force it, or you'll damage them. I like to lay the pods on a clean towel and roll them gently with my fingers until the seeds release. Store the extracted seeds in a cool, dry place until ready to plant.
💧 Step 2: Soak and Scarify the Seeds
Mountain laurel seeds have a tough outer coating that resists water absorption. To break this dormancy, soak the seeds in warm water for 24-48 hours, changing the water every 12 hours. This softens the seed coat and helps kickstart germination. I use a small glass jar with a lid to keep the seeds submerged.
After soaking, scarify the seeds by gently rubbing them between two sheets of sandpaper or using a knife to lightly nick the outer shell. This small abrasion lets moisture penetrate more easily. Don't overdo it—just enough to scratch the surface. Rinse the seeds with clean water and let them dry for 24 hours before planting.
☀️ Step 3: Plant the Seeds in Well-Draining Soil
Fill small pots or seed trays with a mix of 50% peat moss and 50% perlite to ensure excellent drainage—mountain laurels hate soggy roots. Plant the seeds ¼ inch deep, spacing them about 1 inch apart. I use a toothpick to make small holes in the soil, then place one seed in each hole and cover lightly with more mix.
Water gently until the soil is moist but not saturated. Place the pots in a warm, shaded area with temperatures between 65-75°F. Keep the soil consistently moist but never waterlogged. You'll know it's right when the surface looks damp but not glistening. Germination can take 4-8 weeks, so patience is key.
🌿 Step 4: Transplant Seedlings When Ready
Once seedlings reach 2-3 inches tall and have developed their first true leaves, they're ready to move to individual pots. I use 4-inch pots filled with a mix of potting soil and sand for better drainage. Handle the seedlings carefully—mountain laurels are sensitive to root disturbance.
Place the pots in a location with partial shade and protect them from strong winds. Keep the soil moist but reduce watering gradually as the seedlings grow. After 6-12 months, when the seedlings are sturdy and have grown another 4-6 inches, they can be transplanted outdoors to their permanent location.
⏰ Step 5: Maintain and Protect Young Plants
Mountain laurels grow slowly, so give them time to establish. Water deeply once a week during the first year, ensuring the soil drains well. Avoid fertilizing during the first year—too much nutrients can weaken the plant. I mulch around the base with 2 inches of pine needles or wood chips to retain moisture and suppress weeds.
Watch for pests like spider mites or scale insects, which can stress young plants. If you spot any, treat them with neem oil or insecticidal soap. Mountain laurels are drought-tolerant once established, but young plants need consistent care. With patience, you'll have a beautiful, twist-resistant laurel thriving in your garden.
Tips & tricks for growing mountain laurel seeds
Working with mountain laurel seeds takes patience and precision—here's how to avoid common pitfalls and maximize your success.
Pod Selection Matters: In Step 1, look for pods that are fully brown but still slightly pliable when you gently squeeze them. Overly dry pods will crumble when you try to extract seeds, while underripe ones won't release seeds at all. I've found that pods collected in late September often yield the best results—just as they're beginning to naturally split open. Store harvested pods in a paper bag in a dry, dark place until ready to process.
Soaking Strategy: The 24-48 hour soaking period in Step 2 is crucial, but don't rush it. I've learned that changing the water every 12 hours prevents bacterial growth and keeps the water warm enough to effectively soften the seed coats. Use a jar with a lid to keep seeds submerged—any seeds floating to the top are likely empty. After soaking, I add a drop of dish soap to the rinse water to help remove any residual oils that might prevent moisture absorption during scarification.
Scarification Technique: When scarifying in Step 2, think of it like sanding a piece of wood—just enough to break the surface without removing too much. I use fine-grit sandpaper (around 220-grit) and gently rub each seed for about 5 seconds per side. For a small batch, you can also use a knife to make 2-3 small nicks around each seed. The goal is to create tiny openings that let water penetrate while keeping the seed intact. After scarifying, I spread the seeds on a clean paper towel to dry completely before planting.
Germination Environment: In Step 3, maintaining that 65-75°F temperature range is key, but don't overlook humidity. I've found that placing a clear plastic bag over the pots creates a mini greenhouse effect that helps maintain moisture levels. Just be sure to remove the bag and ventilate occasionally to prevent mold. The soil mix of 50% peat moss and 50% perlite works wonders for drainage—this prevents the root rot that can kill mountain laurel seedlings before they even sprout.
Pro Tips for Seed Pods Mountain Laurel
- Working with mountain laurel seeds takes patience and precision—here's how to avoid common pitfalls and maximize your success.
- Pod Selection Matters: In Step 1, look for pods that are fully brown but still slightly pliable when you gently squeeze them.
- Soaking Strategy: The 24-48 hour soaking period in Step 2 is crucial, but don't rush it.
Frequently asked questions
Got questions about mountain laurel seed pods? You’re not alone!
Here are some of the most common queries—plus straightforward answers—to help you navigate the quirks of these tough little pods.
When is the best time to harvest mountain laurel seed pods?
Harvest pods when they turn brown and papery (usually late summer to early fall), but before they split open. If you wait too long, the seeds will scatter, and squirrels or birds might beat you to them! Pro tip: Shake a pod over a bag—if seeds rattle inside, it’s ready.
Why are mountain laurel seed pods so hard to open?
The pods are naturally tough to protect seeds from animals and harsh weather. Their twist-resistant design is a survival tactic! Use pliers, a hammer, or soak them in water for 24 hours to soften the fibers. Patience is key—don’t force it!
Can I grow mountain laurel from seed pods, or should I buy seedlings?
You can grow from seeds, but it’s slow (2+ years to mature) and hit-or-miss. Seedlings are faster and more reliable for landscaping. If you’re experimenting, stratify seeds (mix with moist sand, refrigerate 3 months) to mimic winter conditions and boost germination.
Are mountain laurel seed pods toxic to pets or wildlife?
Yes! All parts of mountain laurel—including pods, seeds, and leaves—are toxic if ingested. Symptoms in pets (or curious critters) may include vomiting, drooling, or weakness. Keep pods out of reach and dispose of them safely.
What’s the best way to store harvested mountain laurel seeds?
Once extracted, store seeds in a cool, dry place (like a sealed jar with silica gel) for up to 6 months. Label them with the harvest date! For longer storage, freeze them—this preserves viability better than room temperature.
Wrapping up and next steps
Mountain laurel seed pods may seem tough, but with patience and the right techniques, you can unlock their hidden potential! 🌱 Whether you're a gardening enthusiast or a nature lover, extracting these seeds is a rewarding challenge that connects you to the beauty of the wild. Ready to take the next step? Try your hand at growing mountain laurel saplings—your future garden (or local ecosystem) will thank you!
💡 Pro Tip: Share your success with fellow plant lovers or join a local gardening group for tips and inspiration!