Lawn
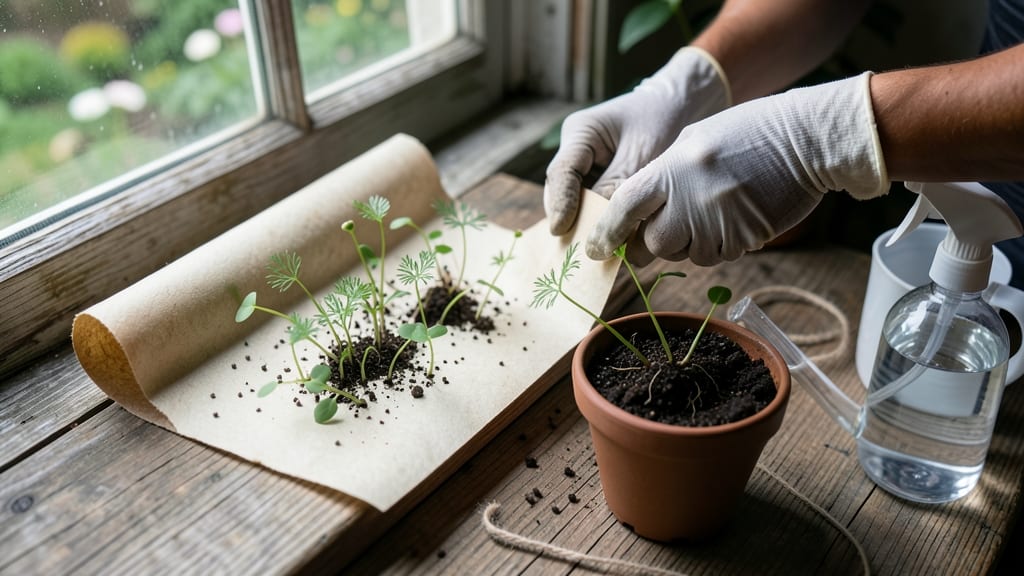
Creating seed paper instructions that grows into vibrant wildflowers is easier than you think—just mix seeds, paper pulp, and water. 🌱 I’ve turned this process into a weekend project that doubles as a creative craft and a way to grow beautiful blooms without digging. The best part?
You’ll end up with biodegradable paper that sprouts into flowers when planted. Start with a simple blend of wildflower seeds, recycled paper pulp, and a bit of water—no fancy equipment needed. Press the mixture into molds, dry it completely, and you’ve got plantable paper ready for direct sowing.
The process takes about 2 hours from start to finish, and you’ll have seeds ready to plant in just a few days. Once planted, your seed paper will germinate in 7-14 days, revealing delicate sprouts that grow into full blooms.
The flowers attract pollinators, and the paper decomposes naturally, leaving no trace behind. Perfect for gardeners who love eco-friendly projects with a creative twist. Works in any sunny spot, from garden beds to containers, and even makes a thoughtful gift. Here’s how to make it bloom!
📚 In This Guide
- What you need
- Instructions
- Tips and common mistakes
- Wrapping up and next steps
What you need
- ● Wildflower seeds – Choose a mix (e.g., marigolds, sunflowers, or native wildflowers). Quantity: ~1–2 tbsp per sheet (adjust based on size).
- ● Unbleached paper pulp – Use recycled paper (newspaper, printer paper, or egg cartons) or pre-made pulp from craft stores. Quantity: Enough to cover your mold (~1–2 cups of shredded paper).
- ● Water – Filtered or distilled works best to avoid contaminants.
- ● Blender – A high-powered blender (like a Vitamix) for smooth pulp. Alternative: A food processor (results may vary).
- ● Mold & deckle – A DIY frame (wooden or plastic) or store-bought paper-making kit. Size: Adjust to your desired paper dimensions (e.g., 4x6" or 8.5x11").
- ● Sponge & towel – For pressing out excess water.
- ● Rolling pin or heavy books – To flatten the paper while drying.
- ● Natural dyes – Turmeric (yellow), beet juice (pink), or coffee (brown) for colored paper.
- ● Essential oils – A drop of lavender or citrus oil for a subtle scent.
- ● Decorative elements – Dried flowers, glitter (biodegradable), or pressed leaves for texture.
- ● Seed paper cutter – Cookie cutters or a craft knife for fun shapes (hearts, stars, etc.).
- ● Access to a sink or large bowl for mixing pulp.
- ● Patience! Drying time varies (24–48 hours).
- ● Outdoor space for planting (seed paper needs sunlight and water to grow).
Step-by-step instructions for making your own seed paper
Here's how to craft plantable paper that grows into vibrant flowers—no green thumb required.
🌱 Step 1: Prepare Your Materials
Start by gathering 1 cup wildflower seeds (choose fast-growing varieties like cosmos or marigolds), 1 cup water, and 2 cups recycled paper (shredded office paper works best). Tear the paper into small pieces—think confetti-sized. I like to use a blender for this step because it breaks down fibers evenly without leaving large clumps.
In a large bowl, mix the paper pieces with 1 cup water until fully saturated. Let it soak for 10-15 minutes while you prepare the next components. The goal is a thick, pulp-like consistency—like oatmeal but with more texture. If it's too dry, add a splash more water; if too watery, let it sit longer. You want it to hold together when squeezed but still be moldable.
💧 Step 2: Blend and Strain the Mixture
Transfer the soaked paper to a blender and add 1 cup fresh water. Blend on high for 30-45 seconds until smooth. You'll see the fibers break down into a thick, creamy slurry—this is your seed paper base. Pour the mixture through a fine-mesh strainer or cheesecloth into a clean bowl to remove any remaining lumps or undissolved bits.
While the pulp cools slightly, sprinkle 1 cup wildflower seeds into the mixture. Stir gently to distribute them evenly—this ensures every sheet of paper has a good chance of sprouting. Real talk: if you skip this step and just sprinkle seeds on top later, they won’t adhere well, and you’ll end up with patchy results. The seeds need to be embedded in the fibers.
☀️ Step 3: Mold the Paper and Dry
Line a baking sheet with parchment paper or a silicone mat. Using a spoon or your hands (wear gloves if you prefer), spread the seed-pulp mixture evenly across the surface to create 4 uniform sheets, about 1/8-inch thick. Work quickly—this stuff dries fast! Smooth the edges with a wet finger or the back of a spoon for clean lines.
Let the sheets air-dry for 24-48 hours in a warm, dry place away from direct sunlight. A windowsill with indirect light works perfectly. You’ll know they’re ready when they feel stiff and slightly crisp to the touch—like regular paper. If you rush this step, the paper may crumble when planted. Patience here pays off with sturdy, plantable sheets.
🌿 Step 4: Plant and Care for Your Seed Paper
Once dry, fold or cut the seed paper into smaller squares or shapes—great for gifts or decor. To plant, simply place a sheet on top of 1 inch of moist soil in a pot or garden bed. Press it down lightly so it makes contact with the soil. Water gently to settle everything in place. You’ll see sprouts in 7-14 days, depending on the flower variety and warmth.
Keep the soil consistently moist but not soggy—think of it like a damp sponge. Seed paper blooms best in full sun to partial shade, so position it where it gets at least 4-6 hours of sunlight daily. Once the flowers mature, you can transplant them directly into the ground or let them bloom in their paper "pot" for a whimsical touch. Just don’t toss them—they’ll grow!
Tips & tricks for perfect plantable paper
Here's what nobody tells you about crafting seed paper that actually grows—no sad, crumbly failures here.
Paper Selection Matters: For the best results, use uncoated, white office paper without glossy finishes or ink. Colored paper or magazine pages can contain chemicals that inhibit seed germination. If you must use colored paper, opt for natural kraft paper instead. The fibers need to break down cleanly to create sturdy sheets that won't fall apart when planted.
Timing Secret: During the 10-15 minute soak time in Step 1, test your pulp's consistency by squeezing a handful. It should hold together when pressed but still feel slightly wet—like well-kneaded playdough. If it crumbles, add 1 tablespoon water at a time. If it's too sticky, let it sit uncovered for 5 more minutes to evaporate excess moisture. This is the foundation for your paper's strength.
Seed Distribution Technique: When adding the 1 cup wildflower seeds in Step 2, sprinkle them gradually while stirring the pulp. This ensures even distribution without clumping. For extra germination power, you can optionally add 1 teaspoon compost (clearly marked optional) to the pulp before blending—it provides mild nutrients for the seeds. Just don't overdo it, or your paper may become too dense to handle.
Drying Strategy: For the 24-48 hour drying period, place a small fan on low setting nearby to create gentle airflow. This prevents mold growth while maintaining even drying. Flip the sheets halfway through if possible. If your space is humid, extend drying to 48 hours—proper drying is what makes the difference between paper that crumbles and paper that grows!
Pro Tips for Seed Paper Instructions
- Here's what nobody tells you about crafting seed paper that actually grows—no sad, crumbly failures here.
- Paper Selection Matters: For the best results, use uncoated, white office paper without glossy finishes or ink.
- Timing Secret: During the 10-15 minute soak time in Step 1, test your pulp's consistency by squeezing a handful.
Frequently asked questions
Got questions about seed paper? You’re not alone! Here are the most common ones—plus simple answers to help you get started with your plantable paper project.
What kinds of seeds can I use in seed paper?
Seed paper typically works best with small, lightweight seeds like wildflowers (e.g., cosmos, sunflowers, or marigolds), herbs (basil or thyme), or grasses. Avoid large seeds (like beans or peas)—they won’t embed well and may not germinate properly. Check the seed packet for size recommendations!
How long does it take for seed paper to sprout?
Germination time varies by seed type and weather, but most seed paper blooms in 7–21 days under ideal conditions (warmth, moisture, and sunlight). Keep the paper damp for the first few weeks—think of it like a tiny greenhouse. Patience pays off!
Do I need to water seed paper differently than regular soil?
Yes! Seed paper needs gentle, frequent misting (not heavy watering) to keep it moist but not soggy. Soak it lightly for the first 2–3 days, then reduce to light watering as roots take hold. Overwatering can cause the paper to break down too fast—balance is key!
Can I use seed paper indoors, or is it only for gardens?
Seed paper thrives outdoors in gardens, pots, or even as a living confetti for events—but it’s not ideal for indoor use. Low light or dry air indoors slows germination. If you want indoor blooms, try a sunny windowsill or a small greenhouse setup instead!
What if my seed paper doesn’t grow? Troubleshooting tips?
No sprouts? Check these fixes:
- Not enough light: Move to a sunnier spot (6+ hours/day).
- Too dry: Mist daily and cover with plastic wrap temporarily.
- Old seeds: Some seeds lose viability after 1–2 years—check expiry dates!
- Poor soil contact: Press the paper firmly into moist soil to ensure seed-to-earth contact.
Wrapping up and next steps
Creating your own seed paper is a rewarding way to blend creativity with sustainability—turning scraps into vibrant blooms! 🌱 Whether you’re crafting for a garden project or a thoughtful gift, this eco-friendly process is simple, fun, and full of potential.
Now that you’ve got the seed paper instructions down, why not experiment with different flower seeds or even herbs to personalize your creations?
Ready to take the next step? Share your seed paper masterpieces with friends, plant them in your garden, or even turn them into handmade greeting cards. Every sheet you make is a tiny seed of change—literally and figuratively! 🌸