
Propagation
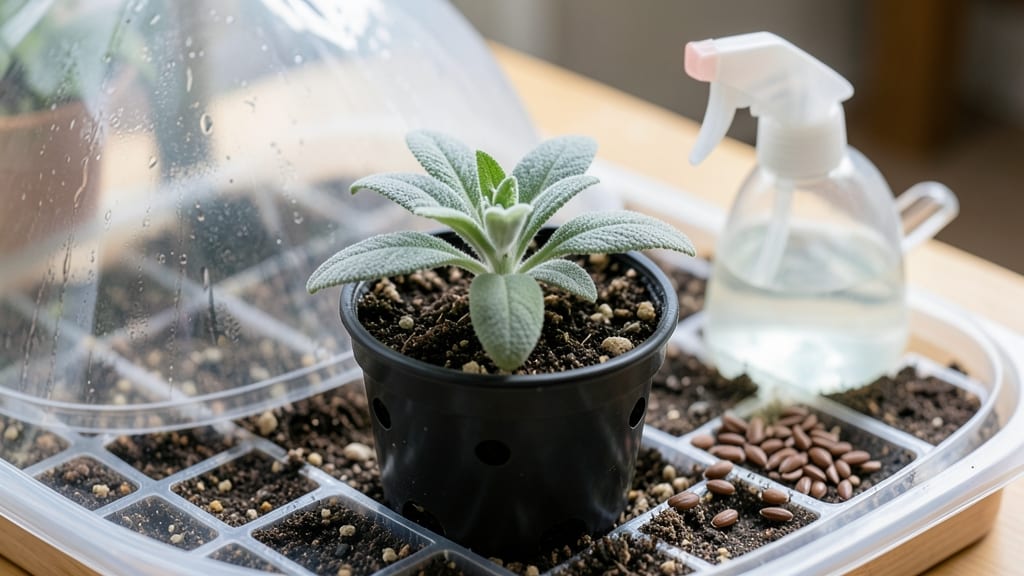
Sage seed germination is the secret to turning tiny sage seeds into sturdy seedlings. 🌱 I’ve struggled with fussy seeds before, but sage responds beautifully when you nail the moisture balance—no guesswork, just reliable results every time. Start with a shallow tray of damp, sterile potting mix (think crumbly, not soggy) and scatter seeds lightly on top. Cover with a humidity dome or plastic wrap to lock in moisture, then place in a warm spot (around 70°F). Within 10-14 days, you’ll see those first pale green leaves push through—patience pays off here. Once sprouted, uncover the tray and move to bright, indirect light to prevent leggy seedlings. Keep the soil evenly moist (not wet) and watch those seedlings thicken into robust plants ready for transplanting in 4-6 weeks. The key? Consistency—never let the soil dry out completely. This method works for both culinary and ornamental sage varieties, and it’s perfect for beginners. Troubleshoot slow germination by checking moisture levels or warmth, and always use fresh seeds for best results.
📚 In This Guide
- What you need
- Instructions
- Tips and common mistakes
- Wrapping up and next steps
What you need
- ● Sage seeds: 1–2 tbsp (fresh or stored properly—see tips below!)
- ● Germination tray or seed-starting kit: 1 shallow tray (6–8 inches wide) with drainage holes
- ● Seed-starting mix: 1 bag (1–2 quarts) of sterile, well-draining potting mix (avoid garden soil!)
- ● Spray bottle: 1 (with a fine mist nozzle for gentle watering)
- ● Plastic wrap or humidity dome: 1 sheet (to retain moisture)
- ○ Heat mat (optional but helpful): 1 (set to 70–75°F for faster germination)
- ● Grow lights or sunny windowsill: 1 (sage seeds need 12–16 hours of light daily)
- ● Tweezers or toothpick: 1 (for gently placing tiny seeds)
- ● Small hand trowel: 1 (for mixing soil)
- ○ Thermometer (optional): 1 (to monitor soil temp if using a heat mat)
- ● Fertilizer (post-germination): 1 mild, water-soluble option (like fish emulsion, diluted to half-strength)
Step-by-step instructions for sage seed germination
Moisture control is everything with sage—here's how to create ideal conditions for consistent sprouting.
🌱 Step 1: Prepare the Seeds and Soil Medium
Sage seeds have a hard outer coating that needs softening before planting. Soak them in lukewarm water for 12-24 hours to break dormancy. I like to use a small bowl with a damp paper towel over the top to keep them moist during soaking. This step is crucial—skipping it often results in uneven or slow germination.
While the seeds soak, fill your seed-starting trays with a sterile seed-starting mix (never garden soil). Press it down gently to create a firm, even surface. The mix should be moist but not soggy—think of it as holding together when squeezed but not dripping. Sage seeds prefer a well-draining medium, so avoid heavy clay-based soils.
💧 Step 2: Plant the Seeds at the Right Depth
Sage seeds are tiny, so I use a toothpick to create small planting holes—about ¼ inch deep. Place 2-3 seeds per cell (you'll thin later) and cover them lightly with additional mix. The key here is not to bury them too deeply; sage seeds need light to trigger germination. Press the soil gently around the seeds to ensure good contact.
After planting, mist the surface with a spray bottle until the soil is evenly damp. You'll know it's right when the moisture reaches down about ½ inch deep without creating puddles. Place the tray in a warm location (70-75°F)—a seedling heat mat works wonders if your home runs cooler. Cover the tray with a clear plastic dome or plastic wrap to retain humidity.
☀️ Step 3: Monitor Moisture and Light Conditions
Check the tray daily but resist the urge to water—condensation inside the dome should maintain moisture. If the soil surface feels dry to the touch, mist lightly again. Overwatering now can cause damping-off, a fungal disease that collapses seedlings overnight. You'll see the first signs of germination in 14-21 days, though some varieties may take up to 30 days.
Once the first true leaves appear (not the initial seed leaves), remove the dome immediately. Sage seedlings need bright, indirect light to prevent leggy growth. Place them under a grow light positioned 4-6 inches above the plants, or move them to a south-facing window. You'll know the light is sufficient when the seedlings grow upright with dark green leaves.
🌿 Step 4: Thin and Transplant Seedlings
When seedlings reach 2 inches tall and have 2-3 sets of true leaves, it's time to thin. Use small scissors to snip the weakest seedlings at soil level, leaving the strongest one per cell. This reduces competition and encourages robust growth. If transplanting into individual pots, handle the seedlings by their leaves—never the stems—to avoid damage.
Fill 4-inch pots with fresh seed-starting mix and transplant the seedlings, burying them to the same depth they were growing before. Water gently to settle the soil around the roots. Sage seedlings are sensitive to root disturbance, so take your time to avoid compacting the soil or breaking stems. After transplanting, place them in bright light (6+ hours daily) and keep the soil consistently moist but never soggy.
Tips & tricks for perfect sage seed germination
Here's what nobody tells you about getting those stubborn sage seeds to sprout reliably—these tricks make all the difference.
Soaking Strategy: The 12-24 hour soaking period isn't just about hydration—it's about breaking that tough seed coat while preventing mold. I've found that adding a few drops of hydrogen peroxide (3%) to the soaking water acts as a natural fungicide, keeping those seeds safe from rot while they soften. After soaking, rinse the seeds thoroughly before planting to remove any chemical residue.
Temperature Matters: That 70-75°F range is critical for germination, but most homes don't maintain consistent temperatures. If your house runs cooler, place the seed tray on top of your refrigerator (not inside) where it stays warmer. For cooler climates, consider using a seedling heat mat—just don't let the soil exceed 80°F, or you risk overheating the delicate seeds. A simple thermometer placed in the soil will help you monitor this precisely.
Light Exposure Secret: Sage seeds need light to germinate, but the timing matters. In Step 2, when you cover the tray with plastic, you're creating a mini greenhouse—but leave a small gap (about ¼ inch) between the plastic and tray to allow some light penetration. This prevents the seeds from becoming "blind" to light, which can delay germination by up to a week. Once you see those first sprouts, remove the plastic completely to prevent fungal growth.
Pro Tips for Sage Seed Germination
- Here's what nobody tells you about getting those stubborn sage seeds to sprout reliably—these tricks make all the difference.
- Soaking Strategy: The 12-24 hour soaking period isn't just about hydration—it's about breaking that tough seed coat while preventing mold.
- Temperature Matters: That 70-75°F range is critical for germination, but most homes don't maintain consistent temperatures.
Frequently asked questions
Got questions about sprouting sage seeds? You’re not alone!
Here are answers to the most common queries—from timing to troubleshooting—to help you grow sage successfully.
How long does it take for sage seeds to germinate?
Sage seeds typically germinate in 14–30 days under ideal conditions (warmth, moisture, and darkness). Patience is key—some varieties may take longer, especially if exposed to cold or inconsistent moisture. Keep the soil consistently damp (not soggy) and maintain temperatures around 70–75°F (21–24°C) for best results.
Can I speed up sage seed germination?
Yes! Try these tricks:
- Soak seeds in warm water for 12–24 hours before planting to soften the hard outer shell.
- Use a heat mat (set to 75–80°F) to mimic natural warmth.
- Plant in sphagnum moss or a seed-starting mix—it retains moisture better than regular soil.
What’s the best soil mix for sage seed germination?
A lightweight, well-draining mix is critical. Try:
- 50% peat moss or coco coir (for moisture retention)
- 30% perlite or vermiculite (for aeration)
- 20% sand or fine gravel (to prevent compaction)
Why aren’t my sage seeds sprouting? Troubleshooting tips
If your seeds refuse to germinate, check these common culprits:
Issue
Fix
Seeds are too deep
Plant no deeper than ¼ inch (0.6 cm)—sage seeds need light to trigger germination.
Temperature too low
Move to a warmer spot (e.g., near a sunny window or under grow lights).
Moisture imbalance
Use a spray bottle to mist soil daily—keep it damp like a wrung-out sponge.
Old or low-quality seeds
Test viability by soaking a few seeds in water; if they float, they’re likely dead.
Can I grow sage from cuttings instead of seeds?
Cuttings are often easier and faster than seeds. Take 3–4 inch (7–10 cm) cuttings from healthy stems, strip the lower leaves, and dip in rooting hormone. Plant in moist perlite or sand, then cover with a plastic bag to retain humidity. Roots should form in 2–4 weeks—sage is a resilient plant!
Wrapping up and next steps
Mastering sage seed germination is all about patience, precision, and the right balance of moisture—just like nurturing a tiny green promise into a thriving plant! 🌱 With the right setup (think cozy warmth, consistent dampness, and gentle light), you’re well on your way to growing your own fragrant sage.
Whether you’re a seasoned gardener or just starting out, every sprouted seed is a step closer to a bountiful harvest.
Ready to take the next step? Once your seedlings are strong enough, transplant them into nutrient-rich soil and watch your garden flourish. Happy growing!