
Lawn
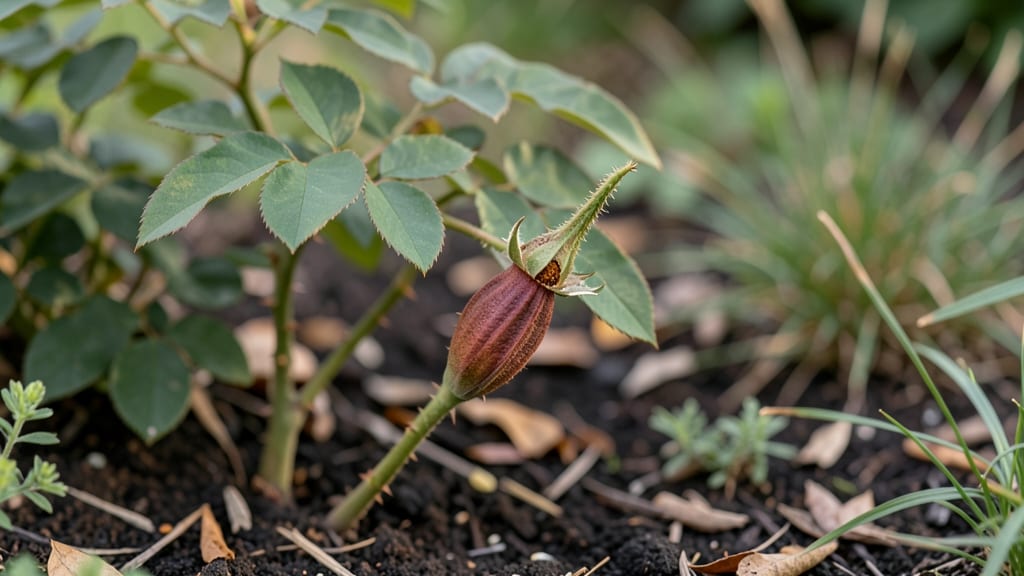
Harvesting rose seed pods turns last season’s blooms into next year’s garden showstoppers—if you time the cold stratification just right. 🌹 I’ve collected hundreds of pods over the years, and the difference between patient stratification and impatient sowing is the difference between thriving seedlings and a sad pile of shriveled seeds.
The key? Understanding when those pods are ready and how long they need to chill before they’ll even think about sprouting.
Here’s the thing—rose seeds are stubborn. They won’t germinate without a proper winter break, even if you’re eager to see them grow. Most pods need 6-8 weeks of cold, moist stratification to mimic natural conditions, but some heirloom varieties can take up to 12 weeks.
The process starts with drying the pods fully before cracking them open, then mixing the seeds with damp sand or peat moss and storing them in the fridge. It’s not rocket science, but it is precise timing that separates success from disappointment.
By the time spring rolls around, you’ll have plump, viable seeds ready to plant. The payoff? Roses grown from seed develop stronger root systems, resist local pests better, and often produce unexpected color variations—something you’ll never get from store-bought plants.
Just don’t expect overnight miracles; these seedlings move at their own pace, but with patience, you’ll end up with roses that feel like a secret garden treasure.
This method works best for heirloom roses or wild species, but even hybrid roses can surprise you if you’re willing to experiment. The trick is consistency—keep those seeds moist but not soggy during stratification, and avoid rushing the process.
If you’ve ever dreamed of growing roses that no one else has, this is how you start. Let’s get those pods prepped!
📚 In This Guide
- What you need
- Instructions
- Tips and common mistakes
- Wrapping up and next steps
What you need
- ● Fresh rose seed pods (harvested from healthy, disease-free roses—aim for 3–5 pods per variety for best results).
- ● Paper towels or coffee filters (1–2 sheets per pod to absorb moisture).
- ● Plastic zip-top bags (quart-sized or larger, 2–4 bags depending on pod quantity).
- ● Distilled or room-temperature water (just enough to lightly dampen the towels—no soaking!).
- ● Small container or tray (for storing stratified pods, like a seedling tray or even a muffin tin with holes).
- ● Refrigerator with a crisper drawer (or a cool, dark spot like a garage if no fridge is available).
- ● Permanent marker (to label pods by variety/date).
- ● Hydrogen peroxide (3%) (1 tsp in 1 cup water for a 5-minute soak to prevent mold on seeds).
- ● Vermiculite or coconut coir (for a moist, sterile alternative to paper towels).
- ● Grow lights or sunny windowsill (for post-stratification germination, 6–8 hours/day of light).
- ● Planting pots (2–4 inch) (with drainage holes for transplanting sprouted seeds).
- ● Humidity dome or plastic wrap (to retain moisture during germination).
How to cold stratify rose seed pods for next season’s blooms
Cold stratification tricks rose seeds into breaking dormancy naturally—here’s my foolproof timeline.
🌱 Step 1: Harvest and Clean the Seed Pods
Collect rose seed pods when they turn brown and papery, usually in late fall or early winter. Twist them gently to release the seeds inside—don’t squeeze, or you’ll crush the delicate seed coats. I rinse them in lukewarm water to remove any residual pulp, then lay them out on a paper towel to air-dry for 24 hours. The goal is to remove moisture without drying them out completely.
Once dry, store the seeds in a sealed container lined with a damp paper towel. Place it in the fridge’s vegetable crisper (around 35-40°F) for 4-6 weeks before stratification. This mimics winter’s chill and prevents premature sprouting. I label the container with the rose variety and date—next season’s blooms depend on it.
⏰ Step 2: Stratify for 8-12 Weeks
After the initial cold storage, move the seeds to a peat moss and sand mix (equal parts) in a shallow container. Moisten the mix until it feels like a wrung-out sponge—damp but not soggy. Plant the seeds ¼ inch deep, spacing them 1 inch apart to avoid crowding. Cover the container loosely with plastic wrap to retain moisture, but leave it slightly ajar for airflow.
Place the container in your fridge’s coldest section (usually the back shelf) for 8-12 weeks. Check monthly to ensure the mix stays moist—never let it dry out. You’ll see tiny roots forming after 4-6 weeks, but don’t rush to transplant yet. This slow process mimics nature’s rhythm and ensures strong seedlings.
☀️ Step 3: Germinate in Warmth and Light
Once the stratification period ends, transfer the container to a warm, bright spot (around 65-70°F). I use a seedling heat mat under the container to maintain consistent warmth. Keep the mix moist but not waterlogged—tap the container gently to settle the soil if it shifts during handling.
Germination can take 2-6 weeks, depending on the rose variety. Place a humidity dome over the container to trap warmth and moisture, but remove it daily for 10 minutes to prevent mold. You’ll spot the first true leaves as tiny, dark green shoots pushing through the soil—this is your cue to thin seedlings if needed.
🌿 Step 4: Transplant Seedlings for Outdoor Growth
When seedlings reach 2-3 inches tall and have 3-4 true leaves, it’s time to transplant. Fill 3-inch pots with a light, well-draining potting mix, and plant each seedling 1 inch deep. Water gently to settle the soil, then place the pots in a sheltered outdoor spot for 1-2 hours daily to acclimate.
Gradually increase their outdoor time over 10-14 days, moving them to full sun by late spring. Roses are slow growers, so don’t rush—patience here means stronger plants. By next season, you’ll have hardy seedlings ready to bloom, thanks to the cold stratification trick.
Tips & tricks for perfect rose seed stratification
These little details make all the difference when coaxing rose seeds to life.
Timing Secret: The 24-hour drying period in Step 1 is non-negotiable—this prevents mold while keeping seeds viable. I place my seed pods on a mesh screen over a paper towel to ensure airflow on all sides. If your kitchen is humid, extend drying to 36 hours to be safe. Trust me, skipping this step leads to slimy seeds that refuse to sprout.
Temperature Matters: That 35-40°F range in the vegetable crisper is critical for mimicking winter conditions. If your fridge runs cooler (like mine does), use a thermometer to confirm—too cold can slow germination, while warmer temps risk premature sprouting. I’ve seen seeds wake up too early and rot when stored at 50°F or above. Pro tip: Place the container on the bottom shelf where temps are most stable.
The Technique That Changed Everything: When mixing peat moss and sand for Step 2, I sift both through a fine mesh strainer first to eliminate clumps. This creates a uniform texture that drains perfectly while holding moisture. Pack the mix lightly around seeds—think "fluffy cloud," not "dense brick." Over-packing suffocates roots before they even start growing.
Make-Ahead Move: You can prep everything up to the stratification step 4-6 weeks early and store the seeds in the fridge. Just remember to label containers with the rose variety and harvest date—next season’s blooms depend on this! For long-term storage beyond 6 weeks, transfer seeds to a sealed bag with a damp paper towel and store at 35°F for up to 3 months before stratification.
Pro Tips for Rose Seed Pod
- These little details make all the difference when coaxing rose seeds to life.
- Timing Secret: The 24-hour drying period in Step 1 is non-negotiable—this prevents mold while keeping seeds viable.
- Temperature Matters: That 35-40°F range in the vegetable crisper is critical for mimicking winter conditions.
Frequently asked questions
Got questions about rose seed pods and cold stratification?
Here are answers to the most common queries to help you grow thriving roses next season!
How long should I cold stratify rose seed pods for best results?
Cold stratification typically takes 6–12 weeks for rose seed pods. Most gardeners use a moist paper towel method in the fridge (33–41°F) for 8–10 weeks. Patience pays off—longer stratification (up to 16 weeks) can improve germination rates for stubborn varieties.
Can I skip cold stratification and plant rose seeds directly outdoors?
While possible, direct outdoor planting without stratification is risky. Rose seeds need cold treatment to break dormancy. If you try it, sow seeds in fall in a protected, well-draining spot and mulch heavily. Success rates are lower, but some gardeners report occasional germination in mild climates.
Why aren’t my rose seeds germinating after stratification?
Common reasons include:
- Improper moisture: Keep seeds consistently damp (not soggy) during stratification.
- Old seeds: Fresh pods (harvested in fall) germinate better than dried-out seeds.
- Poor timing: Plant too early (before soil warms) or too late (after summer heat). Aim for spring after stratification.
- Depth issues: Seeds need light—plant them just barely covered (¼ inch max).
What’s the fastest way to germinate rose seeds if I’m in a hurry?
For faster (but less natural) results, try:
- Soak seeds in warm water for 24 hours before stratification.
- Use a heat mat (70–75°F) after cold treatment to speed up sprouting.
- Try a germination kit with built-in misting systems for humidity control.
Note: Rushed methods may reduce hardiness—balance speed with long-term success!
Can I save seeds from hybrid roses, or will they grow true to parent?
Hybrid roses rarely produce offspring identical to the parent plant. Seed-grown roses often revert to simpler, wild-type traits (e.g., smaller blooms, different colors). For true-to-type roses, grafted plants or cuttings are better. If experimenting, collect seeds from heirloom or species roses for more predictable results!
Wrapping up and next steps
Growing roses from seed pods is a rewarding journey that unlocks next-season blooms with patience and care! By mastering the cold stratification timeline—whether through a DIY fridge setup or outdoor winter exposure—you’re setting the stage for vibrant, healthy roses. Celebrate your green thumb and the magic of nature’s cycle!
Ready to watch your garden transform? Plant those stratified seeds in spring and nurture them with love—your future roses will thank you! 🌱✨