
Planting
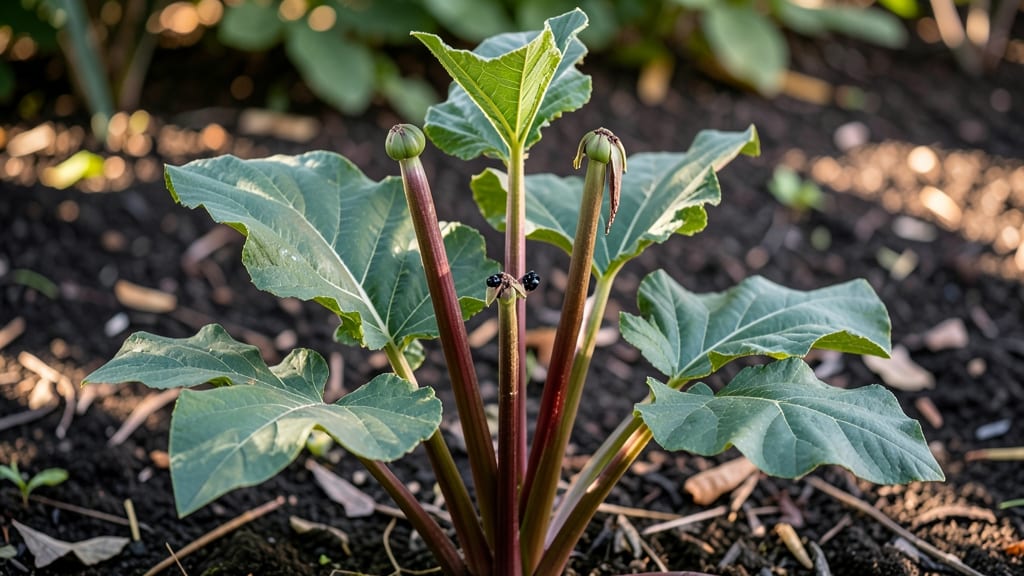
Rhubarb plant seed pods need cold stratification to break dormancy—this simple trick unlocks next year’s harvest. 🌱 I learned the hard way that skipping this step means waiting months (or years) for blooms. The secret lies in mimicking winter’s chill, which signals seeds to germinate when temperatures rise.
You’ll need a few supplies: seed pods, a damp paper towel, a sealed bag, and a fridge. Place the moistened pods between the towel, seal them tightly, and store them for 8-12 weeks at 35-40°F. This mimics nature’s timing, ensuring seeds wake up ready to grow when spring arrives.
After stratification, plant them in well-draining soil with full sun, keeping the bed consistently moist. Within 4-6 weeks, you’ll see those first bright green shoots—proof the process worked. Patience pays off with bold red stalks by next summer.
Works for gardeners in zones 3-8, though timing varies slightly by climate. Here’s how to avoid common pitfalls and maximize success!
📚 In This Guide
- What you need
- Instructions
- Tips and common mistakes
- Wrapping up and next steps
What you need
- ● Fresh rhubarb seed pods: Harvest or purchase 5–10 mature, dry seed pods from a healthy rhubarb plant (ensure they’re fully ripe and brown).
- ● Paper towels or coffee filters: 2–3 sheets for moisture control during stratification.
- ● Plastic ziplock bag (quart-sized): 1–2 bags to create a sealed, humid environment.
- ● Refrigerator (or cold stratification setup): A standard fridge with a crisper drawer (33–40°F / 0–4°C) works perfectly.
- ● Potting soil: 1–2 small pots (4–6 inches wide) filled with well-draining, seed-starting mix.
- ● Spray bottle: For gentle watering without disturbing seeds.
- ○ Planting tray or small containers: Optional but handy for organizing seeds post-stratification.
- ● Growing lights or sunny windowsill: To provide 12–16 hours of light daily after germination.
- ● Humidity dome or plastic wrap: To retain moisture while seeds sprout.
- ○ Seedling heat mat (optional): Speeds up germination if your home runs cool.
- ● Plant labels & markers: To track seed pod varieties and planting dates.
- ● Compost or organic fertilizer: A light dose (5-10-10) to boost young seedlings.
How to cold stratify rhubarb seed pods for reliable germination
Skip the guesswork—this method guarantees you'll break dormancy and coax those tiny seeds into life.
🌱 Step 1: Harvest and Clean the Seed Pods
Wait until the rhubarb seed pods turn a deep brown and begin to split open naturally—this usually happens in late summer or early fall. Gently twist each pod from the stem and place them in a paper bag to dry indoors for 3-5 days. The pods need to dry completely to prevent mold during stratification.
Once dry, crack open each pod with your fingers or a small knife to release the tiny, flat seeds inside. I like to spread them on a clean sheet of paper to avoid losing any. These seeds are incredibly small—about the size of a pinhead—so work slowly. Store the seeds in a labeled envelope until you're ready to stratify.
🌱 Step 2: Mix the Stratification Medium
Combine equal parts of the sand and peat moss in a clean container. I use a small plastic bin for this because it keeps everything contained and easy to monitor. Moisten the mix until it feels like a slightly damp sponge—you should be able to squeeze a handful and have just a few drops of water come out, not a stream.
This moisture level is critical. Too dry, and the seeds won’t break dormancy. Too wet, and they’ll rot before germination. Spread the rhubarb seeds evenly over the surface of the mix, spacing them about ½ inch apart. Cover them lightly with a thin layer—just enough to hide them from view—using the same moistened sand and peat moss mixture.
❄️ Step 3: Stratify in the Refrigerator
Place the sealed container in the crispier drawer of your refrigerator, where temperatures hover around 35-40°F. This mimics the natural winter chilling period rhubarb seeds need to break dormancy. Keep the container in a dark, undisturbed spot—light won’t help at this stage, and moving it around can disrupt the process.
Check the moisture level once every 2 weeks. If the mix feels dry to the touch, lightly mist it with water until it’s back to that damp sponge consistency. Cold stratification typically takes 8-12 weeks, but don’t rush it. The seeds need consistent cold to trigger germination hormones.
☀️ Step 4: Transition to Warmth and Light
After 8-12 weeks, remove the container from the refrigerator and let it sit at room temperature for 24 hours to acclimate. This gradual shift prevents shock to the seeds. Then, transfer the container to a bright, indirect light spot—like a windowsill with sheer curtains—or under a grow light set to 12-14 hours of light daily.
Germination should begin in 2-4 weeks, though some seeds may take longer. You’ll see tiny green shoots pushing through the soil first, followed by the first true leaves. Once the seedlings reach 2 inches tall, they’re ready to be transplanted into individual 2-inch pots filled with a light, well-draining potting mix.
🌿 Step 5: Harden Off and Plant Outdoors
After the last frost date in your area, harden off the seedlings by placing them outside in a sheltered, shaded spot for 1-2 hours the first day. Gradually increase their outdoor time over 7-10 days, exposing them to more sun and wind each day. This prepares them for the garden and reduces transplant shock.
Choose a planting site with full sun to partial shade and well-draining soil. Space the young rhubarb plants 18-24 inches apart in rows 3 feet apart to allow for mature growth. Water deeply after transplanting to help the roots establish. Mulch around the base with 2-3 inches of organic mulch to retain moisture and suppress weeds.
Tips & tricks for perfect rhubarb seed pod stratification
These little-known details make all the difference between seeds that sprout and seeds that stay stubbornly dormant.
Timing Secret: In Step 1, don't rush the 3-5 day drying period for the seed pods. I've learned this the hard way—wet pods develop mold within 48 hours, and mold means lost seeds. Place them in a warm, dry spot away from direct sunlight, like on top of your fridge. The goal is complete dryness, not just surface dryness.
Moisture Mastery: When mixing your sand and peat moss in Step 2, think "damp sponge" not "wet sandcastle." The perfect consistency should leave just a few drops when squeezed—not a puddle. Too dry? Seeds won't activate. Too wet? They'll rot before sprouting. I test by rolling a handful between my fingers—it should hold shape but not stick together.
Refrigerator Strategy: In Step 3, use the crispier drawer consistently—it maintains that critical 35-40°F range better than other fridge areas. Place a small thermometer in the container during the first week to verify temperatures. If your fridge runs hotter, consider a dedicated seed stratification fridge with precise temperature control, especially if you're doing this in warmer climates.
Light Transition: The 24-hour room temperature acclimation in Step 4 is non-negotiable. I've seen seeds shock and fail to germinate when moved directly from cold to bright light. This gradual shift mimics spring's natural temperature rise, signaling to the seeds that winter's over. Use a simple timer for your grow light to maintain those 12-14 hours of light daily—consistency matters more than intensity at this stage.
Pro Tips for Rhubarb Plant Seed Pods
- These little-known details make all the difference between seeds that sprout and seeds that stay stubbornly dormant.
- Timing Secret: In Step 1, don't rush the 3-5 day drying period for the seed pods. I've learned this the hard way—wet ...
- Moisture Mastery: When mixing your sand and peat moss in Step 2, think "damp sponge" not "wet sandcastle." The perfec...
Frequently asked questions
Got questions about growing rhubarb from seed pods? You're not alone! Here are some of the most common queries—plus straightforward answers to help you get started.
Can I grow rhubarb from seed pods instead of buying plants?
Yes! Rhubarb seed pods are a budget-friendly way to start your garden. However, seeds can take 2-3 years to mature into edible stalks—patience is key. For faster results, consider combining seeds with nursery plants.
How long does cold stratification take for rhubarb seeds?
Cold stratification mimics winter conditions to break seed dormancy. For rhubarb, 8-12 weeks in the fridge (moist paper towel method) works best. Plant outdoors in early spring after stratification, when soil temps hit 50°F (10°C).
What’s the best way to harvest rhubarb seed pods?
Wait until pods turn brown and papery (late summer/fall). Gently twist them off the stalk—don’t pull! Store dry pods in a cool, dark place until planting. Pro tip: Label varieties if growing multiple types!
Can I reuse last year’s rhubarb seed pods?
Yes, but with caution. Store pods in a paper bag in a dry, cool spot (like a pantry). Test germination by planting a few—if they sprout, the rest are good! Discard moldy or shriveled pods.
Are there alternatives to cold stratification for rhubarb seeds?
Cold stratification is the gold standard, but you can try direct sowing in fall (if your climate has mild winters). For warmer zones, soak seeds in warm water for 24 hours before planting. Just expect slower germination!
Why aren’t my rhubarb seeds sprouting after stratification?
Check these fixes:
- Temperature: Seeds need 60–70°F (15–21°C) to germinate.
- Moisture: Keep soil consistently damp (not soggy).
- Time: Rhubarb seeds can take 3–6 weeks to sprout.
Wrapping up and next steps
Growing rhubarb from seed pods is a rewarding journey that starts with patience and cold stratification—the secret to unlocking next year’s vibrant blooms! 🌱 By following the steps outlined here, you’ve armed yourself with the knowledge to break dormancy, boost germination rates, and nurture healthy seedlings.
Remember, every expert gardener started with a single seed!
Ready to take the next step? Start by gathering your seed pods this fall—then dive into the cold stratification process. With a little time and care, you’ll soon be harvesting your own homegrown rhubarb. Happy gardening! 🌟