Planting
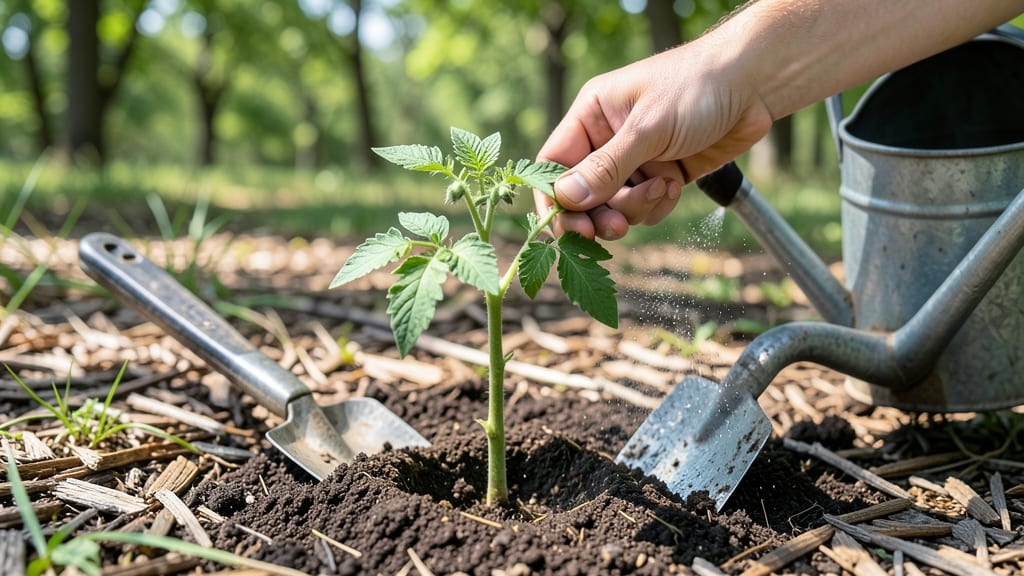
Put the seed in the soil at the right depth to unlock the secret to strong roots and healthy seedlings. 🌱 I learned this the hard way—burying tiny seeds too deep left them struggling to reach sunlight, while shallow planting left them vulnerable to drying out.
The perfect depth depends on seed size, but there's a simple rule that works for almost everything.
Start with loose, well-draining soil that's moist but not soggy. For most small seeds like lettuce or marigolds, plant just below the soil surface—about ¼ inch deep.
Larger seeds like beans or sunflowers need 1-2 inches of coverage, while tiny seeds like petunias should barely be pressed into the top layer. A good trick is to use your finger: a shallow scratch for small seeds, a deeper one for larger ones.
After planting, gently firm the soil around seeds to remove air pockets, then water lightly to settle everything in place. The goal is consistent moisture without soaking the seeds—think of it like giving them a cozy blanket, not a swamp.
You'll see the first signs of success when those little green shoots break through the surface in 7-14 days, depending on the plant.
Common mistakes like overcrowding or planting too deep can set seedlings back for weeks, but once you master this step, you'll see stronger plants that establish faster. The key is patience—those first few weeks determine whether your garden thrives or struggles. Let's get those seeds in the ground right!
📚 In This Guide
- What you need
- Instructions
- Tips and common mistakes
- Wrapping up and next steps
What you need
- ● Seeds: Choose high-quality, fresh seeds suited to your climate (e.g., tomato, basil, or marigold). Quantity depends on your garden size—start with 50–100 seeds for small plots.
- ● Potting soil or garden soil: Use sterile, well-draining soil (e.g., miracle-gro potting mix). For containers, 1–2 gallons per seedling is ideal.
- ● Containers or garden bed: Containers: 4–6 inch pots (depth) with drainage holes, or seed trays with individual cells.
- ● Garden bed: Loosen soil to 6–8 inches deep for easy root growth.
- ● Watering can or spray bottle: A gentle spray nozzle prevents seed displacement.
- ● Trowel or planting stick: A small hand trowel (2–3 inches wide) works perfectly for precision.
- ● Seedling heat mat: Speeds up germination for cool-season crops (e.g., 70–80°F range).
- ● Grow lights: Provides 12–16 hours of light/day if natural sunlight is limited.
- ● Plant labels: Use biodegradable markers to track seed varieties.
- ● Compost or fertilizer: Add a balanced 10-10-10 fertilizer (1 tbsp per gallon of soil) for a nutrient boost.
- ● Mulch: Straw or shredded leaves retain moisture and suppress weeds.
How to plant seeds at the perfect depth for healthy growth
Here's the foolproof method I use to ensure every seed gets the right start—no guesswork, just strong roots.
🌱 Step 1: Understand Seed Size and Depth Rules
Most seeds need planting at a depth of twice their diameter. Tiny seeds like lettuce or basil go in just ¼ inch deep, while larger seeds like beans or peas should sit 1-2 inches down. I always check the seed packet for specifics, but this rule covers 90% of what you'll grow.
The goal is simple: enough soil to protect the seed but not so deep it struggles to reach light. Too shallow and they dry out; too deep and they exhaust their energy before sprouting. Think of it like burying a treasure map—just deep enough to hide it, not so deep you lose it forever.
💧 Step 2: Prepare the Soil Surface
Loosen the top 1-2 inches of soil with your fingers or a small trowel. You want it soft enough to drop seeds in without resistance, but not so loose it collapses around them. I like to make tiny furrows (shallow trenches) with my finger—just enough to create a neat line for planting.
Moisten the soil lightly before planting. It should feel like a damp sponge, not soggy or dry. If it's too dry, seeds won't draw up moisture to start germinating. A quick spray from a watering can does the trick. Here's the thing—don't soak it. You'll wash seeds away or create air pockets that prevent good contact.
☀️ Step 3: Plant Seeds with Precision
Drop seeds into the furrow one at a time, spacing them 1-2 inches apart unless the packet says otherwise. I tap the seed packet gently to release one seed at a time—planting too many in one hole leads to weak, crowded seedlings. Cover them lightly with soil using the back of a spoon or your fingers.
Press down very gently to settle the soil around the seeds. You're not packing it down like a road—just enough to hold them in place. For small seeds, a light dusting with a handful of soil works best. Watch for any seeds that get buried too deeply; if you see them, gently lift and reposition. This is the moment that matters: get it right now, and you'll save yourself headaches later.
⏰ Step 4: Water Gently and Monitor
Water the planted seeds with a fine mist from a spray bottle or gentle stream from a watering can. You want the soil to be evenly moist but not drenched. Think "damp newspaper" not "swamp." Avoid watering from above if possible—it can dislodge seeds or create mud that clumps around them.
Place a small marker or stick near the row to track progress. Most seeds need warmth (65-75°F) and consistent moisture to germinate. Check daily but don't disturb the soil. If the surface dries out, mist again. You'll see the first sprouts in 5-14 days, depending on the plant. That's your signal everything is working!
🌿 Step 5: Thin and Support as Needed
Once seedlings have 2-3 true leaves (not the first tiny cotyledons), thin them to the strongest one per spot. Use scissors to snip weak seedlings at soil level—don't pull, or you'll disturb the roots of the ones you're keeping. This might seem cruel, but crowded seedlings compete for light and nutrients, leaving you with leggy, weak plants.
If you planted in rows, create a small mound of soil around each remaining seedling to support its stem. This prevents "flopping" and gives roots more contact with soil as they grow. Real talk: Skipping this step leads to plants that topple over when they're just a few inches tall. Trust me, it's worth the 30 seconds.
Tips & tricks for planting seeds at the perfect depth
These small adjustments make all the difference between healthy seedlings and wasted effort—trust me, I've buried more than my fair share.
Seed Size Matters: The "twice the diameter" rule is your golden standard, but here's the thing: for seeds smaller than ¼ inch (like carrots or parsley), you can actually press them gently into the surface rather than covering them. Tiny seeds need light to germinate, and too much soil blocks that. I've seen parsley seeds fail completely when buried even ⅛ inch too deep.
Soil Texture Tip: If your soil feels gritty or compacted after planting, mix in a little compost or coconut coir before covering seeds. This creates tiny air pockets that help seeds draw up moisture without suffocating. In Step 2, when you're loosening that top 1-2 inches, take an extra moment to break up any clumps—seeds need good contact with soil, not pockets of air.
Precision Planting Tool: For seeds smaller than ⅛ inch (like chives or dill), grab a toothpick instead of your fingers. Dip it in water, then use it to create individual tiny holes—just deep enough for the seed. This gives you perfect spacing without crushing delicate seeds. I keep a small container of toothpicks by my garden tools now, and it's saved me from replanting more times than I can count.
Germination Environment: Most seeds need consistent warmth (65-75°F) to germinate, but some like snapdragons actually prefer cooler soil (around 60°F). Check your seed packet! If your garden gets too hot, create a mini greenhouse effect by covering planted seeds with clear plastic wrap until they sprout. Just poke a few tiny holes for airflow—this traps moisture and warmth without smothering the seeds.
Pro Tips for Put The Seed In The Soil
- These small adjustments make all the difference between healthy seedlings and wasted effort—trust me, I've buried more than my fair share.
- Tiny seeds need light to germinate, and too much soil blocks that.
- Soil Texture Tip: If your soil feels gritty or compacted after planting, mix in a little compost or coconut coir before covering seeds.
Frequently asked questions
Got questions about planting seeds at the right depth?
You’re not alone! Here are answers to the most common queries to help you grow confidently.
What’s the best depth to plant seeds?
Most seeds need to be planted 2-3 times their width deep in the soil. Tiny seeds (like lettuce) go in just 1/4 inch, while larger ones (like beans) can handle 1-2 inches. Check the seed packet for specifics—it’s your best guide!
Can I plant seeds too deep?
Yes! Planting seeds too deep can starve them of sunlight, slowing germination. If you’ve already buried them too deep, gently loosen the soil around them and adjust their position. For stubborn cases, try top-dressing with a thin layer of soil instead.
What if the weather isn’t ideal for planting?
Timing matters, but don’t stress! If rain or extreme heat is forecasted, wait 24–48 hours. For delicate seeds, use a cloche or row cover to shield them. Always plant when soil is warm (60°F+) and moist—your seeds will thank you!
What are some alternatives if my soil is too hard to plant?
If compacted soil makes planting difficult, try:
- Amending soil with compost or coconut coir to loosen it.
- Using seed starter plugs for delicate seeds.
- Planting in containers with well-draining mix.
Why aren’t my seeds sprouting after planting?
Common culprits include wrong depth, cold soil, or lack of moisture. Check for mold (a sign of overwatering) and ensure seeds aren’t buried under mulch. If all else fails, test a few seeds on a damp paper towel—if they don’t sprout in 7–10 days, they may be old or damaged.
Wrapping up and next steps
The journey of planting seeds is more than just a task—it’s a promise of growth and renewal. Whether you’re a seasoned gardener or just starting, the key takeaway is simple: placing seeds at the right depth creates the perfect conditions for strong roots and thriving plants.
Remember, patience and care are your best tools, and every seed you plant has the potential to blossom into something beautiful.
Ready to take the next step? Start small—pick one seedling or a few seeds—and experiment with depth and soil conditions. Keep a journal to track progress, and soon, you’ll be confidently planting with the knowledge that you’re nurturing life from the ground up. Happy gardening! 🌱✨