
Lawn
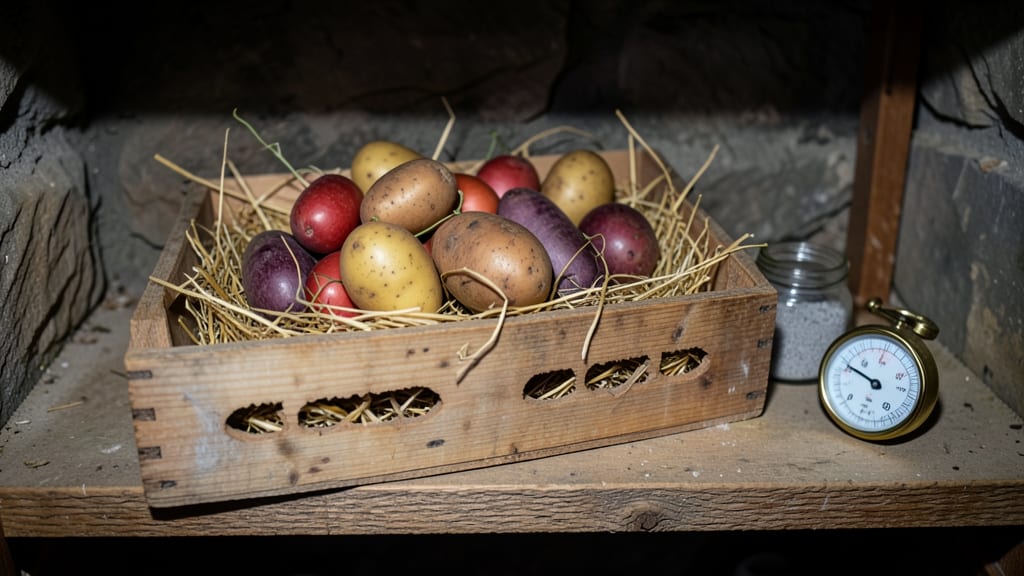
Proper potato seed storage means fresh planting stock every spring without buying new tubers. ✨ I’ve saved hundreds of dollars by mastering this simple method—no fancy equipment, just the right conditions to keep your seed potatoes viable until planting time. The key is balancing cool temperatures, darkness, and good airflow to prevent sprouting or rot. A cardboard box with a thermometer works just as well as a fancy root cellar. Store them in a 50–60°F space where they’ll stay dormant until you’re ready to plant. By spring, you’ll have firm, unsprouted potatoes ready to cut into seed pieces. The best part? You’ll avoid last-minute store buys and grow exactly the varieties you love—year after year with zero waste. This works for both short-term (a few months) and long-term (up to 6 months) storage. Here’s how to do it right the first time.
📚 In This Guide
- What you need
- Instructions
- Tips and common mistakes
- Wrapping up and next steps
What you need
- ● Potato tubers: Choose certified disease-free seed potatoes (not grocery-store spuds). Aim for 5–10 lbs (adjust based on your garden size).
- ● Storage container: Wooden crate (ventilated, untreated wood preferred) or
- ● Cardboard box (lined with newspaper or paper bags) with air holes.
- ● Curing agent: Newspaper (black-and-white ink only) or
- ● Paper bags (brown kraft paper works best).
- ● Desiccant: 5–10 silica gel packets (or uncooked rice in a breathable cloth) to absorb moisture.
- ● Labeling supplies: Masking tape + marker to label varieties and storage dates.
- ● Thermometer/hygrometer (to monitor 35–40°F (2–4°C) and 85–90% humidity).
- ● Plastic wrap (for sealing gaps in containers temporarily).
- ● Fungicide spray (e.g., copper-based) to pre-treat tubers if disease risk is high.
- ● Second container (for rotating stock if storing >10 lbs).
Instructions for storing potato seeds through winter
Here's how I keep my favorite potato varieties thriving for next season's harvest.
🪴 Step 1: Cure and Select Healthy Tubers
After harvest, let potatoes cure in a cool (55-60°F), dark, well-ventilated space for 2-3 weeks. This toughens their skins and builds natural resistance. Choose only firm, medium-sized tubers with smooth, unblemished skin—small or damaged ones won't store well. Discard any with soft spots, sprouts, or signs of disease.
I spread mine on wooden shelves or mesh racks to prevent moisture buildup. The goal is to mimic their natural dormancy conditions. If you store them in paper bags, poke holes for airflow—trapped moisture causes rot. Once cured, brush off excess soil but don't wash them; the natural skin protects against decay.
⏰ Step 2: Create Ideal Storage Conditions
Store potatoes in a dark, humid (85-90% humidity), cool (35-40°F) environment. A root cellar or basement works best, but a dark closet with a humidity tray (pebbles + water) can substitute. Avoid refrigeration—cold temps convert starches to sugars, making them sweet and mealy.
I use ventilated cardboard boxes or burlap sacks lined with newspaper for airflow. Never store with onions or apples—they release ethylene gas that speeds spoilage. Check monthly for soft spots or sprouting. If you see green patches, those tubers have been exposed to light and contain toxic solanine—discard them immediately.
🌱 Step 3: Monitor and Rotate Storage
Every 4-6 weeks, rotate tubers to prevent uneven sprouting. Remove any that develop soft spots, mold, or excessive sprouts—these spread quickly. A single rotting potato can ruin an entire batch. I keep a small notebook to track varieties and storage dates; older tubers sprout first and should be planted earliest.
If sprouts appear before spring, you can plant them early in containers or a cold frame. Just cut back sprouts to 2-inch stubs before planting to reduce stress. For long-term storage, avoid plastic bins—they trap moisture and accelerate decay. Instead, use breathable materials that allow air circulation while blocking light.
☀️ Step 4: Prepare for Spring Planting
About 6-8 weeks before your last frost date, move tubers to a bright, cool (45-50°F) location to encourage even sprouting. Place them in open trays or shallow boxes with good airflow. Healthy sprouts should be white or light pink, about 1-2 inches long—never green or shriveled.
When planting time arrives, cut larger tubers into pieces with 2-3 eyes each, letting the cut ends dry for 24 hours before planting. This prevents rot and ensures each piece has enough energy to grow. I mark varieties with popsicle sticks in the garden to track performance. With proper storage, you'll have vigorous, disease-free starts ready for spring planting.
Tips & tricks for perfect potato seed storage
Keeping your potato seeds viable through winter requires a few key strategies that mimic their natural dormancy—here's what I've learned after years of trial and error.
The Cure is Critical: That 2-3 week curing period at 55-60°F isn't optional—it's when the skins toughen and natural protective compounds develop. I've seen potatoes stored without curing develop soft spots within weeks. Place them on wooden shelves or mesh racks where air circulates freely, and resist the urge to wash them. The natural soil residue actually helps prevent decay during storage.
Humidity Control is Everything: The 85-90% humidity range in Step 2 might seem tricky to maintain, but it's non-negotiable for preventing shriveling. I've had success using a simple humidity tray (pebbles with water) in a dark closet when a root cellar isn't available. The key is to check monthly—if tubers feel dry to the touch, you need more humidity; if they're damp, increase airflow. Never let them sit in standing water, even for a moment.
Light Exposure Ruins Everything: Green patches mean toxic solanine buildup, and that's a dealbreaker. Store containers in completely dark spaces—even a small amount of light can trigger this chemical change. I've lost entire batches because I temporarily moved potatoes to a basement corner that had a tiny window crack. If you must check on them, do it by feel alone in complete darkness. A simple cardboard box with a tight-fitting lid works better than plastic for light blocking.
Sprout Management Strategy: When those first sprouts appear in Step 3, don't panic—it's actually a good sign they're still viable. The 2-inch stub rule works well for early planting, but I've found that cutting sprouts back to 1-inch stubs actually reduces transplant shock. For long-term storage, the breathable materials tip is crucial: I've had potatoes last through two winters using old burlap potato sacks from the garden center, while plastic bins always failed within months.
Pro Tips for Potato Seed Storage
- Keeping your potato seeds viable through winter requires a few key strategies that mimic their natural dormancy—here'...
- The Cure is Critical: That 2-3 week curing period at 55-60°F isn't optional—it's when the skins toughen and natural p...
- Humidity Control is Everything: The 85-90% humidity range in Step 2 might seem tricky to maintain, but it's non-negot...
Frequently asked questions
Got questions about storing potato seeds?
You’re not alone! Here are answers to the most common concerns—so you can keep your tubers fresh and ready for planting all season long.
How long can I store potato seeds before they go bad?
With the right conditions—cool (34–40°F), dark, and humid—potato seeds can last 3–6 months (even up to a year for certified seeds). After that, sprouts weaken, and germination drops. Test viability by cutting a tuber in half: if the eyes are firm and white, they’re still good!
Can I store potato seeds in the fridge?
Yes! A fridge’s 35–40°F temperature is ideal for short-term storage (weeks to months). Just avoid the crisper drawer (too cold) and place them in a paper bag with a damp towel to prevent drying. For longer storage, a root cellar or basement is better.
What happens if my potato seeds sprout too early?
Early sprouting (before planting) is normal but can weaken tubers. To slow it down, store them in a dark, well-ventilated container (like a cardboard box with holes). If sprouts appear, plant them sooner—they’ll still grow, but yield may drop slightly.
Can I reuse last year’s grocery-store potatoes as seed?
Technically yes, but not recommended! Store-bought potatoes are treated to prevent sprouting and may carry diseases. For best results, use certified seed potatoes from a nursery. If you must reuse, let them sprout indoors first to ensure viability.
How do I know if my stored potatoes are still good?
Check for soft spots, mold, or a musty smell—these mean it’s time to toss them. For a quick viability test, place a few in a warm, sunny spot for a week. If green sprouts appear, they’re still good to plant!
Wrapping up and next steps
Proper potato seed storage isn’t just about saving tubers—it’s about setting your garden up for success next season! By following these simple steps, you’ll ensure viable, healthy seeds that sprout with vigor, reducing waste and boosting your harvest.
Whether you’re a backyard gardener or a homesteader, this method is your ticket to zero-waste, year-round gardening.
Ready to take the next step? Start small—pick a few tubers to experiment with this winter, and soon, you’ll be stocking your storage space like a pro! 🌱✨