
Lawn
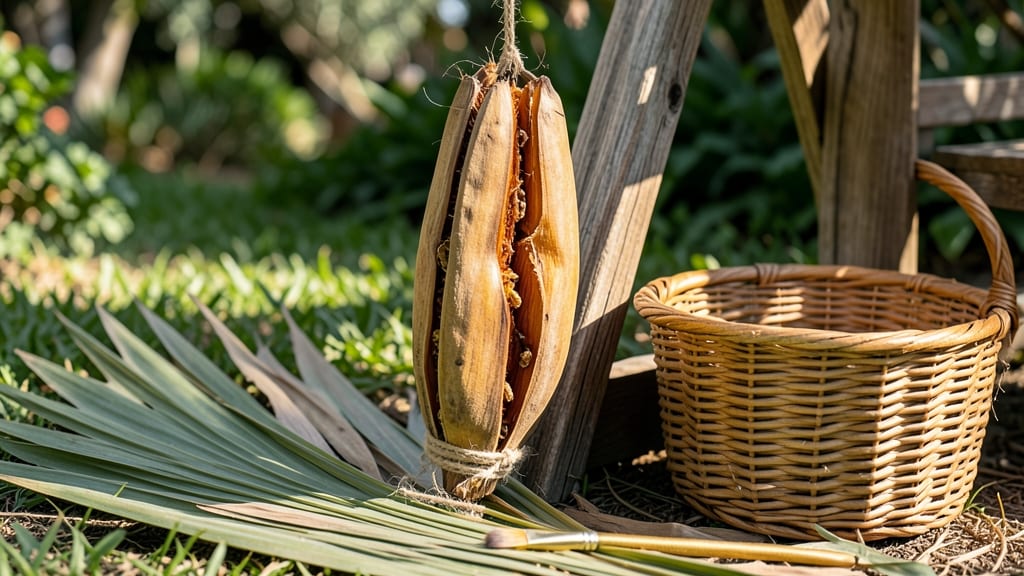
Turn those palm tree seed pod art into stunning garden decor without the frustrating twists. 🌿 I’ve spent years collecting them from fallen fronds and transforming them into everything from wind chimes to sculptural centerpieces—no special tools required.
The key is harvesting them fresh when they’re still flexible, then letting nature do the drying work for you.
You’ll need just a few basics: gloves (those spines pack a punch!), a bucket for collection, and a sunny spot to dry them for 2-4 weeks. Once dried, the pods become lightweight yet sturdy enough to craft with—perfect for boho-chic decor or tropical-themed gardens.
Think woven baskets, hanging mobiles, or even framed shadow boxes.
What you end up with is textured, organic decor that adds movement and warmth to any outdoor space. The pods’ natural curves create a bohemian vibe, while their earthy tones blend seamlessly with greenery or driftwood.
Best of all, each piece tells a story of where it came from—your very own piece of the tropics, right in your backyard.
Works for patios, porches, or even indoor arrangements—just avoid direct rain to keep them looking fresh. Let’s get creative with what might otherwise be garden waste!
📚 In This Guide
- What you need
- Instructions
- Tips and common mistakes
- Wrapping up and next steps
What you need
- ● Palm tree seed pods: 5–10 fresh or dried pods (depending on project size)
- ● Prefer Cocos nucifera (coconut) or Borassus flabellifer (palmyra) for durability
- ● Harvesting tools (if collecting fresh): Heavy-duty pruning shears or a bolster cutter (for thick stems)
- ● Work gloves (to protect hands from sharp edges)
- ● Ladder or extension pole (for high branches)
- ● Cleaning/safety supplies: Rubbing alcohol (70% or higher) or hydrogen peroxide (for sterilizing cuts)
- ● Soft-bristle brush or toothbrush (for removing debris)
- ● Sandpaper (medium-grit, 120–150) or a wood rasp (for smoothing)
- ● Artistic tools: Acrylic paint or non-toxic wood stain (for coloring)
- ● Paintbrushes (varied sizes, including fine detail brushes)
- ● Wood glue or E6000 glue (for assembling pieces)
- ○ Hot glue gun (optional, for quick fixes)
- ● Sealant (e.g., polyurethane varnish) to protect finished art
- ● Twine, fishing line, or jute rope (for hanging or weaving)
- ● Stencils or freehand templates (for intricate designs)
- ● Drill with small bits (for adding holes or details)
- ● Magnifying glass (to spot tiny imperfections)
Step-by-step guide to harvesting and crafting palm tree seed pod art
Transforming palm seed pods into sculptural art is simpler than you think—just follow these steps for twist-free harvesting and stunning designs.
🌿 Step 1: Identify and Harvest Mature Seed Pods
Look for seed pods that have turned a rich brown color and feel dry to the touch—these are ready for harvesting. The best time to collect them is in late fall or winter when they've fully matured but haven't yet decomposed. Use pruning shears or a small saw to cut the pods from the tree, leaving a small stem attached to prevent damage.
Here's the thing—don't harvest from protected or endangered palm species. Always check local regulations first. I like to work with coconut or date palm pods because they're sturdy and easy to shape. Once you've collected your pods, lay them out in a dry, shaded area to air out for 24-48 hours before cleaning.
✂️ Step 2: Clean and Prepare the Pods
Use a stiff brush or sandpaper to gently remove any remaining fibrous material or debris from the pod's surface. This step is crucial because leftover fibers can interfere with your design later. I find that a medium-grit sandpaper (around 120-150 grit) works well for smoothing rough edges without damaging the pod.
Once the pods are clean, soak them in warm water for 30-60 minutes to soften any stubborn fibers. This makes them easier to work with and helps prevent cracking when you start shaping. After soaking, pat them dry with a towel and let them sit in a well-ventilated area for another 24 hours to ensure they're completely dry.
🎨 Step 3: Design and Shape Your Sculpture
Start by sketching your design on paper first—this helps you visualize how the pods will fit together. For beginners, I recommend starting with simple shapes like spheres, cylinders, or abstract forms. Use a pencil to mark where you'll cut or drill the pods to create openings or connections.
To connect pods, you'll need a cordless drill with a small bit (around 1/8 inch) and some strong, flexible wire or twine. Drill holes where your design calls for connections, then thread the wire through the holes to bind the pods together. For added stability, you can also use a non-toxic wood glue inside the holes before inserting the wire.
🪴 Step 4: Assemble and Secure Your Art Piece
Begin assembling your sculpture by attaching the pods in the order you've planned. Use the wire or twine to secure each connection tightly, but don't overtighten—this can cause the pods to crack. For larger pieces, you might need to add a base, like a wooden plank or a metal stand, to keep everything stable.
Once your sculpture is fully assembled, let it dry in a warm, dry place for 48 hours to ensure all connections are secure. This is also a good time to add any final touches, like painting or staining the pods with acrylic paint or natural dyes if you want to enhance their appearance. Just make sure to seal any painted areas with a clear varnish to protect your work.
⏰ Step 5: Display and Maintain Your Art
Choose a display area that's dry and away from direct sunlight to preserve your palm pod art. If you've painted or sealed the pods, they'll hold up well indoors for years. For outdoor displays, consider using a weather-resistant sealant to protect against moisture and UV damage.
To keep your sculpture looking its best, occasionally check the connections and tighten any loose wires or twine. If you notice any cracks or wear, you can repair them with a bit of glue or additional wire. With proper care, your palm pod art will remain a stunning centerpiece for seasons to come.
Tips & tricks for crafting palm tree seed pod art
Working with natural materials like palm seed pods can be tricky, but these simple strategies will help you avoid common pitfalls and create stunning, long-lasting sculptures.
Harvesting Insight: When harvesting, look for pods that feel slightly hollow when tapped—they're ready for crafting. I've found that date palm pods are particularly sturdy, while coconut pods offer a smoother surface for intricate designs. Always leave a small stem attached during harvesting; this prevents the pod from splitting open during the drying process.
Preparation Technique: The 30-60 minute soak in warm water is your secret weapon for preventing cracks during shaping. I like to add a splash of mild dish soap to the water—it helps break down stubborn fibers without damaging the pod's structure. After soaking, pat the pods thoroughly with a towel before your 24-hour drying period; any remaining moisture can cause mold or uneven drying.
Design Strategy: For your first project, try creating a simple geometric shape like a cube or pyramid. These forms help you practice precise drilling and connection techniques without the complexity of organic shapes. Mark your drilling points with a pencil first—this prevents you from accidentally drilling through important structural areas of the pod.
Assembly Tip: When using wire to connect pods, leave about 1/4 inch of slack at each joint. This flexibility allows for slight movement that prevents stress cracks over time. For extra stability in larger pieces, consider adding a hidden internal wire frame before attaching the outer pods—this creates a skeleton that supports your entire sculpture.
Pro Tips for Palm Tree Seed Pod Art
- Working with natural materials like palm seed pods can be tricky, but these simple strategies will help you avoid common pitfalls and create stunning, long-lasting sculptures.
- Harvesting Insight: When harvesting, look for pods that feel slightly hollow when tapped—they're ready for crafting.
- Preparation Technique: The 30-60 minute soak in warm water is your secret weapon for preventing cracks during shaping.
Frequently asked questions
Got questions about creating stunning palm tree seed pod art? You’re not alone!
Here are some of the most common queries—plus clear, creative answers to help you craft with confidence.
Can I use seed pods from any palm tree for art?
Not all palm seed pods are ideal! Look for hard, fibrous pods like those from coconut palms (Cocos nucifera) or royal palms (Roystonea spp.). Avoid soft or brittle pods—they won’t hold up in sculptures. Always harvest from fallen pods (never cut live ones) to protect the tree.
How long does it take for seed pods to dry enough for carving?
Drying time varies by pod size and climate, but plan for 4–8 weeks in a well-ventilated, dry space (60–70°F). Check for readiness by tapping—if it sounds hollow, it’s ready! Pro tip: Place pods on a mesh rack to allow airflow on all sides.
What’s the best way to clean seed pods before sculpting?
Start by rinsing pods with warm, soapy water to remove dirt and debris. Use a stiff brush to scrub away stubborn grime, then disinfect with a 10% bleach solution (1 part bleach to 9 parts water). Rinse thoroughly and let air-dry completely before handling. Warning: Wear gloves—some pods have sharp edges!
What tools do I need if I don’t want to carve the pods?
No carving skills? No problem! Try these twist-free alternatives:
- Weaving: Use dried pods as natural beads or lash them into baskets with jute twine.
- Painting: Seal pods with gesso, then paint with acrylics for vibrant designs.
- Glue art: Assemble pods into mobiles or wall hangings with strong craft glue.
- Planting: Save viable seeds to grow new palms (check local regulations first!).
What should I do if my seed pod art gets bugs or mold?
Bugs or mold mean your pods aren’t fully dry. Act fast:
- Brush off pests with a damp cloth (vinegar spray deters them).
- For mold, scrub with a hydrogen peroxide solution (1:1 with water), then redry in sunlight.
- Prevent future issues by storing pods in a sealed container with silica gel or cedar blocks.
Wrapping up and next steps
Transforming palm tree seed pods into stunning art is a rewarding way to celebrate nature’s beauty while keeping your space unique. Whether you’re crafting a rustic centerpiece or a sculptural masterpiece, this twist-free harvesting method ensures a seamless creative process.
Now that you’re equipped with the know-how, why not gather your materials and start sculpting today? 🌿✨
🌟 Your Next Step:
- Experiment with textures, finishes, or even mixed-media techniques to make your piece one-of-a-kind.
- Share your creation on social media—tag us @YourLawnInspo for a chance to be featured!
- Explore other natural materials like driftwood or shells for endless DIY possibilities.