
Lawn
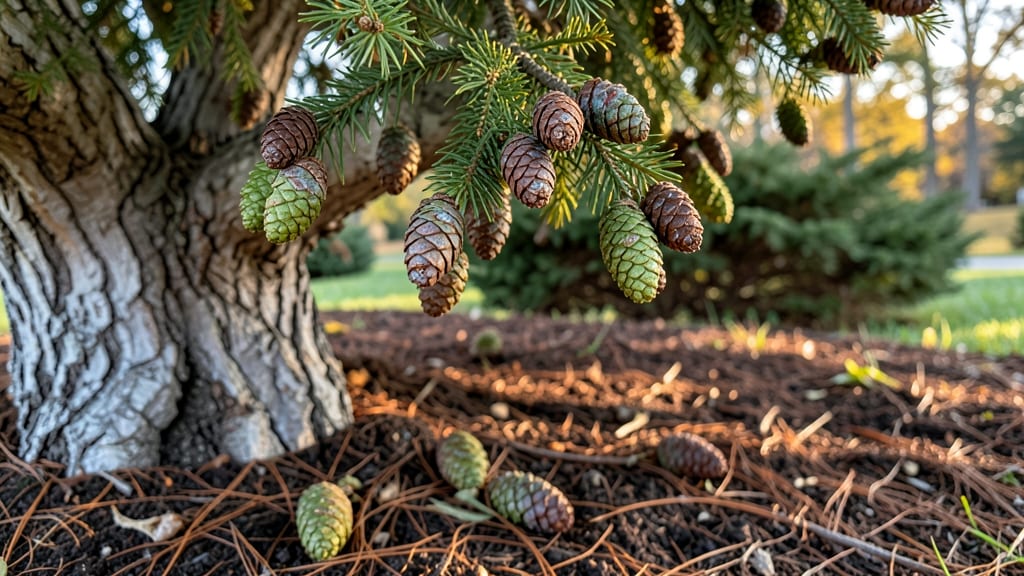
Harvesting cedar tree seed pods when they're just starting to open gives you the best shot at growing your own trees. 🌿 The key is timing—wait until the pods turn from green to light brown, but before they release seeds naturally.
Eastern Red Cedar and Western Red Cedar both follow this pattern, though Western varieties need slightly more patience before they're ready.
You'll need a few simple tools: pruning shears for collecting branches, a bucket for holding pods, and a dry, well-ventilated space to process them. The real trick is separating the seeds from the woody pods without damaging them.
A gentle rolling motion on a clean surface works best—no twisting required. Once free, the seeds should be clean and ready for the next steps.
After extraction, stratification isn't always necessary, but a cold, moist period mimics winter conditions and boosts germination rates. Plant the seeds about ¼ inch deep in well-draining soil, keeping it consistently moist but never soggy.
Within 4-8 weeks, you'll see tiny seedlings pushing through, signaling your patience has paid off.
This method works year-round with proper timing, though spring and fall planting yields the fastest results. Whether you're restoring a natural landscape or adding privacy hedges, growing cedars from seed gives you control over the process—and the satisfaction of watching them mature into sturdy, aromatic trees.
📚 In This Guide
- What you need
- Instructions
- Tips and common mistakes
- Wrapping up and next steps
What you need
- ● Mature cedar trees (Western Red Cedar, Eastern Red Cedar, or similar) – Ensure they’re at least 10–15 years old for optimal seed pod production.
- ● Pruning shears or loppers – Bypass pruners (8–12" blades) for clean cuts; loppers (for thicker branches) if needed.
- ● Large breathable bags or mesh sacks – 5–10 gallon capacity (paper or burlap works best to prevent moisture buildup).
- ● Gloves (gardening or work gloves) – Thick, cut-resistant to protect against sap and thorns.
- ● Sharp utility knife or scissors – For trimming seed pods from branches.
- ● Labeling tags & permanent marker – To track harvest dates and tree varieties.
- ● Drying tray or screen – Wire mesh or perforated plastic (18"x24") for airflow.
- ○ Fan (optional but helpful) – Small box fan or dehumidifier to speed up drying (place on low setting).
- ● Seed tray or shallow container – For sorting and storing viable seeds (glass or plastic with lid).
- ● Fine-mesh sieve or sifter – #10–#20 mesh to separate seeds from debris.
- ● Patience – Cedar seed pods mature late summer to early fall (wait until they turn brown and dry!).
- ● Weather check – Harvest on a dry, sunny day (avoid rain or high humidity).
- ● Landowner permission – If harvesting from public/private land, always ask first!
Instructions for harvesting cedar tree seed pods without damaging the tree
Here's how to collect healthy seed pods without twisting or hurting the cedar tree.
🌿 Step 1: Identify and Locate Mature Seed Pods
Look for seed pods that have turned a deep brown color and feel slightly dry to the touch—these are ready for harvest. Mature pods are usually found on the lower branches, where they cluster in groups of 3-5. Avoid green or soft pods, as they won't contain viable seeds.
Gently shake the branch to confirm the pods are loose inside the cone. If they rattle or move freely, they're ready. I always check pods in late summer or early fall, when they've fully matured but haven't yet released their seeds naturally. Wear gloves to protect your hands from the sharp scales on the cones.
🪴 Step 2: Prepare Your Harvesting Tools and Containers
Gather a small pruning saw or sharp scissors to cut the branch where the pods are clustered. A clean bucket or paper bag works best for collecting the pods—avoid plastic, as it can trap moisture and cause mold. I like to line my bucket with newspaper to keep the pods organized and prevent them from rolling away.
Have a pair of pruning shears or loppers ready to trim the branch cleanly, about 6 inches below the pods. This ensures you don't damage the tree while still getting a good harvest. If you're working with a tall tree, bring a sturdy ladder or use a pole saw to reach higher branches safely.
✂️ Step 3: Carefully Cut and Collect the Seed Pods
Make a clean cut just below the cluster of seed pods, angling the blade slightly upward to avoid tearing the bark. Hold the branch steady to prevent the tree from shaking and dropping the pods prematurely. Once the branch is cut, gently lay it on the ground or into your container.
Remove the seed pods from the branch by hand, being careful not to crush them. Place them directly into your collection container. If you're harvesting from multiple branches, repeat the process, cutting only what you need to avoid over-harvesting. Never take more than 20% of the pods from a single tree to ensure it remains healthy.
🌱 Step 4: Process and Store the Seed Pods for Germination
Once you've collected the pods, spread them out on a clean, dry surface to air-dry for 1-2 days. This helps prevent mold and ensures the seeds inside remain viable. I like to place them in a single layer on a screen or mesh to allow airflow on all sides.
After drying, store the seed pods in a cool, dry place in a sealed container, such as a glass jar or airtight bag. Label the container with the date and tree species to keep track of their freshness. Cedar seed pods can remain viable for up to a year if stored properly, so you can harvest and save them for future planting.
☀️ Step 5: Monitor the Tree’s Health After Harvesting
After harvesting, keep an eye on the tree for any signs of stress, such as wilting branches or discolored needles. Cedar trees are resilient, but over-harvesting can weaken them. If you notice any issues, reduce future harvests or focus on different branches to allow the tree to recover.
Water the base of the tree deeply if your area has experienced dry spells, as cedars benefit from consistent moisture, especially after being disturbed. Mulch around the base with 2-3 inches of organic material to retain moisture and protect the roots. This step ensures your cedar tree stays healthy for future harvests.
Tips & tricks for perfect cedar tree seed pod harvesting
Here's what I've learned after years of harvesting cedar seed pods without damaging a single tree.
Timing is Everything: Late summer to early fall is your best window for harvesting. The pods should be deep brown and slightly dry, but not yet falling naturally. I always check them in August or September—this timing ensures the seeds are fully mature but still contained. If you harvest too early, the seeds won't be viable; too late, and they'll scatter on their own.
Tool Selection Matters: A small pruning saw or sharp scissors is ideal for clean cuts, but never use dull tools—they tear bark and damage the tree. For taller trees, a pole saw with an extendable handle lets you reach safely without climbing. I've ruined branches before by using the wrong tool, so invest in quality equipment if you plan to harvest regularly.
Storage Wisdom: After your 1-2 days of air-drying, store pods in a sealed container with a desiccant packet to prevent moisture buildup. I use glass jars with silica gel packets—they keep pods viable for up to a year. Label each container with the harvest date and tree species. This simple step prevents mold and ensures you'll have healthy seeds when you're ready to plant.
Tree Health First: Never harvest more than 20% of pods from a single tree in one season. Cedar trees are resilient, but they need their seeds to reproduce. After harvesting, I always monitor the tree for stress signs like wilting branches. A deep watering and 2-3 inches of mulch around the base helps the tree recover quickly—it's the least you can do after taking its seeds.
Pro Tips for Cedar Tree Seed Pods
- Here's what I've learned after years of harvesting cedar seed pods without damaging a single tree.
- Timing is Everything: Late summer to early fall is your best window for harvesting. The pods should be deep brown and...
- Tool Selection Matters: A small pruning saw or sharp scissors is ideal for clean cuts, but never use dull tools—they ...
Frequently asked questions
Got questions about harvesting, storing, or growing cedar tree seed pods? You’re not alone! Here are some of the most common queries—and their answers—to help you master the process like a pro.
When is the best time to harvest cedar tree seed pods?
The ideal time to collect cedar seed pods is late fall to early winter (November–January), when they’re fully mature but haven’t yet released their seeds. Look for pods that are brown and dry—they should twist open easily when squeezed. Harvesting too early may yield non-viable seeds, while waiting too long risks losing them to wildlife or wind.
How do I store cedar seed pods for future planting?
Store your harvested pods in a cool, dry place (like a paper bag or breathable container) for up to 6 months. Avoid plastic—it traps moisture and causes mold. For long-term storage (1+ years), refrigerate the pods in a sealed container with a desiccant packet to prevent spoilage. Label them with the harvest date!
Why aren’t my cedar seeds germinating? Troubleshooting tips.
If your seeds aren’t sprouting, check these common issues:
- Improper stratification: Cedar seeds often need cold stratification (4–6 weeks in the fridge) to break dormancy. Skip this step, and germination rates drop.
- Low viability: Old or improperly stored pods may have non-viable seeds. Test a few in damp paper towels—if <10% sprout, replace your seed source.
- Poor soil conditions: Cedar seeds thrive in well-draining, sandy soil with a pH of 5.0–7.0. Compacted or waterlogged soil suffocates them.
Pro tip: Soak seeds in lukewarm water for 24 hours before planting to speed up germination.
Can I use cedar seed pods as mulch or natural pest control?
Cedar seed pods make excellent mulch—they decompose slowly, releasing nutrients while suppressing weeds. Plus, their natural cedar scent repels moths and other pests, making them a low-toxicity alternative to chemical treatments. Just crush them slightly for faster breakdown. Win-win for your garden!
Are there alternatives to harvesting my own cedar seed pods?
Yes! If harvesting isn’t an option, try these alternatives:
- Buy seeds online: Reputable suppliers (like Arbor Day Foundation or Fast-Growing-Trees.com) sell certified cedar seeds.
- Transplant saplings: Local nurseries often carry young cedar trees (e.g., Eastern Red Cedar or Western Red Cedar).
- Grafting: If you have a healthy cedar tree, ask a local arborist about grafting branches for faster growth.
Wrapping up and next steps
Harvesting cedar tree seed pods can be a rewarding way to ensure year-round growth and nurture new trees—without the frustration of tangles or wasted time! 🌲 By following the right techniques, you’ll maximize viability and enjoy a steady supply of fresh seeds.
Whether you’re a gardening enthusiast or a DIY landscaper, this twist-free method makes the process simple and effective.
Ready to put your new skills to work? Start small—collect a few pods today and experiment with germination! With patience and practice, you’ll soon be growing a thriving cedar forest right in your own backyard. Happy harvesting! 🌱