
Lawn
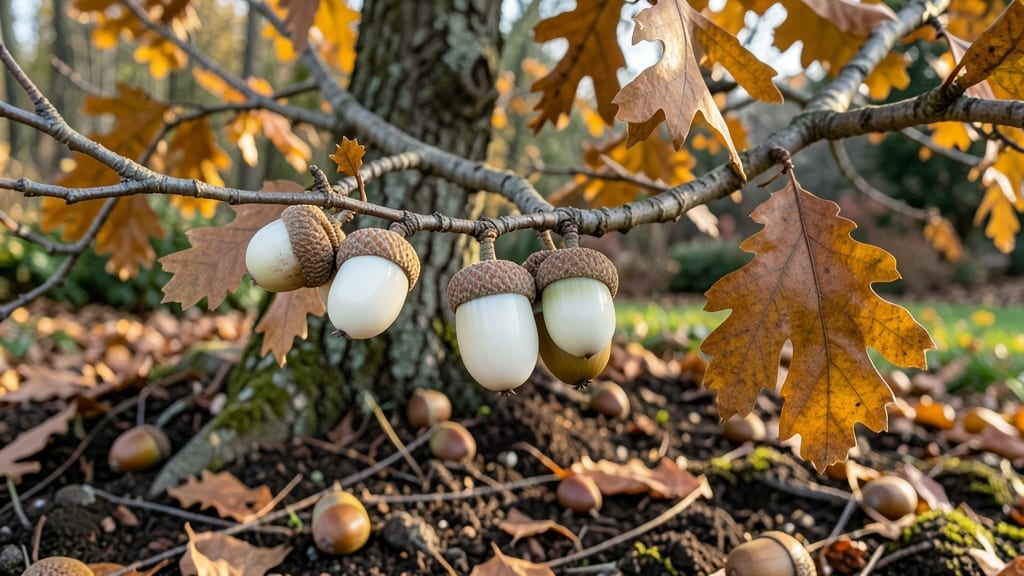
Collecting oak tree seed pods in late fall means future shade trees for your yard. 🌳 The acorns inside need proper drying and stratification before they’ll sprout—skipping these steps means months of waiting (or no germination at all). Start by harvesting mature pods when they’ve fallen but aren’t rotting.
Spread them in a dry, airy spot for 2-3 weeks to dry completely, then store them in a sealed container with slightly damp sand or peat moss. This mimics winter’s cold-wet cycle, breaking dormancy so seeds wake up ready to grow.
By spring, you’ll see tiny roots poking through the soil—slow but steady is normal for oaks. Plant them 1/4 inch deep in well-draining soil, and keep them moist (not soggy) until they’re a few inches tall. Patience pays off: these saplings will outlast anything else in your landscape.
Challenges? Yes—mice love acorns, and germination can take 3-6 months. But with the right prep, you’ll beat the odds and grow strong, native oaks that’ll thrive for centuries.
📚 In This Guide
- What you need
- Instructions
- Tips and common mistakes
- Wrapping up and next steps
What you need
- ● Fresh oak acorns (seed pods) – Collect at least 50-100 pods from mature oak trees (preferably white oak or red oak). Ensure they’re plump, firm, and free of cracks or mold.
- ● Gloves – Heavy-duty gardening gloves to protect your hands from tannins (which can irritate skin).
- ● Bucket or breathable mesh bag – A 5-gallon bucket or large breathable bag to store and transport acorns (avoid airtight containers to prevent mold).
- ● Paper towels or newspaper – For drying and separating acorns (use 1-2 sheets per batch of 20-30 pods).
- ● Plastic zip-top bags – Quart-sized bags (2-3 per batch) for stratification. Poke 5-10 small holes in each bag for airflow.
- ● Moistened peat moss or vermiculite – 1 part peat moss or vermiculite to 1 part water (enough to mix with your acorns for stratification).
- ● Refrigerator or cold frame – A standard fridge (35-40°F) or outdoor cold frame for stratification (requires 3-4 months of cold treatment).
- ● Small pots or seed trays – 2-3 inch diameter pots or seed trays with drainage holes for germination (use 1 pot per acorn or cluster 3-5 in a tray).
- ● Potting soil – A well-draining, sterile mix (e.g., 50% peat moss, 30% perlite, 20% sand).
- ● Spray bottle – For gently misting soil during germination.
- ● Acorn cap remover – A small tool to gently pry off caps without damaging the nut (or use a butter knife carefully).
- ● Humidity dome or plastic wrap – To create a mini greenhouse for faster germination (remove once sprouts appear).
- ● Labeling tags – To track oak species and planting dates (especially useful if experimenting with multiple types).
- ● Grow lights – If germinating indoors before transplanting outdoors (provides 12-14 hours of light daily).
- ● Outdoor thermometer – To monitor soil temperature (ideal germination range: 60-75°F).
Step-by-Step guide to harvesting, drying, and stratifying oak tree seed pods
Here's how to turn those acorn-filled pods into strong, healthy saplings ready for planting.
🌿 Step 1: Harvest Mature Oak Seed Pods at the Right Time
Collect pods in late fall when they've turned brown and begin opening naturally—usually October through December. Look for pods that release acorns when gently squeezed; immature pods stay closed and green. I always check the ground first—many acorns have already fallen, and these often have higher viability.
Harvest on a dry day to prevent mold. Wear gloves if pods are covered in tannins, which can irritate skin. Fill a bucket with the pods, then spread them in a single layer on newspaper or cardboard to begin drying. This prevents rot and makes sorting easier later.
💧 Step 2: Dry and Clean the Pods Thoroughly
Place the pods in a well-ventilated area with indirect sunlight for 2-4 weeks. Stir them weekly to ensure even drying—you want them completely dry but not brittle. Test by squeezing an acorn; if it feels light and the shell cracks easily, it’s ready. Discard any pods with mold, insects, or acorns that smell musty.
Once dry, separate the acorns from the empty pods by hand or with a fine mesh screen. Remove any damaged or shriveled acorns—they won’t germinate. Store the clean acorns in a paper bag (plastic traps moisture) in a cool, dark place until stratification. I label the bag with the oak species and harvest date to track germination progress.
☀️ Step 3: Stratify Acorns for Successful Germination
Oak acorns need cold stratification to break dormancy. Place the acorns in a moistened mix of sand and peat moss (equal parts) in a sealed container. Keep the mix damp but not soggy—water should drain freely. Store the container in your refrigerator for 90-120 days at 35-40°F. Check monthly to ensure no mold forms.
After stratification, plant the acorns ½ inch deep in well-draining soil in pots or directly in the ground. Keep the soil consistently moist but never waterlogged. Germination can take 4-8 weeks—be patient. The first true leaves (not the initial seed leaves) signal successful sprouting.
🌱 Step 4: Transplant Saplings When Ready
Once seedlings have 3-4 true leaves and are 4-6 inches tall, they’re ready for transplanting. Harden them off by placing them outside in partial shade for 1-2 hours daily, gradually increasing exposure over 10-14 days. Choose a sunny, well-drained location with 6+ hours of light for permanent planting.
Dig a hole twice as wide as the root ball but no deeper. Water the sapling deeply before transplanting to reduce shock. Mulch around the base with 2-3 inches of organic mulch to retain moisture and regulate soil temperature. Oak saplings grow slowly—expect 1-2 feet of growth per year in ideal conditions.
Tips & tricks for perfect oak tree seed pod processing
These practical insights will help you maximize your acorn yield and germination success from start to finish.
Harvest Timing Secret: I've learned the hard way that timing is everything—harvest pods when they've fully matured but haven't yet released their acorns naturally. The ideal window is when pods turn completely brown and begin opening on their own. I always check the ground first because many acorns have already fallen, and these often have higher viability than those still in pods. If you harvest too early, the acorns won't be fully developed; too late, and they'll have already sprouted or been eaten by wildlife.
Drying Strategy: For the 2-4 week drying period in Step 2, I recommend using a fan on low setting to circulate air around your drying pods. This speeds up the process while preventing mold growth. Place a mesh screen over a baking rack to allow airflow on all sides. Stir your pods weekly to ensure even drying—this prevents any acorns from becoming too brittle or developing mold. Test readiness by squeezing an acorn; it should feel light and crack easily when pressed. The drying process is complete when you can hear the acorn rattle inside its shell.
Stratification Success: When creating your moist sand and peat moss mix for Step 3, I suggest using a ratio of 2 parts sand to 1 part peat moss by volume. This provides excellent drainage while maintaining moisture. After placing your acorns in the mix, give the container a gentle shake to distribute them evenly. During the 90-120 day refrigeration period, I check my containers monthly by lifting the lid slightly to release any built-up moisture vapor. This simple step prevents condensation that could lead to mold growth. The consistent 35-40°F temperature in your refrigerator mimics natural winter conditions that oak acorns need to break dormancy.
Pro Tips for Oak Tree Seed Pods
- These practical insights will help you maximize your acorn yield and germination success from start to finish.
- Harvest Timing Secret: I've learned the hard way that timing is everything—harvest pods when they've fully matured bu...
- Drying Strategy: For the 2-4 week drying period in Step 2, I recommend using a fan on low setting to circulate air ar...
Frequently asked questions
Got questions about oak tree seed pods? You’re not alone! Here are answers to the most common queries—from harvesting to growing—so you can tackle your project with confidence.
When is the best time to collect oak acorns (seed pods)?
Harvest oak acorns in late fall (October–November), once they’ve fallen naturally from the tree. Look for firm, plump acorns with intact caps—avoid shriveled or worm-infested ones. Early harvesting ensures higher viability for stratification.
How long does it take for oak seeds to germinate after stratification?
After a 3–4 month cold stratification period (mimicking winter), germination typically takes 2–4 weeks in warm, moist conditions. Plant stratified acorns in early spring for the best results—patience is key!
Can I plant oak seed pods directly in the ground without stratification?
While possible, stratification dramatically improves germination rates. Oak seeds need this cold treatment to break dormancy. If you skip it, expect low or delayed germination. For best success, always stratify!
How do I prevent acorns from getting worms or mold before planting?
Store acorns in a cool, dry place (50–60°F) in a breathable container (like a mesh bag) with dry sand or peat moss to prevent mold. Check weekly for pests—discard any acorns with holes or foul smells.
What’s the best way to store oak seed pods long-term?
For short-term storage (weeks), keep acorns in a paper bag or cardboard box in the fridge. For long-term storage (months), place them in a sealed container with damp sand in the fridge (stratification starts early!). Avoid plastic—it traps moisture and promotes rot.
Wrapping up and next steps
From harvesting fresh oak tree seed pods to mastering the art of stratification, you’ve now got the tools to nurture your very own saplings into mighty oaks! 🌳 These resilient trees aren’t just beautiful—they’re a legacy, offering shade, wildlife support, and timeless charm for generations.
Ready to plant the future? Start small today: gather your supplies, pick a sunny spot in your yard, and watch those acorns transform into towering giants over time.
💡 Pro tip: Share your oak-growing journey with fellow green thumbs—whether it’s swapping tips or celebrating your first sprouts! The best gardens (and forests) grow together.