
Lawn
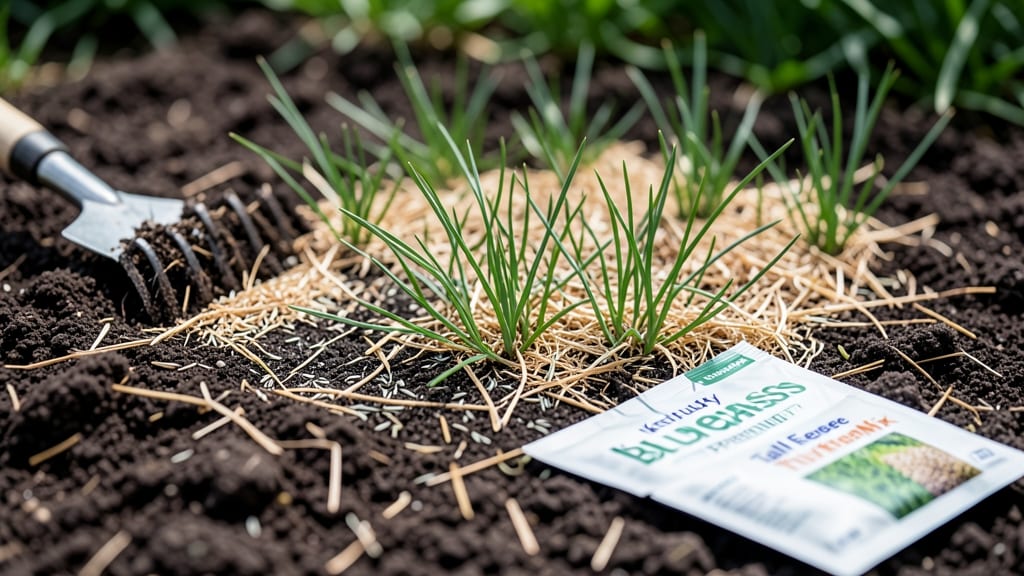
Lawn seed mulch keeps seeds moist and weeds at bay—two things that make or break your lawn’s first season. 🌱 I’ve seen seedling failures from both drought and competition, and mulch solves both problems.
The right layer locks in moisture while blocking sunlight from weeds, giving your grass a fighting chance. Straw is the classic choice, but peat moss or even shredded leaves work too—just avoid anything that mats down or smothers the seeds.
Apply a ¼-inch layer after sowing, then water gently to settle it in. Too thick, and you’ll suffocate new shoots; too thin, and you won’t stop weeds. By week 3, you’ll see uniform germination and fewer weeds than your neighbors’ patchy lawns.
The mulch breaks down naturally, feeding the soil as your grass establishes roots. Just remember: cool-season grasses need mulch in early fall, while warm-season types prefer spring applications. Works for overseeding, new lawns, or repairing bare spots. Here’s how to do it right without the common pitfalls.
📚 In This Guide
- What you need
- Instructions
- Tips and common mistakes
- Wrapping up and next steps
What you need
- ● Lawn seed: Choose a high-quality blend (e.g., Kentucky Bluegrass, Fine Fescue, or Ryegrass). Quantity: 5–10 lbs per 1,000 sq ft (follow package rates).
- ● Compost or organic mulch: Finely ground hardwood mulch, straw, or peat moss. Quantity: ¼–½ inch layer (about 1–2 lbs per 100 sq ft).
- ● Water: Access to a hose or sprinkler system for hydration.
- ○ Lawn fertilizer (optional but recommended): Slow-release granular fertilizer (e.g., 10-10-10 or 20-0-5). Quantity: Follow label instructions (typically ½–1 lb per 1,000 sq ft).
- ● Broadcast spreader (for even seed distribution).
- ● Rake (with fine tines for smoothing).
- ● Garden hose with adjustable nozzle (for gentle watering).
- ● Gloves & knee pads (for comfort during prep).
- ○ Optional: Soil test kit (to check pH/nutrient levels before seeding).
- ● Test soil pH (ideal: 6.0–7.0; amend with lime or sulfur if needed).
- ● Clear debris (rocks, weeds, or thatch) from the lawn area.
- ● Choose a cool-season (fall) or warm-season (spring) planting window for your grass type.
- ● Ensure the lawn is moist but not soggy before applying mulch.
How to apply lawn seed mulch for a thick, weed-free lawn
This method keeps seeds moist and protected while blocking weeds—exactly what you need for a lush, healthy lawn.
🌱 Step 1: Prepare the Soil Before Seeding
Start by raking the soil to create a smooth, level surface. Remove any debris, rocks, or existing weeds—this ensures your new seeds have direct contact with the soil. I like to use a stiff-bristled rake to break up any clumps, but avoid overworking the soil, which can compact it and prevent roots from growing properly.
Test the soil moisture by grabbing a handful—it should crumble slightly when squeezed but not leave a wet clump. If it's too dry, water lightly until the top 2-3 inches feel evenly damp. If it's too wet, wait a day or two for excess moisture to evaporate. The goal is a balance that keeps seeds from drying out or sitting in soggy soil.
💧 Step 2: Spread Seed Evenly Across the Area
Using a broadcast spreader or by hand, distribute the lawn seed evenly across the prepared soil. I like to walk in a crisscross pattern to ensure no gaps—this is where many people make mistakes by focusing only on one direction. For a 4,000-square-foot lawn, use about 10-12 pounds of seed (check the seed bag for exact rates). Lightly press the seeds into the soil with the back of a rake to ensure good soil contact.
Watch for uneven spots where seeds might clump together—these areas will grow thicker and may need thinning later. If you see bare patches, sprinkle a few extra seeds there. Once seeded, give the soil a light misting with water to settle the seeds without displacing them.
✂️ Step 3: Apply Mulch to Protect and Retain Moisture
Spread a ¼-inch layer of straw mulch evenly over the seeded area. Avoid using wood chips or other heavy mulches—they can smother seeds or attract pests. Straw is lightweight, biodegradable, and allows water and air to reach the soil while keeping seeds moist. I use a drop spreader for large areas to ensure an even application, but a push broom works for smaller sections.
Leave a small gap (about 2-3 inches) around the edges of the lawn to prevent mulch from blowing away. Gently press the mulch into the soil with your hands or a light rake to secure it, but don’t compact it—you want it to stay in place while still allowing seeds to push through. This layer will also block weeds from germinating, giving your grass a competitive edge.
☀️ Step 4: Water Gently and Consistently
Water the mulched area immediately after applying it to help settle everything in place. Use a fine mist setting on your sprinkler or a gentle watering can to avoid displacing seeds or washing away mulch. Aim for ¼ inch of water per day, split into two applications—once in the morning and once in the evening. This keeps the soil consistently moist without creating puddles.
Check the mulch daily—it should stay slightly damp but not soggy. If it dries out, water lightly until the top ½ inch feels moist. Overwatering can lead to seed rot, while underwatering causes seeds to dry out and fail to germinate. You’ll know you’re doing it right when the mulch looks uniformly damp and the soil beneath stays cool to the touch.
⏰ Step 5: Monitor and Maintain Until Germination
Keep the mulch in place for 4-6 weeks or until you see 50% germination of the grass seed. During this time, avoid walking on the area to prevent disturbing the seeds or mulch. If rain provides enough moisture, you can reduce your watering slightly, but always check the soil—it should never dry out completely.
Once the grass reaches 2-3 inches tall, you can remove the mulch by raking it away gently. At this stage, the grass roots are strong enough to compete with weeds on their own. Thin out any thick patches by mowing slightly higher than usual to encourage even growth. This method ensures a thick, weed-free lawn with minimal effort once established.
Tips & tricks for perfect lawn seed mulch application
These simple tricks will help you avoid common mistakes and get the most out of your mulched lawn.
Soil Prep is Everything: Before seeding, take an extra 10 minutes to remove all existing weeds and debris—even small pebbles can create bare spots. I like to use a stiff-bristled rake to create a fine, crumbly texture. This ensures your seeds make direct contact with the soil, which is critical for even germination. Think of it like preparing a perfect canvas before painting.
Seed Distribution Secret: When spreading seed, walk in a crisscross pattern to avoid thick and thin spots. I've seen people miss entire sections by only going one direction. For a 4,000-square-foot lawn, use about 10-12 pounds of seed—this gives you a nice, even coverage. After spreading, lightly press the seeds into the soil with the back of your rake to ensure good contact without burying them.
Mulch Application Technique: That ¼-inch layer of straw mulch is your secret weapon against weeds and moisture loss. Use a drop spreader for large areas to get an even application—this prevents thick spots that can smother seeds. Leave those 2-3 inches of clearance around edges to keep mulch from blowing away during windy days. Gently press it into place, but don't compact it like you would for a garden bed.
Watering Wisdom: The key to successful germination is consistent moisture—aim for that ¼ inch per day split into morning and evening waterings. I always check the mulch daily by lifting a corner—it should feel slightly damp like a wrung-out sponge. If it's dry at the top ½ inch, it's time to water. Remember, you're not trying to drown the seeds, just keep them consistently moist until germination.
Pro Tips for Lawn Seed Mulch
- These simple tricks will help you avoid common mistakes and get the most out of your mulched lawn.
- Soil Prep is Everything: Before seeding, take an extra 10 minutes to remove all existing weeds and debris—even small pebbles can create bare spots.
- Seed Distribution Secret: When spreading seed, walk in a crisscross pattern to avoid thick and thin spots.
Frequently asked questions
Got questions about lawn seed mulch?
You’re not alone! Here are some of the most common concerns—and their straightforward answers—to help you get the most out of your weed-suppressing, moisture-locking layer.
What exactly is lawn seed mulch, and how does it work?
Lawn seed mulch is a thin layer of dry grass seed, compost, or straw spread over newly seeded areas. It shields seeds from birds, locks in moisture, and blocks sunlight to prevent weeds—while keeping seeds cozy until germination. Think of it as a protective blanket for your grass!
When is the best time to apply mulch after seeding?
Apply mulch immediately after seeding to prevent seeds from drying out or being scattered by wind. For cool-season grasses, aim for early fall; for warm-season grasses, late spring. Just avoid mulching too heavily—keep it ¼-inch thick or less to avoid suffocating seeds.
Can I use straw or leaves as mulch instead of store-bought options?
Straw
(especially wheat or oat) is ideal—it’s weed-free and breaks down slowly. Leaves work too, but shred them first to avoid smothering seeds. Avoid clumpy hay, which may contain weed seeds. Pro tip: Test your mulch for weed contaminants by soaking a small pile in water—if weeds sprout, skip it!
How often should I water after applying mulch?
Keep the mulch damp but not soggy for the first 2–3 weeks. Water lightly daily (or every other day in hot climates) to encourage germination. Once grass sprouts (about 7–14 days), reduce to 1–2 times per week, watering deeply to reach roots. Mulch helps retain moisture, but consistency is key!
What should I do if mold or fungus appears under the mulch?
Mold or fungus can occur if mulch is too thick or the area stays too wet. Remove excess mulch immediately and improve drainage by aerating the soil. If mold persists, lightly rake the area, let it dry, and reapply a thin layer (¼-inch max). For prevention, avoid mulching in shaded or low-lying spots where moisture lingers.
Can I reuse mulch from last year’s lawn?
Reusing mulch is fine if it’s weed-free and hasn’t broken down into soil. Sift out debris, check for pests, and reapply lightly. However, if it’s old or contaminated (e.g., with fungus or weeds), compost it first or replace it. Fresh mulch ensures better seed protection and weed control.
Wrapping up and next steps
Using lawn seed mulch is a game-changer for growing lush, healthy grass while keeping weeds at bay and moisture locked in. Whether you’re a seasoned gardener or a beginner, this simple technique saves time, water, and effort—giving you a thicker, greener lawn with minimal hassle. 🌱
Ready to transform your lawn? Grab your mulch, follow the steps, and watch your grass thrive! Start small—try one section first—and soon, you’ll be the envy of the neighborhood with that perfect, weed-free carpet of green.