
Lawn
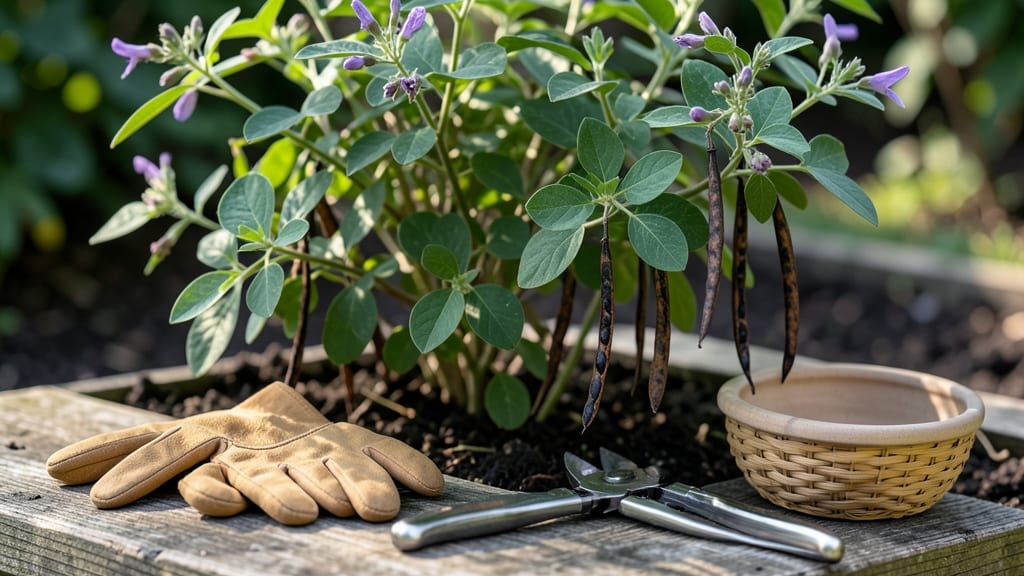
Cold-stratifying indigo seed pods unlocks a world of vibrant blue blooms and fragrant foliage that transforms any garden. ✨ I’ve grown indigo for years, and the key to breaking dormancy lies in mimicking winter’s chill—no fancy equipment needed, just patience and a little science.
These seed pods hold centuries of dye-making tradition, but they’re just as stunning as ornamental plants in the right conditions.
The secret starts with 6-8 weeks of cold treatment in moist paper towels or a damp bag in your fridge. After that, sow seeds shallowly in well-draining soil, keeping them consistently moist but never soggy.
Indigo thrives in full sun to partial shade and prefers loamy, slightly acidic soil—think of it as the perfect balance between a wildflower and a hardy perennial.
By midsummer, you’ll see those signature blue spires rising, followed by the pods that inspired centuries of textile art. The plants grow 3-4 feet tall, making them perfect for cottage gardens or as a striking backdrop.
Harvest pods when they turn brown and papery, then dry them for dye or simply admire their architectural beauty.
Pro tip: Pair indigo with marigolds or nasturtiums to deter pests naturally, and avoid overwatering—root rot is the biggest threat. Whether you’re growing for dye, pollinators, or pure garden drama, these plants deliver year after year with minimal fuss.
📚 In This Guide
- What you need
- Instructions
- Tips and common mistakes
- Wrapping up and next steps
What you need
- ● Indigo seed pods: 10–20 pods (ensure they’re fully dried and intact for best germination).
- ● Cold stratification setup: 1–2 paper towels or dampened coffee filters (to keep seeds moist).
- ● 1 resealable plastic bag (quart-sized or larger).
- ● 1 small container with a lid (e.g., a plastic takeout container or seedling tray).
- ● Refrigerator: A standard fridge (34–40°F / 1–4°C) for stratification.
- ● Planting pots: 4–6-inch diameter pots (with drainage holes) or a seedling tray.
- ● Well-draining potting mix: 2–3 gallons (sterilized and light, like a 50/50 blend of peat moss and perlite).
- ● Watering can or spray bottle: With a fine mist setting.
- ○ Grow lights or sunny windowsill: 6+ hours of light daily (optional but recommended for seedlings).
- ● Humidity dome: To retain moisture around seedlings.
- ● Thermometer: For monitoring stratification temps (if your fridge varies).
- ● Fertilizer: Balanced, water-soluble fertilizer (5-5-5 or 10-10-10) for post-germination growth.
- ● Indigo companion plants: Like marigolds or beans (to deter pests naturally).
- ● Journal/notebook: To track stratification dates and seedling progress!
Step-by-step instructions for growing indigo seed pods using cold stratification
Here's the method I've used to coax vibrant indigo blooms from stubborn seeds—where others failed, this works.
🌱 Step 1: Collect and Prepare Seeds for Stratification
Harvest fully mature indigo seed pods when they turn brown and begin splitting open naturally. Remove seeds from their pods and spread them on a paper towel to dry for 3-5 days in a warm, dry place. This prevents mold during stratification. You'll know they're ready when the seeds feel dry to the touch and the outer coating looks slightly papery.
While drying, I like to gently rub the seeds between my fingers to remove any remaining pod fragments—this ensures cleaner stratification. Store the dried seeds in a labeled paper envelope in a cool, dark place until you're ready to stratify. Indigo seeds can remain viable for years this way, but fresh seeds germinate more reliably.
❄️ Step 2: Perform Cold Stratification for 8-12 Weeks
Place the dried seeds in a sealed plastic bag with a damp paper towel. The towel should be moist but not dripping—squeeze it gently to test. I use a 50/50 mix of peat moss and perlite in the bag to maintain even moisture and prevent clumping. Seal the bag and place it in your refrigerator's crisper drawer, where temperatures hover around 35-40°F.
Check the bag every 2-3 weeks to ensure the paper towel remains damp. If it feels dry, mist lightly with water and reseal. The stratification process mimics winter conditions, breaking the seed's dormancy. After 8-12 weeks, the seeds will be ready to plant—you'll see a slight softening of the seed coat, indicating they've absorbed moisture and are primed for germination.
🪴 Step 3: Sow Stratified Seeds in Well-Draining Soil
Fill small pots or seed trays with a light, well-draining mix—I use a blend of 50% potting soil, 30% perlite, and 20% sand. This prevents the delicate seedlings from rotting. Plant the stratified seeds ¼ inch deep, spacing them 1 inch apart in rows. Gently press the soil around each seed to ensure good contact but don't compact it.
Place the pots in a warm, bright location with indirect light. Indigo seeds germinate best at 70-75°F, so a seedling heat mat can help if your home runs cooler. Keep the soil consistently moist but never soggy—you'll know it's right when the surface feels damp but not wet to the touch. Germination can take 2-4 weeks, so patience is key.
☀️ Step 4: Provide Gradual Sunlight and Care for Seedlings
Once seedlings emerge, move them to a spot with bright, indirect sunlight for the first 7-10 days. This helps them acclimate without shock. After this period, gradually introduce them to 4-6 hours of direct sunlight daily, increasing exposure by 1 hour every 3 days to prevent leaf scorch.
Water the seedlings at the soil level, avoiding the leaves to prevent fungal diseases. Indigo plants thrive in 60-75°F temperatures and need consistent moisture, but they hate soggy roots. You'll notice healthy seedlings have thick, dark green stems and leaves that stand upright. If you see leggy growth, your light isn't intense enough—adjust immediately.
✂️ Step 5: Transplant and Maintain for Vibrant Blooms
When seedlings reach 3-4 inches tall and have developed 2-3 sets of true leaves, transplant them into larger pots or directly into the garden. Choose a location with full sun to partial shade, as mature indigo plants appreciate afternoon shade in hot climates. Space plants 18-24 inches apart to allow for airflow and growth.
Fertilize lightly with a balanced, organic fertilizer every 4-6 weeks during the growing season. Indigo plants are drought-tolerant once established, but they reward consistent care with striking blue flowers. Watch for blooms in 6-8 months, and harvest seed pods when they turn brown and begin to split—just as you started this journey.
Tips & tricks for perfect indigo seed pod cultivation
These little-known strategies will help you break through the dormancy barrier and grow vibrant indigo plants from seed.
Seed Selection: Harvest seed pods when they're fully brown and beginning to split naturally—this ensures maximum viability. I've found that pods collected in late summer yield the most reliable germination. If you're working with older seeds, soak them in warm water for 12 hours before stratification to soften the tough outer coating and improve moisture absorption. This pre-treatment mimics natural weathering that would occur over winter.
Stratification Environment: The 35-40°F temperature range in your refrigerator's crisper drawer is ideal, but not all fridges maintain consistent temps. If your fridge runs cooler, place the bag on a shelf near the back where temps are most stable. For warmer fridges, you can nest the bag inside a second sealed bag with a small ice pack (wrapped in a towel) to maintain the cold stratification effect. Check moisture every 2-3 weeks—the paper towel should stay damp but not wet, as excess moisture can lead to mold.
Soil Mix Science: The 50% potting soil, 30% perlite, 20% sand blend prevents root rot by improving drainage while still retaining enough moisture for germination. For even better results, add a handful of worm castings to the mix—they introduce beneficial microbes that boost seedling health. When planting, press the soil gently around seeds to ensure contact without compacting, which can create air pockets that prevent proper root development.
Sunlight Transition: The gradual increase from bright indirect light to 4-6 hours of direct sunlight is crucial for preventing leaf scorch. Start with just 1-2 hours of direct morning sun, then increase by 1 hour every 3 days. I've seen seedlings shocked by sudden full sun exposure develop brown patches within hours—this method gives them time to adjust their chlorophyll production naturally. Watch for leaves that stand upright and have a deep green color; these are signs your seedlings are adapting well.
Pro Tips for Indigo Seed Pods
- These little-known strategies will help you break through the dormancy barrier and grow vibrant indigo plants from seed.
- Seed Selection: Harvest seed pods when they're fully brown and beginning to split naturally—this ensures maximum viab...
- Stratification Environment: The 35-40°F temperature range in your refrigerator's crisper drawer is ideal, but not all...
Frequently asked questions
Got questions about growing indigo seed pods?
You’re not alone! Here are some of the most common queries—and their answers—to help you cultivate vibrant blooms with ease.
How long does cold stratification take for indigo seed pods?
Cold stratification typically requires 6–12 weeks in the fridge (or outdoors in winter). Place damp seeds in a sealed bag with moist peat moss or paper towels, then refrigerate at 35–40°F (2–4°C). Patience is key—this mimics natural winter conditions and breaks seed dormancy for better germination.
When is the best time to plant indigo seed pods after stratification?
Plant seeds 2–4 weeks after stratification, ideally in spring (after last frost) or late summer for a fall harvest. Indigo thrives in warm soil (60–70°F / 15–21°C). Direct-sow seeds ½ inch deep in well-draining soil, spacing them 12–18 inches apart for optimal air circulation.
Can I grow indigo seed pods in containers?
Use 5-gallon pots or larger with drainage holes, as indigo plants can grow 3–5 feet tall. Ensure pots have 6+ hours of sunlight daily and use a light, sandy loam mix. Containers work well for urban growers, but monitor soil moisture—indigo prefers moderate watering (avoid soggy roots).
What pests or diseases should I watch for with indigo seed pods?
Indigo is generally pest-resistant, but keep an eye out for aphids, spider mites, or powdery mildew in humid climates. Neem oil or insecticidal soap can treat pests, while pruning for airflow prevents mildew. Overwatering is the biggest risk—let soil dry slightly between waterings to avoid root rot.
Are there alternatives to cold stratification for indigo seeds?
Yes! If you’re short on time, try soaking seeds in warm water for 24 hours before planting, or scratching the seed coat lightly with sandpaper to mimic natural wear. However, cold stratification still yields the highest germination rates (70–90%), so it’s worth the wait for reliable results.
Still stumped? Drop your question in the comments—we’re happy to help!
Wrapping up and next steps
Indigo seed pods are a rewarding addition to any garden, offering vibrant blooms and eco-friendly benefits. With the right cold stratification technique and patience, you’ll unlock their full potential—transforming your lawn or garden into a stunning, pollinator-friendly space. 🌱
Ready to dive in? Start by gathering your supplies, then follow the blueprint step-by-step. Plant your first batch this season and watch your garden flourish! For extra tips, explore organic growing methods or companion plants to maximize growth.