
Lawn
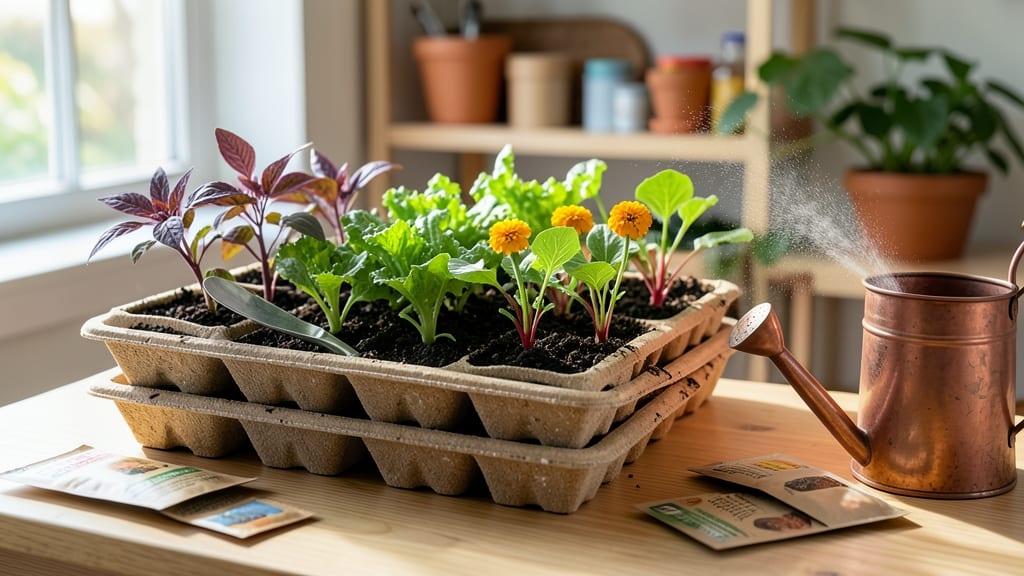
My reusable seed trays cut my seed-starting costs by half while keeping my basement workspace organized. 🌱 The first time I saw how much less plastic waste I generated, I never went back to disposable trays—now I reuse the same plastic flats for years, and my seedlings always germinate faster in the consistent environment.
These trays work best when paired with a sterilization routine (bleach solution or boiling water) and proper drainage holes. I’ve tried everything from shallow 10x20-inch flats for herbs to deep 5-gallon buckets for tomatoes, and the right size makes all the difference in transplant shock.
A simple 3-step cleaning process—scrub, rinse, dry—keeps them ready for the next round of seeds. By the time your seedlings hit the garden, you’ll have saved money, reduced waste, and mastered a system that works for tomatoes, peppers, flowers, and everything in between.
The trays stay in rotation year-round, and I’ve even repurposed broken ones into mini planters for herbs. Whether you’re starting seeds in March or November, these trays adapt to any season. Here’s how to pick the right ones—and keep them working for decades.
📚 In This Guide
- What you need
- Instructions
- Tips and common mistakes
- Wrapping up and next steps
What you need
- ● Reusable seed trays: 2–4 trays (depending on planting scale; 10"x20" or 12"x24" sizes are ideal for most gardens).
- ● Made from recycled plastic, biodegradable materials, or stackable plastic (avoid non-ventilated trays).
- ● Growing medium: 2–3 cubic feet of seed-starting mix (lightweight, sterile, and well-draining).
- ○ Optional: Perlite or vermiculite (1 part per 4 parts soil) for extra aeration.
- ● Seeds: Your chosen varieties (check seed packet for depth/sowing instructions).
- ● Misting bottle or spray nozzle (for gentle watering).
- ● Clear plastic dome or humidity lid (to retain moisture; included with some trays).
- ● Grow lights or sunny windowsill (6–8 hours of light daily; LED grow lights are energy-efficient).
- ● Trowel or small hand shovel (for filling trays).
- ● Labels & markers (to track seed types and planting dates).
- ● Heating mat ($10–$20) for faster germination in cool climates.
- ● Bottom tray or saucer (to catch excess water and prevent messes).
- ● Self-watering tray system (for hands-off hydration).
- ● Compost or worm castings (10% mix for nutrient boost).
- ● Twine or clips (to secure humidity domes if needed).
Step-by-Step guide to maximizing reusable seed trays for germination
Here's how to transform reusable seed trays into your most efficient germination tool—no wasted space, no wasted seeds.
🪴 Step 1: Choose the Right Tray System for Your Space
Select trays with stackable cells (typically 2-3 inches deep) to save vertical space. I prefer plastic or biodegradable fiber options because they're lightweight and easy to clean between seasons. Avoid metal trays—they conduct cold and can chill seeds, delaying germination. For year-round use, opt for clear or translucent trays so you can monitor moisture levels without opening lids.
Calculate your needs based on seed size: small seeds (like lettuce or basil) need 1-inch cells, while larger seeds (tomatoes, peppers) require 2-3 inch cells. If using a single tray for multiple varieties, mark each section with a permanent marker to avoid mix-ups later. I label mine with the variety name and planting date—trust me, you'll forget which tray holds your heat-loving peppers and which has the shade-tolerant greens.
🌱 Step 2: Prepare Trays and Seed Starting Mix
Fill each cell with sterile seed starting mix (never garden soil—it's too dense and may harbor pathogens). Press the mix down lightly so it's firm but not compacted. The goal is to eliminate air pockets while keeping the mix loose enough for tender roots to penetrate. I like to tap the tray gently on the table a few times to settle everything evenly—this prevents uneven germination where some seeds get buried too deep.
Moisten the mix until it's evenly damp but not soggy. Think of it like a wrung-out sponge: water should bead up slightly on the surface but not pool. Overwatering now leads to damping-off later, a fungal disease that collapses seedlings overnight. For trays without drainage holes, poke a small hole in the bottom of each cell with a skewer to prevent waterlogging.
💧 Step 3: Sow Seeds at the Correct Depth and Spacing
Plant seeds at a depth of 2-3 times their diameter—this ensures they have enough energy reserves to reach the light. For example, tiny basil seeds go in ¼ inch deep, while large tomato seeds need ½ inch of coverage. I use a toothpick to make a small hole, drop in 1-2 seeds (just in case one fails to germinate), and cover lightly with additional mix. Don't press down—you'll bury them too deep and delay sprouting.
Label each cell immediately after sowing. I use small wooden sticks inserted into the mix—cheap, reusable, and easy to read. Mist the surface with water until evenly moist, but avoid soaking. The trays should feel damp to the touch but not dripping. Place them in a humidity dome or cover with plastic wrap to retain moisture and warmth. Check daily for condensation—if you see water droplets, remove the cover for 30 minutes to prevent fungal growth.
☀️ Step 4: Provide Ideal Germination Conditions
Most seeds germinate best at 70-80°F—a seedling heat mat keeps the soil 10°F warmer than ambient temperature and speeds up the process. Place trays under grow lights (or near a south-facing window) for 14-16 hours of light daily. Without enough light, seedlings stretch weakly toward the source, a condition called legginess—these plants never recover proper strength.
Wait until 50% of seeds have sprouted before removing the humidity dome. This usually takes 5-14 days, depending on the plant. Once seedlings emerge, lower the grow lights to within 2-4 inches of the trays to prevent stretching. You'll know the light is right when seedlings grow compact and sturdy, with dark green leaves and short stems. If they're pale and elongated, they're reaching for more light.
✂️ Step 5: Thin and Harden Off for Transplanting
When seedlings have 2-3 true leaves (the first set are cotyledons, not real leaves), thin to the strongest plant per cell. Use scissors to snip unwanted seedlings at the base—this prevents disturbing roots of the remaining plants. Water lightly after thinning to settle the soil. For trays without individual cells, transplant seedlings into larger pots when they touch each other, using the same sterile mix you started with.
Two weeks before your last frost date, harden off seedlings by placing trays outside in a sheltered, shaded spot for 1-2 hours the first day. Gradually increase time outdoors by 1 hour daily until they're acclimated to full sun and wind. This process prevents transplant shock, where seedlings wilt and struggle to recover. Once hardened off, transplant into the garden or larger containers, watering deeply at the base to encourage root growth.
Tips & tricks for maximizing your seed trays
Here's what nobody tells you about making reusable seed trays work like a pro.
Cell Depth Matters: In Step 1, those 2-3 inch cells aren't just for show—they determine root development. For small seeds like lettuce, use the 1-inch cells to prevent overcrowding, but for larger seeds like tomatoes, the deeper cells give roots room to establish before transplanting. I've seen seedlings in shallow cells become root-bound before they're ready to move outdoors.
Drainage Hack: Step 2 mentions poking holes in trays without drainage, but here's the real trick: use a paper towel under each cell to catch excess water. This prevents soggy bottoms while still allowing airflow. I keep a roll of paper towels handy—it's a game-changer for preventing damping-off without needing fancy equipment. The key is to keep that sterile seed starting mix just damp, not wet.
Light Positioning: When you move those grow lights to within 2-4 inches in Step 4, aim for the tops of seedlings, not the trays. This creates a more even light distribution and prevents the classic "leggy" seedlings that stretch toward the light source. I use a small ruler to measure the distance—consistency is everything. If you notice seedlings leaning, rotate the trays daily to encourage even growth.
Hardening Off Strategy: That 1-2 hour start in Step 5 can be tricky if you're nervous about frost damage. I like to place trays near a south-facing wall during the day and bring them inside at night for the first week. This mimics natural conditions while giving seedlings time to adjust. Watch for wilting but quick recovery—that's normal as they acclimate.
Pro Tips for Reusable Seed Trays
- Here's what nobody tells you about making reusable seed trays work like a pro.
- Cell Depth Matters: In Step 1, those 2-3 inch cells aren't just for show—they determine root development. For small s...
- Drainage Hack: Step 2 mentions poking holes in trays without drainage, but here's the real trick: use a paper towel u...
Frequently asked questions
Got questions about reusable seed trays? You’re not alone—here are some of the most common ones to help you get started with confidence!
What’s the best material for reusable seed trays?
Look for durable, breathable materials like recycled plastic, biodegradable fiber, or thick cardboard. Plastic trays (e.g., 72-cell packs) are lightweight and reusable for years, while fiber trays break down safely after use. Avoid thin plastic—they warp and don’t drain well.
How long do seeds need to stay in trays before transplanting?
Most seedlings are ready in 4–6 weeks, but timing varies by plant:
- Leafy greens (lettuce, spinach): 3–4 weeks
- Herbs (basil, parsley): 4–5 weeks
- Tomatoes/peppers: 6–8 weeks (harden off first!)
Are reusable trays worth the upfront cost?
While plastic trays cost $10–$30 upfront, they save money long-term by replacing disposable options (which add up to $50+ per season). Plus, they’re eco-friendly—reduce waste and reuse for 5+ years with proper cleaning.
How do I clean and store trays between uses?
Rinse trays with soapy water and a 1:10 bleach solution (for sterilization), then air-dry. Store in a dry, ventilated spot (like a garage or shed). For mold prevention, scrub with a brush and let them dry completely before stacking.
Can I use reusable trays for direct sowing outdoors?
Not ideal! Reusable trays are designed for indoor germination—their shallow depth and lack of drainage holes make them poor for outdoor planting. For direct sowing, use biodegradable pots or plant straight into the ground with proper spacing.
What’s the fastest way to troubleshoot moldy seedlings?
Mold thrives in moist, dark conditions. Fix it by:
- Improve airflow: Move trays to a sunny spot or use a small fan.
- Reduce watering: Let the top inch of soil dry between waterings.
- Re-pot affected seedlings into fresh, sterile soil.
Wrapping up and next steps
Reusable seed trays are a game-changer for gardeners who want to save space, reduce waste, and enjoy year-round planting—without breaking the bank! 🌱 Whether you're a seasoned pro or just starting, these trays make germination easier, more efficient, and eco-friendly.
By investing in a few high-quality trays, you’ll cut costs over time while giving your seedlings the perfect start.
Ready to level up your gardening game? Start small—try a few trays with your next batch of seeds, experiment with different plants, and watch your green thumb grow! 🌿 Next step: Grab your trays, pick your seeds, and get planting!