
Size
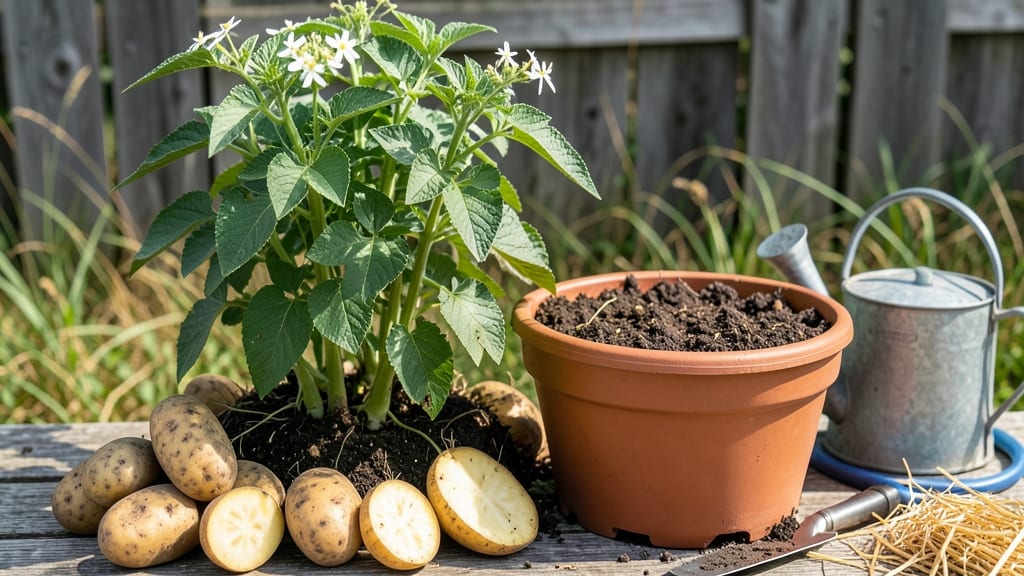
Growing seed potatoes in pots transforms a tiny balcony into a harvest bonanza. 🌱 I learned the hard way that container size matters—too small and you’ll end up with stunted tubers, but get it right and you’ll pull out pounds of crisp, homegrown spuds from just a few square feet.
The secret starts with the right setup: a 5-gallon container per potato plant (or deeper for larger varieties), drainage holes to prevent rot, and a light, crumbly mix of potting soil and compost.
Skip the garden soil—it compacts and suffocates roots. Even my first attempt, using an old whiskey barrel, produced 12 potatoes in one season.
By planting chitted (pre-sprouted) seed potatoes 4 inches deep and keeping them in bright, indirect light, you’ll see green shoots within weeks. The real magic happens when you hill soil around the stems every few weeks—this encourages more tubers to form underground.
Water consistently but never soggy, and you’ll avoid the most common mistake: rot.
This method works for any variety, from crisp Yukon Golds to waxy reds, and even thrives in small spaces. Whether you’re a city dweller or just short on yard space, these containers will give you a harvest that rivals traditional gardens. Let’s get those potatoes growing!
📚 In This Guide
- What you need
- Instructions
- Tips and common mistakes
- Wrapping up and next steps
What you need
- ● Seed potatoes: 2–4 certified disease-free seed potatoes (choose varieties like Yukon Gold, Red Pontiac, or Fingerlings). Pro tip: 💡 Use small to medium-sized potatoes with a few "eyes" (sprouts) for best results!
- ● Containers: 1–2 large pots (10–12 inches deep and wide) per seed potato. Must have drainage holes! (Fabric grow bags or 5-gallon buckets work too.)
- ● Potting mix: 1 bag of high-quality, well-draining container mix (avoid garden soil—it compacts!). Look for blends labeled "organic" or "for vegetables."
- ● Gravel or perlite: A handful for the bottom of pots to improve drainage.
- ● Watering can or hose with a gentle spray nozzle.
- ● Fertilizer: Balanced organic fertilizer (10-10-10 or compost) or potato-specific feed.
- ○ Twine or plant ties (optional but helpful): To secure stems if your plants grow tall.
- ● Garden twine or chicken wire to create a cage for chitting (pre-sprouting) potatoes indoors.
- ● Mulch (straw or grass clippings) to retain moisture and regulate soil temperature.
- ● Potato grow bags with built-in drainage (if you prefer a no-mess solution!).
- ● Soil moisture meter to monitor water levels (especially for beginners!).
Step-by-Step instructions for growing seed potatoes in pots
Here's how I turn small seed potatoes into a container garden harvest—no backyard needed.
🪴 Step 1: Choose Containers and Prepare Your Seed Potatoes
Pick pots at least 10-12 inches deep with drainage holes—seed potatoes need room to develop tubers. I use black plastic grow bags for four plants since they warm up faster in spring. Cut larger seed potatoes into 2-ounce chunks, ensuring each piece has at least one or two eyes (the little dimples where sprouts emerge). Let the cut pieces dry for 24 hours to prevent rotting.
Don't worry if your seed potatoes are still dormant when you start—they'll sprout within 2-3 weeks once planted. I always soak them overnight first to jumpstart growth, then place them in a cool, dark spot until green shoots appear. Once sprouts reach 1-2 inches, they're ready to plant.
🌱 Step 2: Layer Soil and Plant Your Seed Potatoes
Fill the bottom of your pot with 2-3 inches of potting mix, leaving 2-3 inches of space between the soil and the pot's rim. Place your seed potatoes on top, sprouts facing upward, about 4 inches apart. Cover them with 2 inches of additional soil, leaving the sprouts exposed. This ensures the potatoes have enough room to grow without being buried too deep.
Water gently until the soil feels moist but not soggy. You'll see the sprouts emerge within 7-10 days, and that's your signal to start adding more soil. Real talk: If you bury the sprouts too early, they'll rot. Wait until they're 3-4 inches tall before adding more soil.
☀️ Step 3: Provide Sun and Gradually "Earth Up" the Plants
Move your pots to a spot with full sun (6-8 hours daily). Seed potatoes thrive in temperatures between 50-70°F, but they'll tolerate cooler weather better if the soil stays moist. As the plants grow, add more soil in layers—every 2-3 weeks or when the stems reach 6 inches tall. This process, called "earthing up," encourages more tuber formation.
Stop adding soil once the plants flower, usually around 8-10 weeks after planting. You'll know it's time when the foliage turns yellow and starts to die back naturally. This is the plant's way of telling you the tubers are ready to harvest. Don't rush it—wait until the foliage is completely dead to avoid digging up immature potatoes.
💧 Step 4: Water and Fertilize for a Bountiful Harvest
Keep the soil consistently moist but not waterlogged—seed potatoes are drought-tolerant once established, but they need steady moisture during the early growth stages. Water deeply 1-2 times per week, adjusting for your climate. I use a soaker hose to avoid wetting the leaves, which helps prevent disease. Fertilize lightly with a balanced 10-10-10 fertilizer when the plants are 4-6 inches tall, then again when they flower.
Here's the thing—over-fertilizing leads to leafy growth but fewer tubers. Stick to the low-and-slow approach and focus on keeping the soil moist. You'll see the first tubers forming when you gently brush away the soil around the base of the plant after 8-10 weeks. That's your reward for patience!
⏰ Step 5: Harvest and Store Your Potatoes
Wait until the foliage has completely died back before harvesting. Use a fork to gently loosen the soil around the edges of the pot, then carefully lift the plant to avoid damaging the tubers. Shake off excess soil and let the potatoes cure in a dark, dry place for 1-2 weeks before storing. This helps thicken their skins and improves storage life.
Store your harvested potatoes in a cool, dark spot with good ventilation—like a cardboard box in your garage or basement. Check them periodically and remove any that start to sprout or rot. With proper care, your homegrown potatoes will keep for 4-6 months, giving you a taste of summer long after the growing season ends.
Tips & tricks for growing bountiful seed potatoes in containers
Here's what I've learned after growing potatoes in pots for years—these tricks make all the difference between scrappy harvests and potato gold.
Cutting and Curing: When you cut those 2-ounce seed potato chunks, make sure each piece has at least two eyes—this ensures strong sprouting. After cutting, let them cure on a paper towel for the full 24 hours. I've seen people skip this, and their cut pieces often rot instead of sprouting. Pro tip: Use a sharp knife and clean cutting board to prevent spreading disease.
Sprouting Shortcuts: That overnight soak before planting gives your seed potatoes a head start, but here's the thing: if you're in a hurry, you can skip the soak and just plant them dry. The 2-3 week sprouting window in Step 1 accounts for this variation. Just be patient—those green shoots will come eventually, even without soaking.
Soil Layering Strategy: In Step 2, when you're adding those initial 2-3 inches of potting mix, mix in a handful of compost for extra nutrients. The key is to leave that 2-3 inch air gap at the top—this prevents waterlogging when you water. I've ruined pots before by packing soil too tightly at the bottom, which led to rotten tubers.
Harvest Timing: The 8-10 week window in Step 3 is your golden opportunity, but don't wait until the very end. After 10 weeks, the foliage dies back completely, but you can actually start checking for tubers around week 9 by gently brushing soil away from the base. This gives you a preview of your harvest without risking damage to immature potatoes.
Pro Tips for Grow Seed Potatoes In Pots
- Here's what I've learned after growing potatoes in pots for years—these tricks make all the difference between scrappy harvests and potato gold.
- Cutting and Curing: When you cut those 2-ounce seed potato chunks, make sure each piece has at least two eyes—this ensures strong sprouting.
- Sprouting Shortcuts: That overnight soak before planting gives your seed potatoes a head start, but here's the thing: if you're in a hurry, you can skip the soak and just plant them dry.
Frequently asked questions
Got questions about growing seed potatoes in pots? You’re not alone! Here are answers to some of the most common concerns to help you grow like a pro.
What’s the best container size for growing seed potatoes?
For one potato plant, use a pot at least 12 inches deep and 12 inches wide. Larger pots (like 5-gallon buckets) work great for two plants. Just ensure pots have drainage holes to prevent soggy roots!
When is the right time to plant seed potatoes in pots?
Plant 4–6 weeks before your last frost date (spring) or 2–3 months before first frost (fall). Seed potatoes need warm soil (50–60°F) to sprout. Check your local frost dates for timing!
Can I use store-bought potatoes as seed potatoes?
Not ideal! Store-bought potatoes may carry diseases or have been treated to prevent sprouting. Buy certified seed potatoes from garden centers or online. If you must use store-bought, let them sprout in a cool, dark place for 4–6 weeks first.
How do I keep pests like aphids or slugs away from my potted potatoes?
Use row covers or copper tape to deter slugs. For aphids, spray with neem oil or introduce ladybugs. Keep pots elevated to reduce slug access, and avoid overwatering, which attracts pests.
What if my potato plants stop growing or turn yellow?
Yellow leaves often mean overwatering or poor drainage. Let soil dry slightly between waterings. If growth stalls, check for underwatering or nutrient deficiency—feed with a balanced fertilizer if needed. Too much sun can also stress plants!
Wrapping up and next steps
Growing seed potatoes in pots is a rewarding and space-efficient way to enjoy homegrown spuds—no matter how small your garden! 🌱 With the right containers, sunlight, and a little patience, you’ll soon be harvesting fresh, flavorful potatoes straight from your balcony or patio.
Start small, experiment with varieties, and don’t forget to chit your potatoes for a head start.
Ready to dig in? Plant your first batch this week! Once you’ve mastered the basics, try scaling up or even growing other container-friendly crops like tomatoes or peppers. Happy gardening!