
Lawn
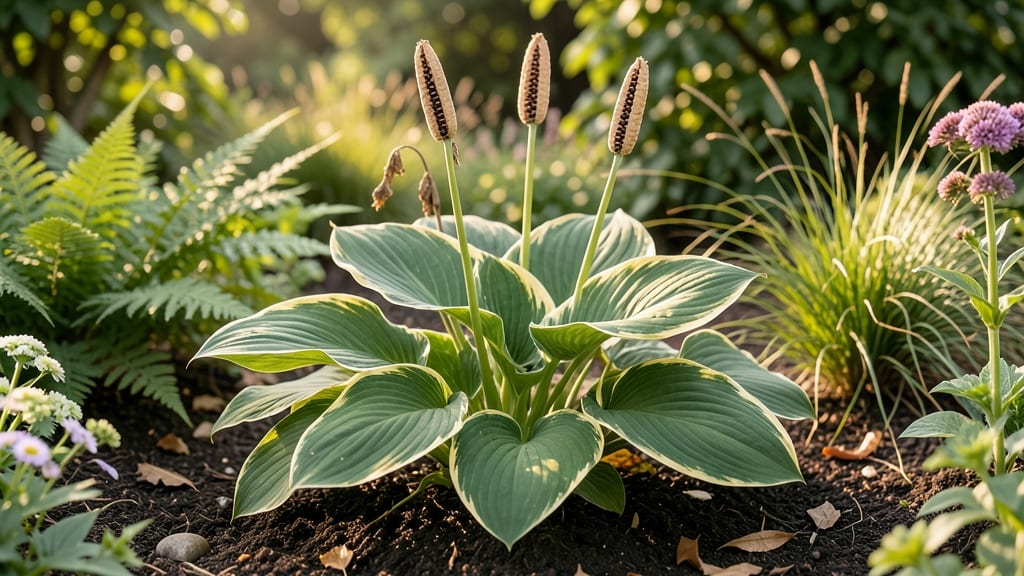
Harvesting hosta seed pods before they twist saves you from empty promises—those dried, contorted pods mean seeds are long gone. 🌱 I learned this the hard way after waiting months for seeds that never materialized, but now I collect pods at the perfect moment when they're still plump and green, packed with potential for new plants.
The key is timing: harvest when pods are fully formed but still firm, usually in late summer when they've swollen but haven't started turning brown. You'll need a sharp knife or scissors, a paper bag for collection, and patience—hosta seeds take 6-12 months to germinate, even with stratification.
The payoff? Unique hosta varieties you won't find anywhere else, since seed-grown plants often surprise with unexpected colors or sizes.
Once you've collected your pods, let them dry completely before cracking them open to reveal the tiny black seeds inside.
Store them in a cool, dry place until you're ready to sow, and don't be discouraged if germination takes a while—hostas are slow starters, but once they break through the soil, they grow into sturdy plants that thrive for decades. The challenge?
Hybrid hostas may not come true from seed, but that's part of the adventure.
Compared to division, growing from seed is slower but offers more variety and the chance to create your own hosta collection. While divisions give you instant plants, seeds let you experiment with colors and patterns you might never find elsewhere.
Just be prepared for a waiting game—these shade-loving perennials reward patience with lush foliage that makes every season worth it.
📚 In This Guide
- What you need
- Instructions
- Tips and common mistakes
- Wrapping up and next steps
What you need
- ● Mature hosta plants (with fully ripe, brown seed pods—typically late summer to early fall).
- ● Sharp pruning shears or scissors (sterilized with rubbing alcohol to prevent disease transfer).
- ● Paper bags or envelopes (labeled with plant variety and date—1 per pod for organization).
- ● Brown paper towels or seed-starting mix (for drying seeds—1 sheet per batch).
- ● Plastic zip-top bags (for long-term seed storage—1 per variety).
- ● Permanent marker (for labeling).
- ● Small paintbrush or cotton swabs (for gently extracting seeds from pods).
- ● Spray bottle with water (for humidifying seed-starting mix if needed).
- ● Desiccant packets (to absorb moisture in storage bags and extend seed viability).
- ● Seed tray and grow lights (if you plan to germinate seeds immediately).
- ● Hand lens or magnifying glass (to inspect seed quality up close).
- ● Notebook or app (to track seed sources, germination dates, and plant traits).
- ● Gloves (to protect hands from sap or soil-borne pathogens).
How to harvest hosta seed pods without twisting or damaging them
Here's the gentle method I use to collect viable hosta seeds—no frustration, no wasted effort.
🌱 Step 1: Identify and Select Mature Seed Pods
Look for seed pods that have turned a pale tan or brown color and feel slightly papery when touched. These are ready for harvesting, while green or firm pods need more time. I always check pods in the late summer to early fall—usually August to September—when they've fully ripened but haven't dried out completely.
Gently squeeze the pod between your thumb and forefinger. If it opens easily and releases tiny black seeds, it's ready. If it resists or feels hard, wait another week. Avoid pods that are already splitting open on the plant—those seeds may have lost viability.
🌿 Step 2: Harvest Pods Without Twisting or Breaking Them
Use a pair of clean, sharp scissors or pruning shears to snip the seed pod from its stem. Cut about ½ inch below the pod to avoid damaging the plant. Hold the pod gently by its base—never pinch the delicate, papery walls. Twisting or squeezing too hard will crush the seeds inside.
Place the harvested pods in a paper bag (not plastic) to allow airflow. If you're collecting multiple pods, label each with the hosta variety and harvest date. I like to write directly on the bag with a marker so I don’t mix varieties later.
💧 Step 3: Dry and Open the Pods for Seed Extraction
Let the pods dry in a cool, dry place for 3-5 days. Spread them out on a clean surface or hang them upside down in the paper bag. The goal is to dry them just enough so the pods open naturally when pressed—don’t let them become brittle or they’ll crumble.
Once dry, place a pod on a flat surface and press gently but firmly with your thumb. The pod should split open and release seeds. If it resists, let it dry another day. Avoid shaking or rubbing pods—this can damage the tiny seeds inside. You’ll likely get 4-8 seeds per pod, depending on the hosta variety.
✂️ Step 4: Store Seeds for Future Planting
Transfer the extracted seeds to a small envelope or airtight container. Label it with the hosta variety, harvest date, and any notes about the parent plant (like leaf color or size). Store the seeds in a cool, dark place—like a refrigerator—where they’ll stay viable for 1-2 years.
Before planting, I like to soak the seeds in lukewarm water for 12 hours to soften the outer coating and encourage faster germination. This step isn’t required, but it helps if you’re eager to see sprouts. Plant the seeds ¼ inch deep in moist, well-draining soil and keep them consistently damp until germination, which usually takes 2-4 weeks.
🌱 Step 5: Plant or Preserve for Later Use
If you’re ready to grow, sow the seeds in well-draining potting mix under bright, indirect light. Keep the soil moist but not soggy—hosta seeds need consistency to sprout. If you’re not planting right away, store the seeds in the refrigerator until you’re ready.
Here’s the thing—hosta seeds can be finicky, so don’t expect a high germination rate. Even with perfect care, you might only get 50% of seeds to sprout. That’s why I always collect extra pods and store them for future tries. Patience pays off with hostas!
Tips & tricks for perfect hosta seed collection
Real talk: harvesting hosta seeds without damaging them takes practice—here's how to avoid the common pitfalls.
Timing Secret: The August-September window is critical for harvesting. If you're in a cooler climate, aim for the first frost date minus 4-6 weeks—this gives pods time to mature without drying out completely. I've learned the hard way that waiting too long means brittle pods that crumble when you try to open them.
Harvest Technique: Those clean, sharp scissors aren't just for cutting—they're your secret weapon. When harvesting in Step 2, make your cut at a 45-degree angle about ½ inch below the pod. This prevents the stem from tearing back into the plant, which can stress it. I always clean my scissors with rubbing alcohol between cuts to prevent any cross-contamination between varieties.
Drying Strategy: The 3-5 day drying period in Step 3 is your best friend. I've found that placing pods on a wire mesh screen (like a cooling rack) works better than paper towels—it allows airflow from all sides. If you're short on time, a dehumidifier set to 40% humidity can speed up the process by about 24 hours, but don't rush it beyond the 5-day maximum or you'll risk seed damage.
Seed Viability Check: Before storing your seeds in Step 4, do this quick test: place 10 seeds on a damp paper towel and cover with another damp paper towel. Keep it in a warm spot (around 70°F) for 5 days. If at least 3 seeds sprout, your batch is viable. This simple test saves you from planting non-viable seeds later—trust me, it's worth the 5-minute effort.
Pro Tips for Hosta Seed Pods
- Real talk: harvesting hosta seeds without damaging them takes practice—here's how to avoid the common pitfalls.
- Timing Secret: The August-September window is critical for harvesting. If you're in a cooler climate, aim for the fir...
- Harvest Technique: Those clean, sharp scissors aren't just for cutting—they're your secret weapon. When harvesting in...
Frequently asked questions
Got questions about harvesting hosta seed pods?
You’re not alone! Whether you’re a seasoned gardener or a curious beginner, these FAQs will help you navigate the process like a pro.
When do hosta seed pods ripen, and how do I know they’re ready?
Hosta seed pods typically ripen late summer to early fall (August–October, depending on your climate). Look for dry, papery pods that split open on their own—this signals seeds are mature. Avoid harvesting if pods are still green or moist, as seeds may not germinate.
How long does it take for hosta seeds to germinate?
Patience is key! Hosta seeds are slow germinators, often taking 3–6 months (or even up to a year) in cold stratification. Start seeds indoors in fall for a head start, or sow directly in late fall to mimic natural winter conditions.
Can I save seeds from hosta plants I buy at nurseries?
Yes, but check for hybrid labels first! Many nursery hostas are cultivar hybrids (e.g., ‘Blue Angel’), meaning their seeds won’t grow true to the parent plant. For reliable results, save seeds from open-pollinated varieties or grow from divisions instead.
What should I do if my seed pods rot or mold before opening?
Overly wet conditions or fungal issues (like powdery mildew) can cause pods to rot. To prevent this:
- Ensure good air circulation around hosta plants.
- Avoid overhead watering—water at the base.
- Harvest pods early if rain is forecasted.
Are there easier ways to propagate hostas besides seeds?
Seeds are hit-or-miss for consistency. Faster methods include:
- Divisions: Split mature clumps in early spring or fall.
- Runners: Separate offsets (pups) from the parent plant.
- Leaf cuttings: Root healthy leaves in water or soil (less reliable but fun!).
Wrapping up and next steps
Harvesting hosta seed pods doesn’t have to be a tricky task—with the right tools and timing, you can collect viable seeds effortlessly! 🌱 Whether you’re a seasoned gardener or just starting, understanding when and how to twist those pods open ensures a bountiful yield for next season.
Now that you’re armed with knowledge, it’s time to put it into action.
Ready to grow your own hosta plants? Start by monitoring your garden for ripe seed pods—then follow the simple steps outlined above. Happy gardening, and may your future hostas thrive! 🌿