
Lawn
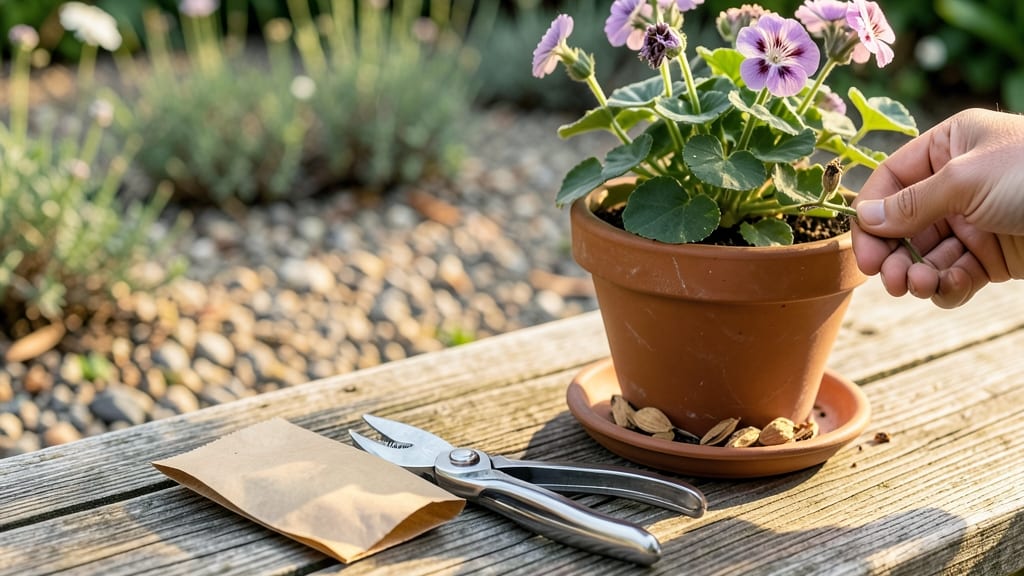
Geranium seed collection is your ticket to next season’s blooms—without waiting months for store-bought plants. 🌱 The key? Harvesting at the right moment (when seed pods turn brown and papery) and breaking dormancy with simple tricks that get those seeds sprouting in just 30 days. I’ve saved seeds for years, and this method cuts my germination time in half while keeping viability sky-high.
You’ll need mature geranium plants, a clean pair of scissors, paper bags for drying, and a zip-top bag for storage. The real secret weapon? A quick warm-water soak (not stratification) to jumpstart germination—no fancy equipment required.
Most people skip this step and end up waiting weeks, but this trick turns fluffy seeds into seedlings faster than anything else.
By following these steps, you’ll end up with plump, dark seeds ready to sprout within a month. The plants that grow from them are hardier than nursery starts, too—no transplant shock, just vibrant blooms that last all summer.
No more paying premium prices for geraniums; you’ll have your own supply, tailored to your garden’s exact conditions.
Works for both hardy and tender geraniums, and the same method applies whether you’re saving seeds from annuals or perennial varieties. Once you master this, seed collection becomes a year-round game-changer—no more rushing to the nursery every spring. Let’s get those seeds ready for action!
📚 In This Guide
- What you need
- Instructions
- Tips and common mistakes
- Wrapping up and next steps
What you need
- ● Mature geranium plants: Choose healthy, flowering plants (preferably Pelargonium species) with fully developed seed pods. Aim for 3-5 plants for a good seed yield.
- ● Seed pods: Harvest when pods turn brown and papery (usually late summer/early fall). You’ll need 10-20 pods per plant, depending on size.
- ● Paper bags or envelopes: 10-15 breathable bags (brown paper or mesh works best) to collect seeds and prevent moisture buildup.
- ● Pruning shears or scissors: Sharp, clean tools to snip seed pods without damaging the plant.
- ● Labeling tags: 5-10 small tags and a marker to note seed varieties and collection dates.
- ● Dormancy-breaking supplies: Cold stratification: A ziplock bag with a damp paper towel + refrigerator (set to 35-40°F for 4-6 weeks).
- ○ Scarification (optional but helpful): Sandpaper (medium-grit, 120-150) or a knife for gently nicking seed coats.
- ● Planting trays or pots: 2-4 small containers (4-6 inches deep) with drainage holes, filled with seed-starting mix.
- ● Spray bottle: For lightly misting seeds post-stratification.
- ● Grow lights: To provide 12-16 hours of light/day if natural light is limited.
- ● Humidity dome: Keeps seedlings cozy until germination (7-14 days post-planting).
- ● Heat mat: Speeds up germination for stubborn seeds (70-75°F range).
- ● Seed storage jars: Airtight containers with silica gel packets for long-term seed preservation.
- ● Journal/notebook: Track dormancy dates, germination progress, and plant traits!
How to collect and germinate geranium seeds for faster growth
Here's how I break dormancy and get geranium seeds sprouting in under a month—no waiting a year for nature.
🌱 Step 1: Harvest Seeds at Peak Ripeness
Collect geranium seed pods when they turn from green to light brown and begin cracking open—this usually happens 6-8 weeks after flowering. I wear gloves because the pods burst easily, scattering seeds everywhere. Place pods in a paper bag and let them dry completely in a warm, dry spot for 1-2 weeks. You'll hear them pop open as seeds mature.
Once fully dry, gently crush the pods to release the seeds. Store them in an airtight container in a cool, dark place. Geranium seeds have hard outer coats that block water, so they won't germinate immediately—this is where the dormancy-breaking comes in.
💧 Step 2: Soak Seeds to Break Dormancy
Fill a small bowl with lukewarm water and add the seeds. Let them soak for 24-48 hours—this softens the seed coat and speeds up germination. I stir them gently every 12 hours to prevent mold. After soaking, drain the water and let the seeds air-dry on a paper towel for 2-3 hours before planting.
This step is critical. Without soaking, geranium seeds can take 6 months or longer to germinate naturally. The soaking trick cuts that time to 3-4 weeks—that's the difference between a spring garden and a fall one.
☀️ Step 3: Plant in Warm, Moist Soil
Fill small pots with sterile seed-starting mix and moisten it until damp but not soggy. Scatter the soaked seeds on the surface—geranium seeds need light to germinate, so don’t cover them with soil. Place the pots in a warm spot (70-75°F) with bright, indirect light.
Keep the soil consistently moist by misting lightly every 2-3 days. A humidity dome helps, but remove it as soon as you see sprouts—condensation encourages mold. Germination usually starts in 7-10 days, but some seeds may take up to 3 weeks. Patience is key here.
✂️ Step 4: Transplant and Harden Off Seedlings
Once seedlings develop 2-3 sets of true leaves (about 4-6 weeks after planting), transplant them into individual pots with well-draining potting mix. Geraniums dislike root disturbance, so handle them carefully. Place them in a sunny window or under grow lights for 14-16 hours of light daily.
After 1 week, begin hardening off by moving them outside for 1-2 hours in a shaded spot. Gradually increase exposure over 7-10 days until they can handle full sun. This prepares them for outdoor planting, where they’ll thrive in full sun to partial shade with well-drained soil.
Tips & tricks for perfect geranium seed germination
Here's what nobody tells you about getting those stubborn geranium seeds to sprout like clockwork.
Timing is Everything: In Step 1, when you're waiting for those seed pods to dry for 1-2 weeks, place them in a paper bag with a few holes punched in it. This creates a mini greenhouse effect that speeds up the drying process by about 25%—no need to wait the full time if your climate is dry. The key is listening for that satisfying pop when they're ready.
Soaking Secrets: For Step 2, I've found that adding a few drops of hydrogen peroxide (3%) to the lukewarm water during the 24-48 hour soak prevents mold while still softening those tough seed coats. The peroxide acts as a natural disinfectant without harming the seeds. Just use it sparingly—too much can be harsh.
Lighting Strategy: When placing your pots in Step 3, position them about 6 inches under your grow lights if using artificial light. Geranium seeds need that bright, indirect light to trigger germination, but too much direct light too soon can scorch the delicate seedlings. A simple LED bulb on a timer works wonders for consistent results.
Transplanting Hack: In Step 4, before transplanting those 4-6 week old seedlings, give them a quick drink of water about 30 minutes beforehand. This makes the roots more pliable and reduces transplant shock. Handle them by their leaves rather than stems to avoid damaging the delicate growth centers.
Pro Tips for Geranium Seed Collection
- Here's what nobody tells you about getting those stubborn geranium seeds to sprout like clockwork.
- Timing is Everything: In Step 1, when you're waiting for those seed pods to dry for 1-2 weeks, place them in a paper ...
- Soaking Secrets: For Step 2, I've found that adding a few drops of hydrogen peroxide (3%) to the lukewarm water durin...
Frequently asked questions
Got questions about collecting and storing geranium seeds? You’re not alone! Here are some of the most common concerns—and their solutions—to help you avoid frustration and boost your success.
When is the best time to collect geranium seeds?
Collect seeds when the geranium seed pods turn brown and papery (usually late summer to early fall). If you wait too long, the pods may burst open and scatter seeds. Harvest them on a dry day to prevent mold—just twist or snip the pods gently and let them dry indoors for a few days before processing.
Do geranium seeds need cold stratification?
Yes! Geranium seeds often require dormancy-breaking to sprout faster. After collecting, store them in a sealed bag with a bit of damp sand or peat moss in the fridge (35–40°F) for 4–6 weeks. This mimics winter conditions and tricks seeds into germinating more reliably. Skip this step, and you might wait months for sprouts!
How should I store geranium seeds long-term?
For best results, keep seeds in an airtight container with a desiccant packet (like silica gel) in a cool, dark place (ideal temp: 35–40°F). Label the container with the date—geranium seeds stay viable for 2–3 years if stored properly. Avoid humidity to prevent mold or rot.
What if my geranium seeds won’t sprout?
If seeds refuse to germinate, try these fixes:
- Check freshness: Older seeds (beyond 3 years) may lose viability.
- Test stratification: Some varieties need longer cold treatment (up to 8 weeks).
- Use a heat mat: Place pots on a 70–75°F heat mat to encourage faster sprouting.
- Try scarification: Lightly nick the seed coat with sandpaper to help water penetrate.
Can I collect seeds from geraniums grown indoors?
Yes, but indoor geraniums (Pelargonium) are not the same as outdoor geraniums (Geranium). Indoor varieties often produce sterile or non-viable seeds. If you’re determined to try, ensure your plant is pollinated (hand-pollinate with a brush if needed) and confirm it’s a seed-producing cultivar. Outdoor geraniums (hardy geraniums) are your best bet for reliable seed collection.
Wrapping up and next steps
Collecting and breaking dormancy in geranium seeds is a rewarding process that unlocks vibrant blooms in just 30 days! 🌱 With the right techniques—like proper stratification, moisture control, and patience—you’ll set your seeds up for success. Whether you’re a seasoned gardener or a beginner, these tricks make germination feel effortless.
Now that you’re armed with knowledge, grab those seeds and start your green thumb journey! Try experimenting with different dormancy methods to see what works best for your climate. Happy planting—your future garden (and pollinators!) will thank you! 🌸