
Lawn
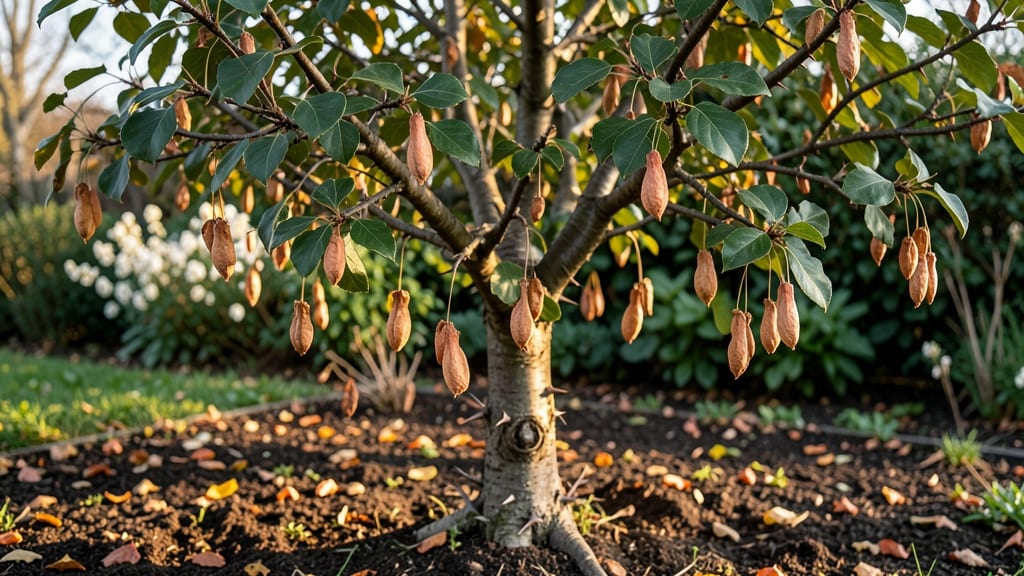
Bradford pear trees drop seed pods that look like nature’s messy confetti—but those pods hold surprising potential. 🌱 I’ve wrestled with their litter for years, then discovered how to break their dormancy and grow new trees from them (yes, really).
The secret isn’t complicated, but it does require patience and the right timing.
These pods are notorious for sprouting unwanted trees, but with a little strategy, you can control their spread—or even turn them into your own nursery stock. The key is understanding their lifecycle: pods mature in fall, drop in winter, and need cold stratification to germinate.
Skipping this step means waiting years for sprouts (or never seeing them at all).
Once you crack the dormancy code, you’ll see tiny seedlings emerge within 4-6 weeks of proper treatment. The trade-off? You’ll also learn how to clean up the mess efficiently—because let’s be honest, no one wants a lawn full of pear tree seedlings.
I’ll show you how to collect, store, and plant these pods or remove them before they become a problem.
Whether you’re dealing with an existing tree’s litter or dreaming of growing your own, this method works for both goals. The best part? You’ll never look at those pods the same way again. Ready to turn trash into treasure—or at least manage it better?
📚 In This Guide
- What you need
- Instructions
- Tips and common mistakes
- Wrapping up and next steps
What you need
- ● Mature Bradford pear seed pods: Collect fresh, plump pods (preferably from late fall/winter) – aim for 10-20 pods for a small batch.
- ● Sharp pruning shears or scissors: For carefully extracting seeds without damage.
- ● Water: Room-temperature, filtered or distilled (avoid chlorinated water).
- ● Paper towels or coffee filters: 2-3 sheets per batch to create a damp germination medium.
- ● Plastic zip-top bags: Quart-sized (2-3 bags) for creating a humid environment.
- ○ Spray bottle (optional but helpful): For gentle moisture control.
- ● Small pots or seed trays: With drainage holes (4-6 inch diameter) for transplanting sprouted seeds.
- ● Potting mix: Lightweight, sterile seed-starting mix (avoid garden soil).
- ○ Heat mat (optional but recommended): A 70-80°F mat to simulate natural warmth and speed up germination.
- ● Patience: Bradford pear seeds can take 4-8 weeks to germinate—stay consistent!
- ● Labeling supplies: Small tags or markers to track seed varieties and planting dates.
- ○ Gloves (optional): To protect hands from sap or debris while handling pods.
- ● Grow lights or sunny windowsill: A bright, indirect light source (12-16 hours/day) for seedlings.
- ○ Thermometer (optional): To monitor soil temperature (ideal range: 65-75°F).
Step-by-Step instructions for germinating Bradford pear tree seed pods
Here’s how I break dormancy and coax these stubborn seeds into sprouting reliably.
🌱 Step 1: Harvest and Clean the Seed Pods
Collect ripe Bradford pear seed pods in late fall, when they’ve turned brown and split open naturally. Remove the seeds from the pulp and rinse them thoroughly under cool water to eliminate any remaining fruit residue. I spread them on a paper towel to air-dry for 2-3 days—this prevents mold and prepares them for stratification.
Look for seeds that are plump and firm, not shriveled or cracked. If you find any damaged seeds, discard them immediately. Healthy seeds will sink when placed in a bowl of water, while empty or damaged ones float. This simple float test saves hours of frustration later.
💧 Step 2: Stratify Seeds to Break Dormancy
Bradford pear seeds need 60-90 days of cold stratification to mimic winter conditions. Place the cleaned seeds in a sealed plastic bag with a damp paper towel—just enough moisture to keep the towel damp, not soaked. I label the bag with the date and store it in my refrigerator’s crisper drawer, where temperatures stay around 35-40°F.
Check the bag every 2-3 weeks to ensure the paper towel remains moist. If it dries out, mist it lightly with water and reseal the bag. You’ll know stratification is working when the seeds begin to soften slightly—this signals the internal changes that allow germination to proceed.
☀️ Step 3: Sow Stratified Seeds in Containers
After stratification, fill 4-inch diameter pots with a mix of 50% potting soil and 50% perlite to ensure good drainage. Plant the seeds ½ inch deep and space them about 1 inch apart. I use a small spoon to create individual holes—this keeps the seeds at the correct depth without overcrowding.
Water the soil gently until it’s evenly moist but not soggy. Cover the pots with clear plastic wrap to create a mini greenhouse effect, which helps retain warmth and humidity. Place the pots in a warm spot, like on top of the refrigerator, where temperatures hover around 70-75°F—this encourages consistent germination.
⏰ Step 4: Monitor for Germination and Transplant
Germination typically takes 3-6 weeks, but be patient—some seeds may take longer. Once sprouts emerge, remove the plastic wrap immediately to prevent fungal growth. Keep the soil consistently moist, but never waterlogged. You’ll see true leaves (not the initial seed leaves) appear within 4-6 weeks after germination.
When seedlings reach 3-4 inches tall and have developed 3-4 true leaves, they’re ready to transplant into individual 6-inch pots. Harden them off by placing the pots outside in a shaded area for 1-2 hours daily over 7-10 days before moving them to their permanent outdoor location.
Tips & tricks for germinating Bradford pear tree seed pods
These little-known secrets will help you bypass the most common pitfalls and get those stubborn seeds sprouting like clockwork.
Selection Tip: The float test in Step 1 is your best quality control—don't skip it! I've wasted weeks on bad seeds that floated away. Healthy seeds should sink immediately and feel plump when squeezed gently. If you're harvesting from multiple pods, separate the seeds by pod source to track which ones perform best.
Stratification Strategy: For the 60-90 day cold treatment in Step 2, I recommend using a small container with ventilation holes in the lid if your fridge bag gets too humid. You'll know it's working when you see tiny white roots emerging from the seeds—this usually happens around the 4-6 week mark. If your refrigerator runs warmer than 40°F, consider moving the bag to your garage or unheated basement instead.
Sowing Secret: In Step 3, those ½-inch deep plantings might seem shallow, but Bradford pear seeds need good air circulation to prevent rot. I like to use a pencil to make the planting holes—it gives me perfect depth control without compacting the soil. After planting, give the pots a gentle shake to help soil settle around the seeds and eliminate air pockets.
Germination Timing: The 3-6 week window in Step 4 can feel like an eternity, but consistency is key. I set a reminder to check moisture levels every 3 days—Bradford pear seeds hate soggy soil but won't germinate if it dries out. If you see mold developing under the plastic wrap, immediately remove it and let the pots air out for 15 minutes before replacing it.
Pro Tips for Bradford Pear Tree Seed Pods
- These little-known secrets will help you bypass the most common pitfalls and get those stubborn seeds sprouting like ...
- Selection Tip: The float test in Step 1 is your best quality control—don't skip it! I've wasted weeks on bad seeds th...
- Stratification Strategy: For the 60-90 day cold treatment in Step 2, I recommend using a small container with ventila...
Frequently asked questions
Got questions about those messy Bradford pear tree seed pods? You’re not alone! Here are answers to the most common concerns—from dealing with the pods to boosting germination success.
Why do Bradford pear trees produce so many seed pods?
Bradford pears are highly prolific seed producers because they’re invasive hybrids designed for rapid growth and reproduction. Each flower cluster (up to 100 per tree!) can turn into hundreds of pods, which is why they’re infamous for littering lawns and sidewalks. Pro tip: Their abundance actually makes them great for naturalizing—or controlling—if you’re strategic!
When is the best time to collect and plant the seed pods?
Collect pods when they’re brown, dry, and starting to split open (usually late fall to early winter). For best results, stratify (simulate winter) the seeds by mixing them with moist sand in a bag and refrigerating for 60–90 days before planting in spring. Rushing this step = poor germination!
Are there non-invasive alternatives to Bradford pear trees?
Yes! Swap Bradford pears for native or sterile cultivars like:
- Callery Pear ‘Aristocrat’ (thornless, fewer pods)
- Serviceberry (Amelanchier) (edible berries, wildlife-friendly)
- Crabapple (Malus spp.) (ornamental, low-seed spread)
Why aren’t my Bradford pear seeds germinating after stratification?
Common culprits:
- Improper stratification (too dry/wet or not cold enough). Use 34–40°F and keep moist.
- Old seeds (viability drops after 1–2 years). Fresh pods = better odds!
- Poor soil contact. Plant seeds ½-inch deep in well-draining soil.
Can I compost or recycle Bradford pear seed pods?
Yes! While the seeds are highly invasive, you can compost the pods themselves (just remove seeds first). For seed disposal:
Warning: Never toss pods into natural areas or waterways!
Wrapping up and next steps
Mastering the art of germinating Bradford pear tree seed pods unlocks a world of rewarding gardening success! 🌱 With the right techniques—like cold stratification, proper moisture, and patience—you can transform tiny seeds into thriving trees.
Whether you're a seasoned gardener or just starting out, these dormancy-breaking secrets make the process achievable and exciting.
Ready to grow your own Bradford pear? Grab those seed pods, follow the steps, and watch your garden flourish! For extra inspiration, explore local gardening forums or connect with fellow plant enthusiasts to share your progress. Happy planting! 🌿