
Propagation
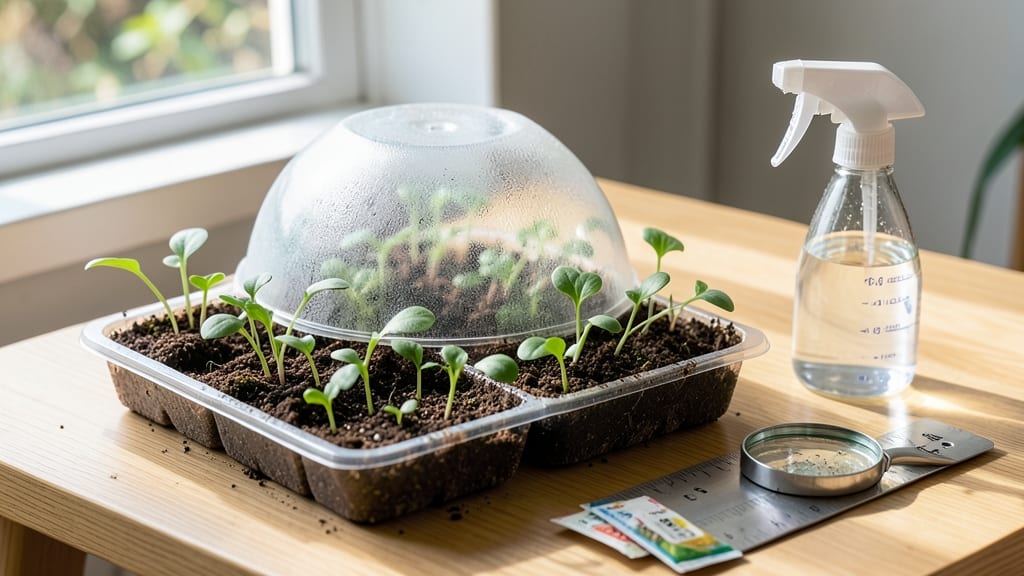
Stratification secrets can cut your wait for blooms from months to weeks. 🌱 I learned this the hard way after struggling with slow germination—until I started experimenting with cold treatment to break seed dormancy. The magic happens when you mimic nature’s timing, and it’s simpler than you think.
You’ll need just a few supplies: paper towels, plastic bags, a refrigerator, and a notebook to track results. The process involves moistening seeds, sealing them in bags, and storing them at 34-40°F for 4-12 weeks, depending on the seed type.
Some seeds, like peonies or delphiniums, need this cold treatment to wake up at all.
Once stratified, germination speeds up dramatically—sometimes within days. You’ll see tiny sprouts pushing through the soil faster than ever, and your garden will reward you with earlier, more vibrant blooms. The key is patience and precision, but the payoff is worth it.
This method works for both annuals and perennials, making it a game-changer for gardeners in cooler climates. Start with a few tricky seeds, and soon you’ll be troubleshooting like a pro—turning dormancy into a predictable, rewarding process.
📚 In This Guide
- What you need
- Instructions
- Tips and common mistakes
- Wrapping up and next steps
What you need
- ● Seeds: Choose cold-stratification-friendly seeds (e.g., Echinacea, Delphinium, or Lupine). Aim for 50–100 seeds for small-scale experiments.
- ● Moistened potting mix: 2–3 cups of sterile, well-draining mix (e.g., peat moss + perlite in a 1:1 ratio).
- ○ Plastic storage bag or container: A quart-sized ziplock or airtight container with a fine mesh breathable lid (optional but ideal).
- ● Spray bottle: For gentle moisture control (avoid oversaturating!).
- ● Labeling tags: Waterproof markers + tags to track seed types and dates.
- ● Refrigerator: Set to 35–40°F (2–4°C) for stratification (most household fridges work!).
- ○ Thermometer: Optional but helpful to monitor temps (e.g., digital fridge thermometer).
- ● Grow lights or sunny windowsill: For post-stratification light exposure (if not direct-sowing outdoors).
- ● Humidity dome: Clear plastic wrap (stretch over containers to retain moisture).
- ● Notebook: To log germination progress, dates, and observations.
Instructions for stratifying seeds to speed germination
Here’s how to break dormancy and coax stubborn seeds into sprouting faster.
🌱 Step 1: Identify Seeds Needing Stratification
Not all seeds require stratification—focus on hard-coated or slow-to-germinate varieties like peonies, delphiniums, or some native wildflowers. Check seed packets for notes about cold treatment; if they’re silent, assume they might benefit. I always test a few seeds first to confirm their response.
Look for seeds that feel hard and impermeable when pinched between fingers. These need the cold-moisture cycle to soften their outer shell. Avoid stratifying tropical or desert species—they’ll rot instead of germinate. Keep a notebook to track which seeds respond best.
❄️ Step 2: Choose Your Stratification Method
Cold-moist stratification mimics winter conditions. The three most reliable methods are: mixing seeds with moist sand in a sealed bag, placing them in a refrigerator’s crisper drawer, or burying them in outdoor pots during winter. I prefer the sand method for precision—it lets me monitor moisture without disturbance.
Use coarse sand or perlite (never fine soil—it compacts and suffocates seeds). Mix seeds with sand at a 1:3 ratio (1 part seeds to 3 parts sand) and dampen until the mixture feels like a wrung-out sponge. Place in a sealed plastic bag or container, label it with the seed type and date, then refrigerate at 35-40°F.
⏰ Step 3: Monitor and Adjust Conditions
Check your seeds every 2-4 weeks for mold or drying. If the sand feels dry, mist lightly and reseal. If mold appears, dump the batch and start fresh—mold means too much moisture. You’ll know stratification is working when seeds develop a slightly wrinkled or softened appearance after 4-12 weeks.
Some seeds germinate during stratification (like certain maples or trilliums). If you see sprouts, plant them immediately in moist potting mix. For others, wait until the seed coat softens noticeably before sowing. Real talk: patience here pays off—rushing leads to weak, uneven germination.
🌿 Step 4: Sow Stratified Seeds at the Right Time
Once stratified, sow seeds in well-draining, sterile potting mix at the depth recommended on the packet (usually 2-3 times the seed’s diameter). Press gently but don’t compact—stratified seeds need loose soil to push through. Water lightly to settle the soil, then place in a warm, bright spot.
Expect germination in 7-30 days, depending on the species. Delphiniums often sprout in 2 weeks after stratification, while peonies can take 4-6 weeks. Keep the soil consistently moist but not soggy—overwatering now causes damping-off, which kills seedlings overnight.
☀️ Step 5: Transition to Growing Conditions
As seedlings emerge, move them to 14-16 hours of light daily—a grow light or south-facing window works. You’ll see strong, stocky seedlings with deep green cotyledons (the first true leaves). Thin to 1 plant per cell if crowded, using clean scissors to avoid disturbing roots.
Hardening off isn’t needed for stratified seeds, but gradually introduce them to outdoor conditions if transplanting. Watch for wilting or yellowing leaves—signs of shock. Once seedlings have 3-4 true leaves, they’re ready for their permanent home, whether in the garden or larger pots.
Tips & tricks for perfect seed stratification
These pro techniques help you bypass dormancy and unlock faster germination every time.
Seed Selection: Not all seeds need stratification—focus on those with hard, impermeable coats like peonies or delphiniums. I always pinch-test a few: if they feel rock-hard, they're ready for cold treatment. Tropical seeds will rot, so skip stratification for those. Keep a simple notebook to track which varieties respond best to this method.
Moisture Management: The 1:3 seed-to-sand ratio is critical for proper moisture balance. After mixing, squeeze the sand mixture—it should feel like a wrung-out sponge, not dripping wet. Too much moisture causes mold, while too little prevents germination. I use a spray bottle to mist lightly if the mixture dries out during the 2-4 week checks.
Temperature Precision: That 35-40°F range is non-negotiable for proper stratification. Most refrigerators maintain around 38°F in the crisper drawer, making it ideal. If your fridge runs warmer, place the sealed container on the bottom shelf where it's coolest. Never use the freezer—frost will destroy your seeds.
Visual Cues: Watch for subtle changes in the seed coat after 4-12 weeks. A successful stratification will show slight wrinkling or softening—this means the cold treatment is working. For seeds that sprout during stratification (like maples), plant them immediately in moist potting mix. If you see mold, toss the batch immediately—mold means too much moisture and ruined seeds.
Pro Tips for Experiments On Seed Germination
- These pro techniques help you bypass dormancy and unlock faster germination every time.
- Seed Selection: Not all seeds need stratification—focus on those with hard, impermeable coats like peonies or delphin...
- Moisture Management: The 1:3 seed-to-sand ratio is critical for proper moisture balance. After mixing, squeeze the sa...
Frequently asked questions
Got questions about seed germination experiments?
You’re not alone! Here are answers to common queries to help you troubleshoot, optimize, and succeed with your stratification projects.
What’s the best way to test if my seeds need stratification?
If your seeds sprout inconsistently or take months to germinate, stratification is likely the key! Try a simple paper towel test: Moisten a towel, wrap 10 seeds, seal in a bag, and refrigerate for 4–8 weeks. If germination improves, stratification is your solution!
How long should I stratify seeds before planting?
Most cold-stratified seeds need 4–12 weeks in the fridge (34–40°F). Warm-stratify tropical seeds (like mangoes) for 2–4 weeks at 70–90°F. Pro tip: Check your seed packet—some varieties (e.g., peonies) require longer cold periods (up to 6 months)!
What if my stratified seeds still won’t germinate?
Try these fixes:
- Check moisture: Overly dry or soggy towels/bags can kill seeds.
- Verify temps: Use a fridge thermometer—too warm (above 45°F) breaks dormancy too soon.
- Scarify hard shells: Lightly nick thick coats (e.g., maple seeds) with sandpaper.
- Test viability: Soak seeds in water—if they float, they’re likely dead.
Can I stratify seeds in soil instead of a bag?
For outdoor stratification, plant seeds in pots with moist soil, cover with a plastic bag, and refrigerate. This mimics natural winter conditions. Bonus: Once sprouted, you can transplant directly into your garden without disturbing roots!
Are there non-refrigerator stratification methods?
Yes! For warm climates:
- Outdoor winter sowing: Plant seeds in clear plastic bottles outside during cold months.
- Heat stratification: Bury pots in warm compost (100–120°F) for 2–4 weeks.
- Oven method: Place seeds in a sealed container in a low-heat oven (140°F) for 1–2 weeks (monitor closely!).
Wrapping up and next steps
Experiments on seed germination reveal that stratification can unlock faster, healthier blooms—especially for stubborn seeds! 🌱 Whether you’re chilling seeds in damp paper towels or layering them in a cold, moist medium, these techniques mimic nature’s timing. The key? Patience and precision—but the rewards are worth it.
Ready to turn your dormant seeds into thriving plants? Start small: pick one tricky seed type (like maple or apple) and test stratification methods. Track your progress, tweak as needed, and soon, you’ll be harvesting homegrown success—one sprout at a time! 🌟