
Lawn
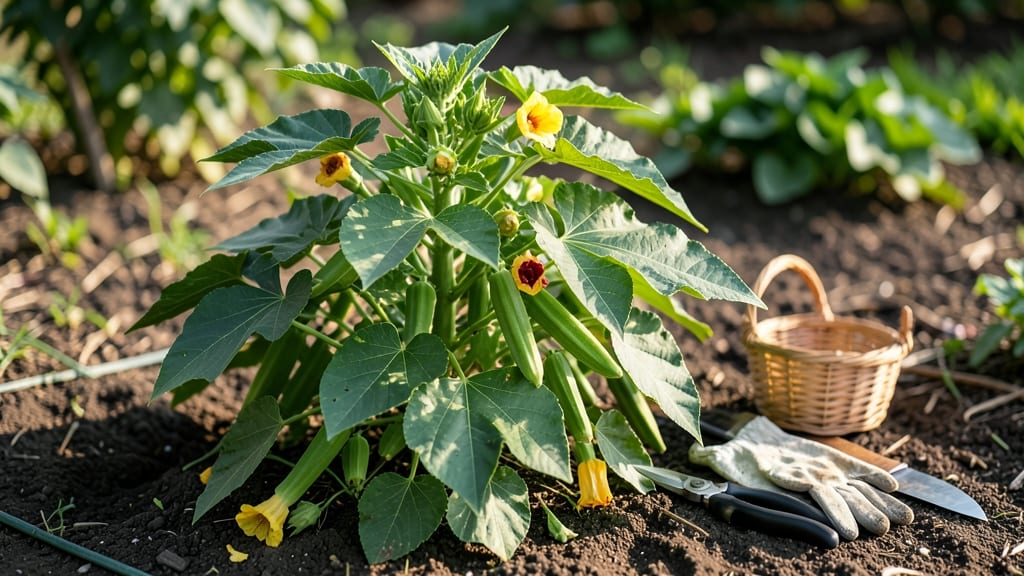
Growing edible seed pods turns your yard into a dual-purpose space—beautiful blooms that feed you. 🌱 I started with okra and peas last spring, and now my lawn edges produce both food and color without sacrificing curb appeal.
The secret lies in choosing the right varieties that thrive in your climate while keeping their ornamental appeal. You’ll need well-draining soil, 6+ hours of sunlight, and a mix of plants that handle your local heat or chill.
Okra loves deep, sandy soil, while peas prefer cooler climates and partial shade. Water consistently but avoid soggy roots—both are picky about moisture but hate standing water. By midsummer, you’ll harvest pods that go from garden ornament to kitchen staple.
Okra turns crisp-tender in 10-12 days after flowering, while chili peppers mature into vibrant, spicy pods perfect for drying or pickling. The best part? Your garden doubles as a living pantry and a pollinator magnet.
Works in small spaces or alongside lawns—just pick compact varieties like bush beans or dwarf okra. Here’s how to make it work without sacrificing your yard’s beauty.
📚 In This Guide
- What you need
- Instructions
- Tips and common mistakes
- Wrapping up and next steps
What you need
- ● Edible seed pods: Choose from okra, hyacinth beans, or peas (3–5 pods per plant, depending on variety). Opt for organic, non-GMO seeds for the best flavor and growth.
- ● Well-draining soil: A mix of topsoil (50%) and compost (50%) (1–2 cubic yards for a small garden bed). Test soil pH (ideal: 6.0–7.0).
- ● Sunlight access: A full-sun location (6+ hours/day) for optimal growth.
- ● Watering can or hose: With a gentle spray nozzle to avoid damaging tender seedlings.
- ● Fertilizer: Balanced 10-10-10 or compost tea (1 tbsp per plant every 4–6 weeks).
- ● Support structures: For vining pods (e.g., hyacinth beans): Trellis or stakes (5–6 ft tall).
- ○ For bush varieties (e.g., okra): Sturdy cages or tomato cages (optional but helpful).
- ● Pruning shears: For trimming dead pods or shaping plants.
- ● Mulch: Straw or wood chips (2–3 inches) to retain moisture and suppress weeds.
- ● Drip irrigation system: For consistent watering (especially in hot climates).
- ● Plant markers: Biodegradable labels to track varieties.
- ● Pest control: Neem oil spray or row covers to deter pests like aphids.
- ● Food processor or mortar & pestle: For crushing dried pods into flour or seasoning blends!
Step-by-step guide to growing edible seed pods from dried specimens
Here's how to bring dried seed pods back to life and grow your own edible blooms.
🌱 Step 1: Prepare the Seed Pods for Planting
Start by selecting healthy, dry seed pods from plants like okra, chili peppers, or nasturtiums—these are classic edible pod producers. Place the pods in a bowl of warm water for 12-24 hours to soften the outer shell. This step is critical because dried pods have tough coatings that can delay or prevent germination.
After soaking, gently rub the pods between your fingers to release the seeds. You'll feel them pop free—this is your cue to separate them from the fibrous pod material. I like to spread them on a paper towel to dry completely before planting, which prevents mold from forming in damp soil.
☀️ Step 2: Set Up the Growing Environment
Fill 4-inch diameter pots with a lightweight seed-starting mix (never garden soil—it's too dense). Press the soil down lightly so it's firm but not compacted. You want roots to push through easily, so avoid packing it too tight. Plant the seeds ¼ inch deep—any deeper and they'll struggle to reach the surface.
Place the pots in a warm spot with bright, indirect light (a south-facing window works well). If your space is dim, use a grow light positioned 3-4 inches above the pots. Keep the soil consistently moist but not soggy—you'll know it's right when the top inch feels damp to the touch.
💧 Step 3: Germinate and Care for Young Seedlings
Germination usually takes 7-14 days, depending on the pod type. Watch for the first tiny green shoots—this is your signal to start thinning. Once seedlings are 1-2 inches tall, remove the weaker ones, leaving the strongest plant per pot. This prevents overcrowding and gives your edible pods room to grow.
When the first true leaves appear (these are the second set after the initial cotyledons), it's time to introduce a balanced liquid fertilizer at half-strength. You'll see the difference in leaf color within a week—they'll turn a vibrant green and grow more vigorously. Keep the soil moist but avoid waterlogging, which can rot delicate roots.
🌿 Step 4: Transplant and Encourage Pod Production
After 4-6 weeks, when seedlings have 4-6 true leaves, transplant them into larger containers or directly into the garden. Choose a spot with full sun (6+ hours daily) and well-draining soil. If you're growing in containers, use pots at least 12 inches deep to accommodate root growth.
Here's the thing—edible seed pods thrive when they feel slightly stressed. Let the top inch of soil dry out between waterings, and pinch off the first few blooms to encourage bushier growth. You'll notice more side shoots forming, which means more pods later. Once flowers appear, hand-pollinate them by gently shaking the plants to ensure fruit set.
✂️ Step 5: Harvest and Store for Next Season
Harvest pods when they're fully developed but still firm to the touch—this ensures the best flavor and texture. For okra, pick when pods are 3-4 inches long; for chili peppers, wait until they're deep in color. Cut stems with clean pruners to avoid damaging the plant. You'll get a second flush of pods if you keep the plant healthy and well-watered.
To save seeds for next year, let some pods dry completely on the plant. Once they're crisp and the seeds rattle inside, collect them and store in a cool, dry place. Label the pods with the variety and date—this way, you'll always know what you're planting. With proper care, your edible seed pods will reward you with a bountiful harvest year after year.
Tips & tricks for perfect edible seed pod growth
Transforming dried seed pods into thriving plants takes patience—and these insider tips will help you avoid common pitfalls along the way.
Soaking Strategy: The 12-24 hour warm water soak is your secret weapon for breaking through those tough dried shells. I like to use a shallow dish with just enough water to cover the pods completely—this prevents them from floating and ensures even hydration. After soaking, I give them a quick rinse to remove any residual debris that could hinder germination. Pro tip: If you're working with particularly thick pods like okra, extend the soak to the full 24 hours for best results.
Lighting Secrets: That bright, indirect light requirement in Step 2 is non-negotiable for healthy seedlings. If you notice your seedlings stretching toward the light (a condition called etiolation), it's time to adjust. For indoor growers, I recommend rotating pots 180 degrees daily to ensure even growth. And if you're using a grow light, keep it on a timer for 12-14 hours of light per day—this mimics natural daylight cycles and prevents leggy growth.
Transplanting Timing: The 4-6 week window for transplanting might seem broad, but it's intentional. Wait until you see those 4-6 true leaves—this indicates the plant has developed a strong enough root system to handle the transition. I like to harden off seedlings for 3-4 days before transplanting by placing them outside in a sheltered spot during the day and bringing them back inside at night. This gradual adjustment prevents transplant shock that can stall growth.
Harvesting Hack: When harvesting those 3-4 inch okra pods or deep-colored chili peppers, use clean, sharp pruners to avoid damaging the plant. I've found that harvesting in the morning gives you the freshest pods since they've had the night to fully develop. For continuous production, pick regularly—this encourages the plant to produce more flowers and pods rather than letting them go to seed all at once.
Pro Tips for Edible Seed Pods
- Transforming dried seed pods into thriving plants takes patience—and these insider tips will help you avoid common pi...
- Soaking Strategy: The 12-24 hour warm water soak is your secret weapon for breaking through those tough dried shells....
- Lighting Secrets: That bright, indirect light requirement in Step 2 is non-negotiable for healthy seedlings. If you n...
Frequently asked questions
Got questions about growing and enjoying edible seed pods?
You’re not alone! Here are answers to the most common queries—from planting tips to harvesting hacks.
Can I eat seed pods straight from the plant?
Most edible seed pods (like okra or chili peppers) are best harvested before they fully dry. Young pods are tender and packed with flavor, while mature, dried pods are often used for planting or decorative purposes. Always research your specific plant—some require cooking or peeling first!
How long does it take for seed pods to mature?
Timing varies by plant! Fast growers like okra produce pods in 50–60 days, while slower varieties (e.g., lupine or sweet pea) may take 90–120 days. Check seed packets for exact days-to-maturity—your local climate also plays a role.
What’s the best way to dry seed pods for planting?
Harvest pods when they’re fully brown and crispy, then:
- Air-dry: Spread pods in a single layer on paper towels in a warm, dry spot (avoid direct sunlight).
- Oven-dry: Set oven to 170°F (77°C), bake for 1–2 hours, and stir occasionally.
- Pro tip: Store dried pods in a sealed container with a silica gel packet to prevent moisture.
Are there any seed pods I should avoid eating?
Yes! Some ornamental pods (like wisteria or castor bean) are toxic. Always double-check before consuming. When in doubt, stick to culinary varieties (e.g., sweet pea, chili, or okra) and consult a trusted gardening guide.
Can I grow edible seed pods in containers?
Compact varieties like dwarf okra or bush beans thrive in pots (5+ gallons). Ensure containers have:
- Drainage holes (to prevent root rot).
- Well-draining soil mixed with compost.
- 6+ hours of sunlight daily.
Wrapping up and next steps
From vibrant edible seed pods to thriving plants, you’ve now got the know-how to transform your lawn into a functional, beautiful, and sustainable space! These pods aren’t just eye-catching—they’re packed with flavor, nutrition, and easy-growing potential. 🌱
Ready to take the next step? Start small—plant a few pods in a sunny spot, experiment with flavors, and watch your green space (and your plate!) come alive. Happy growing!