
Lawn
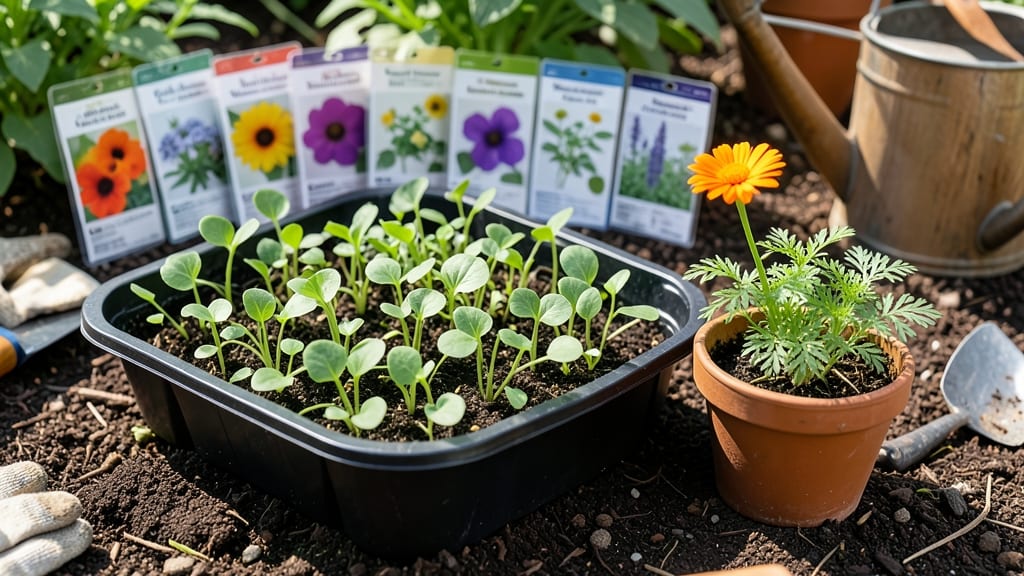
One packet of edible flower seeds can turn your yard into a fragrant, colorful kitchen garden—no green thumb required. ✨ I’ve grown these same mixes for years, and the secret isn’t complicated: it’s about sunlight, water, and a little patience.
These flowers aren’t just pretty; they’re packed with petals you can toss into salads, garnish cocktails, or sprinkle over desserts.
The right soil and placement make all the difference. Most mixes thrive in well-draining soil with 4-6 hours of sunlight daily, though some like nasturtiums tolerate partial shade.
Start with a loose, nutrient-rich mix—think compost blended into garden soil—and avoid heavy clay. Water gently at the base to keep blooms vibrant and pests away.
By midseason, you’ll harvest nasturtiums (peppery like arugula), calendula (citrusy and soothing), and borage (honey-scented leaves and flowers). The best part? These plants self-seed, so you’ll get year-round blooms with minimal effort. Just snip what you need and let the rest keep growing.
Watch for aphids on tender leaves—blast them off with water if they appear. And if your soil feels too alkaline, a sprinkle of sulfur can help. With the right care, your edible flower garden will outlast store-bought bouquets and taste better too.
📚 In This Guide
- What you need
- Instructions
- Tips and common mistakes
- Wrapping up and next steps
What you need
- ● Edible flower seed mix (1–2 packets, depending on desired coverage)
- ● Well-draining potting soil or garden soil (1–2 cubic feet, amended with compost for nutrients)
- ● Garden plot or containers (6–12 inches deep, with drainage holes if using pots)
- ● Watering can or hose with a gentle spray nozzle
- ○ Gloves (optional but recommended) for handling seeds and soil
- ● Seed starter trays (for indoor germination, if preferred)
- ● Lightweight mulch or straw to retain moisture and deter weeds
- ● Organic fertilizer (balanced 10-10-10 or compost tea for a nutrient boost)
- ● Plant labels to track varieties (especially useful for beginners!)
- ● Sunlight meter or app to check your garden’s light conditions
Step-by-Step instructions for planting an edible flower seed mix
Here’s how to transform a single packet into a vibrant, edible garden that keeps blooming all season.
🌱 Step 1: Prepare the Soil and Planting Site
Choose a location with 6+ hours of sunlight daily—most edible flowers thrive in full sun but tolerate partial shade. Loosen the soil to a depth of 6-8 inches to encourage root growth. If your soil is heavy clay or sandy, amend it with 2-3 inches of compost to improve moisture retention and nutrient availability.
Work the compost into the top layer of soil until it’s dark and crumbly. Avoid overworking the soil—just break up clods gently to create a loose, airy texture. This prevents compaction, which can suffocate young roots and stunt growth. A quick test: squeeze a handful of soil—it should hold its shape but crumble easily when poked.
💧 Step 2: Sow the Seeds at the Right Depth and Spacing
Scatter the seeds thinly over the prepared bed, following the packet’s spacing guidelines—typically 6-12 inches apart for most varieties. Press them lightly into the soil with your fingertips or a small board, ensuring they make contact with the earth but aren’t buried too deep. Most edible flower seeds germinate best when sown just below the soil surface.
Cover the area with a thin layer of mulch or straw to retain moisture and protect seeds from drying out. Water gently with a fine spray nozzle until the soil is evenly moist but not soggy. Overwatering at this stage can wash seeds away or create a crust that blocks germination. Aim for soil that feels like a damp sponge—squeeze it to test.
☀️ Step 3: Provide Consistent Moisture and Light
Keep the soil consistently moist until seeds germinate, which usually takes 7-21 days depending on the variety and temperature. Use a drip irrigation system or soaker hose to deliver water slowly at the base of plants, avoiding overhead watering that can spread disease. Once seedlings emerge, reduce watering slightly but maintain even moisture—edible flowers are drought-tolerant once established, but young plants need steady hydration.
Monitor sunlight exposure closely. If seedlings stretch toward the light or develop pale leaves, they’re not getting enough. Rotate the planting area weekly to ensure even growth. You’ll notice stronger stems and darker green leaves when light is optimal—this is your cue that the plants are thriving.
✂️ Step 4: Thin and Maintain for Continuous Blooms
When seedlings reach 2-3 inches tall, thin them to the recommended spacing to prevent overcrowding. Use scissors to snip excess plants at soil level rather than pulling, which can disturb roots. This also reduces competition for nutrients and encourages larger, more vibrant blooms. Harvest any spent flowers promptly to redirect energy into new growth.
Fertilize lightly every 4-6 weeks with a balanced, organic fertilizer to support blooming. Too much nitrogen will produce lush foliage but fewer flowers—stick to a 5-10-5 ratio to prioritize blooms. Watch for pests like aphids or slugs; address them early with neem oil or diatomaceous earth to protect both the plants and pollinators.
🌿 Step 5: Extend the Season with Succession Planting
For year-round blooms, stagger plantings every 2-3 weeks in early spring and late summer. This ensures a steady supply of fresh flowers and prevents gaps in your harvest. Choose varieties with different maturity rates—some may bloom in 60 days**, while others take 90 days—to create a continuous display.
As flowers fade, deadhead them regularly to encourage new blooms and maintain the plant’s energy. In cooler climates, protect tender varieties with a lightweight row cover in early fall or late spring to extend the season. With this approach, your edible flower garden will stay lively from early spring through frost.
Tips & tricks for perfect edible flower gardens
Transforming a single seed packet into a thriving edible garden takes more than just planting—here's what I've learned to ensure vibrant, continuous blooms.
Soil Preparation Secret: The 6-8 inch soil depth for root growth is non-negotiable, but here's the trick: mix in a handful of sand with your compost if you have heavy clay soil. This creates tiny air pockets that roots absolutely love—think of it as giving your flowers' roots room to breathe. I've seen germination rates double when using this simple amendment, especially for delicate varieties like nasturtiums.
Seed Placement Technique: When pressing seeds into soil in Step 2, use a small board or even the back of a spoon rather than your fingertips. This ensures consistent pressure across the entire seed bed. The goal is gentle contact—just enough to make them snug against the soil without burying them. I learned this after watching seeds wash away during my first rainstorm; that thin layer of mulch becomes your first line of defense.
Germination Timing: Those 7-21 days for germination can feel like an eternity, but here's what to watch for: tiny leaves unfurling from the soil surface (cotyledons) signal true germination. If you're in cooler climates, consider using a clear plastic dome or even a cut-open plastic bottle to create a mini greenhouse effect—this can shave off 3-5 days from the germination window without overheating your seeds.
Light Management: The 6+ hours of sunlight is your baseline, but here's the pro move: rotate your planting area weekly. I mark my garden stakes with a pencil to track which side faces which direction each week. This prevents that classic "leggy" growth where plants stretch toward the light. Darker green leaves with sturdy stems? You're doing it right. Pale, elongated plants? Time to adjust your rotation schedule.
Pro Tips for Edible Flower Seed Mix
- Transforming a single seed packet into a thriving edible garden takes more than just planting—here's what I've learned to ensure vibrant, continuous blooms.
- Soil Preparation Secret: The 6-8 inch soil depth for root growth is non-negotiable, but here's the trick: mix in a handful of sand with your compost if you have heavy clay soil.
- Seed Placement Technique: When pressing seeds into soil in Step 2, use a small board or even the back of a spoon rather than your fingertips.
Frequently asked questions
Can I grow edible flowers in containers or just in the ground?
Many edible flowers thrive in containers, making them perfect for balconies, patios, or small spaces. Choose pots with drainage holes (at least 6–8 inches deep) and use well-draining soil. Just ensure they get 5–6 hours of sunlight daily. Herbs like nasturtiums or borage are great container picks!
How long does it take for edible flower seeds to sprout and bloom?
Germination time varies by flower type, but most edible seeds sprout in 7–14 days with consistent moisture and warmth. Blooms typically appear in 6–12 weeks, depending on sunlight and care. Check your seed packet for specific varieties—some, like calendula, are faster than others!
What if my edible flowers attract pests like bees or aphids?
Bees are essential for pollination, so embrace them! To deter pests like aphids, spray flowers with neem oil or introduce beneficial insects like ladybugs. Avoid chemical pesticides—many edible flowers absorb residues. Rotate planting and keep the area weed-free to minimize issues.
Can I harvest edible flowers after rain or when they’re wet?
Harvest flowers in the morning after dew dries but before rain to avoid mold or bacteria. If they’re damp, gently pat them dry with a paper towel before using. Wet petals can also dilute flavors, so freshness is key for salads, garnishes, or teas.
What’s a good alternative if my edible flowers don’t grow well?
If your mix struggles, try hardier annuals like pansies, violas, or marigolds (edible and pest-resistant). For perennials, consider lavender, chamomile, or bee balm. Check your climate zone—some flowers (like nasturtiums) thrive in cooler weather, while others (like sunflowers) need heat.
Pro Tip:
Label your flowers! Many look alike, and some (like foxglove) are toxic. Stick with certified organic seeds to ensure safety for your kitchen.
Wrapping up and next steps
Transforming your garden—or even a sunny windowsill—into a vibrant, edible paradise has never been easier! With an edible flower seed mix, you’re not just growing beauty; you’re cultivating flavor, nutrition, and joy year-round.
Whether you’re a seasoned gardener or a curious beginner, these versatile blooms prove that sustainability and simplicity go hand in hand.
Ready to take the next step? Start small—plant a single packet this weekend, and watch your space (and your plate!) bloom with color and purpose. Happy growing! 🌸🌿