
Lawn
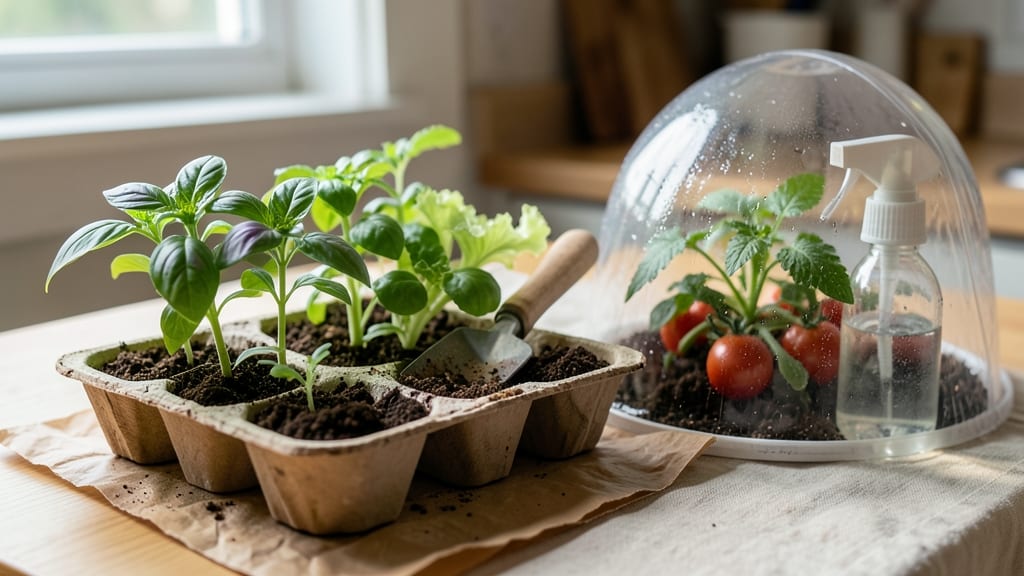
Creating a DIY seed starter tray turns empty containers into a thriving nursery for early spring sprouts—no fancy equipment needed. 🌱 I’ve started hundreds of seedlings this way, and the best part? You’re saving money while giving your plants the perfect head start before the last frost.
The magic is in the setup: take egg cartons, plastic clamshells, or even recycled takeout containers, and you’ve got a stackable system that fits on any sunny windowsill. Sterilize with a quick bleach rinse, fill with seed-starting mix, and plant your seeds just like the pros do.
By the time your neighbors are still buying transplants, you’ll already be harvesting your own. What you’ll end up with is sturdy, well-spaced seedlings ready to transplant without shock—no more leggy, weak plants that flop in the garden.
The trays break down easily, so you can pop them right into the soil when it’s time, roots and all. Plus, you’ll cut your gardening budget by half compared to store-bought starter kits.
This method works for everything from tiny herbs to towering tomatoes, and it’s perfect for small spaces or busy gardeners who want to get a jump on the growing season. Let’s turn trash into treasure—and your garden into a powerhouse!
📚 In This Guide
- What you need
- Instructions
- Tips and common mistakes
- Wrapping up and next steps
What you need
- ● Base Material: 1–2 sheets of 1/4-inch thick plywood (or corrugated cardboard for a budget-friendly option) – 24" x 36" or larger, depending on your tray size.
- ○ Optional: Bamboo slats or reclaimed wood for a rustic look.
- ● Fasteners: Wooden dowels (1/4" diameter, 12–18" long) – 4–6 per tray for stacking.
- ● Wood screws (1.5"–2") – 20–30 screws (or nails if using wood).
- ● Cutting Tools: Hand saw, jigsaw, or circular saw (for precise cuts).
- ● Sandpaper (120-grit) to smooth edges.
- ● Drilling Tools: Drill with 1/4" bit (for dowel holes).
- ○ Pilot bit (optional, for cleaner screw holes).
- ○ Finishing Touches: Non-toxic wood stain or paint (optional, for durability).
- ● Clear sealant (if using outdoor-grade wood).
- ● Seedling trays or biodegradable pots (to fit inside your DIY tray).
- ● Humidity dome covers (clear plastic wrap or store-bought lids).
- ● Small grow lights or a sunny windowsill (for extra warmth).
- ● Labeling tags (to track seed varieties).
Step-by-Step instructions for building DIY seed starter trays
Here's how to create a stackable nursery that'll give your early spring seedlings the perfect head start!
🪴 Step 1: Gather and Prep Materials
Start with four 10x20-inch plastic plant trays—the kind used for seedling flats. Clean them thoroughly with warm, soapy water to remove any residue, then rinse and dry completely. You'll also need 12-16 2-inch deep plastic pots (biodegradable ones work best) and a utility knife or box cutter for cutting.
Measure and mark the bottom of one tray at 2-inch intervals along the length, leaving a 1-inch border from the edges. This creates a grid for your pots. I like to use a pencil to make light, visible lines—just enough to guide the cuts without damaging the plastic.
✂️ Step 2: Cut and Remove Tray Sections
Carefully cut along your marked lines using the utility knife. Press firmly but steadily—don't rush, or you'll crack the plastic. After cutting, gently remove each section, leaving the 1-inch border intact. This border acts as a frame to hold your pots in place while allowing easy access to all sides.
Repeat this process for the remaining three trays. Now you have four identical bases with 12-16 slots each, ready to hold your pots. Stack them together to visualize how they'll nest—this is your future seedling nursery!
🌱 Step 3: Assemble the Stackable Trays
Place the first tray on a flat surface. Insert your 2-inch pots into the slots, pressing them gently but firmly until they sit snugly. The border should keep them from shifting. For extra stability, I like to add a thin layer of adhesive (like a hot glue gun) to the bottom corners of each pot—just a tiny dab to hold them in place without sealing the drainage holes.
Stack the remaining three trays on top, aligning the slots perfectly. The pots should nestle into the slots of each tray above, creating a compact, stackable unit. This design saves space while maximizing your growing area—ideal for small apartments or crowded windowsills!
💧 Step 4: Fill and Prepare for Planting
Fill each pot with seed-starting mix until it reaches just below the rim—about 1.5 inches deep. Press the soil down lightly with your fingers to remove air pockets, then water gently until the mix is evenly moist but not soggy. You'll know it's right when water runs through the drainage holes without pooling.
Place the assembled trays under grow lights or in a sunny window (south-facing gets the most light). Keep the soil consistently moist by misting lightly every 2-3 days—just enough to maintain that damp-but-not-wet feel. This setup gives you four trays of seedlings, ready for transplanting in just a few weeks!
☀️ Step 5: Maintain and Transplant
Watch for first true leaves—those are your signal that germination is complete! Once seedlings have 3-4 sets of leaves, it's time to transplant. Remove the pots from the trays carefully, then place them directly into the garden or larger containers. The biodegradable pots will break down naturally, so roots won't get disturbed.
Here's the thing—I always keep one tray empty as a backup for slow starters. If a seed doesn't sprout within 10-14 days, I'll replant that slot. This way, I maximize every inch of my starter space without wasting materials!
Tips & tricks for perfect DIY seed starter trays
Here's what nobody tells you about building these space-saving seedling nurseries—game-changers that'll make your early spring planting foolproof!
Precision Cutting Tip: When marking your 2-inch intervals in Step 1, use a ruler with a metal edge for crisp, straight lines. I've learned the hard way that pencil-only marks can smudge when cutting—press firmly but don't press too hard, or you'll create grooves that make the plastic crack. A metal ruler gives you clean, visible guides that won't fade during cutting.
Adhesive Stability Hack: For that optional adhesive in Step 3, I recommend using a hot glue gun set to medium heat rather than super glue. Hot glue creates a flexible bond that won't crack when you remove pots later, while still providing enough grip to prevent shifting. Apply just a tiny dot to each corner—you only need enough to hold the pots snugly during watering.
Soil Moisture Secret: In Step 4, the key to that "evenly moist but not soggy" texture is actually feeling the soil between your fingers. After watering, squeeze a small handful—it should hold together when pressed but not leave wet marks on your skin. This prevents both under-watering (which causes leggy seedlings) and over-watering (which leads to mold). I test this every 2-3 days when misting.
Transplanting Timing: The 3-4 sets of leaves rule in Step 5 is perfect, but here's what nobody mentions: those leaves should be about the size of your pinky fingernail. Smaller leaves mean the seedling isn't ready for transplant shock, while larger ones indicate it's been in the pot too long. Also, harden off seedlings by moving the trays outside for 2 hours daily for 3-4 days before final transplant.
Pro Tips for Diy Seed Starter Tray
- Here's what nobody tells you about building these space-saving seedling nurseries—game-changers that'll make your ear...
- Precision Cutting Tip: When marking your 2-inch intervals in Step 1, use a ruler with a metal edge for crisp, straigh...
- Adhesive Stability Hack: For that optional adhesive in Step 3, I recommend using a hot glue gun set to medium heat ra...
Frequently asked questions
about DIY seed starter trays—because every gardener deserves a little clarity before diving in!Can I reuse seed starter trays for multiple growing seasons?
With proper cleaning, your DIY trays can last for years. After harvesting, scrub them with warm, soapy water to remove soil and debris. Disinfect with a 1:10 bleach-water solution (let dry completely) to prevent mold or disease. Store in a dry place until next season—just avoid stacking heavy items on them.
How long should seeds stay in the starter tray before transplanting?
Timing depends on the plant! Most seedlings (like herbs or lettuce) are ready in 3–4 weeks, while larger plants (tomatoes, peppers) may need 6–8 weeks. Check for 2–4 true leaves and sturdy stems before transplanting. Harden off seedlings by exposing them to outdoor conditions for a week to boost survival rates.
What’s a budget-friendly alternative if I don’t have egg cartons?
No problem! Try these zero-cost options:
- Toilet paper rolls (cut into 2-inch sections)
- Plastic containers (yogurt cups, milk cartons—poke drainage holes!)
- Muffin tins (line with coffee filters for drainage)
- Newspaper pots (roll damp newspaper into tubes and tie with twine)
Why are my seedlings leggy or stretching toward the light?
Leggy seedlings are a cry for help! This happens when they’re not getting enough light (even indoors). Move trays to a south-facing window or use a grow light 2–3 inches above them for 12–16 hours daily. Avoid overcrowding—thin seedlings if they’re competing for space. A little less water can also encourage stronger stems!
Do I need to fertilize seeds in starter trays?
Not right away! Start with a light, seed-starting mix (sterile and fluffy). Wait until seedlings sprout their first true leaves before adding a diluted liquid fertilizer (half-strength). Over-fertilizing can burn tender roots. A balanced 10-10-10 or organic option like fish emulsion works well—just follow package instructions!
Wrapping up and next steps
Creating your own DIY seed starter tray is a rewarding way to jumpstart your gardening season—no fancy tools or expensive kits required! With just a few household materials, you’ll have a stackable nursery that gives your seedlings the perfect head start.
Whether you’re a beginner or a seasoned green thumb, this project is a fun, budget-friendly way to nurture strong, healthy plants from day one.
Now that you’re ready to roll up your sleeves, why not start planting today? Grab your tray, fill it with soil, and watch your garden dreams take root—literally! 🌱✨