
Lawn
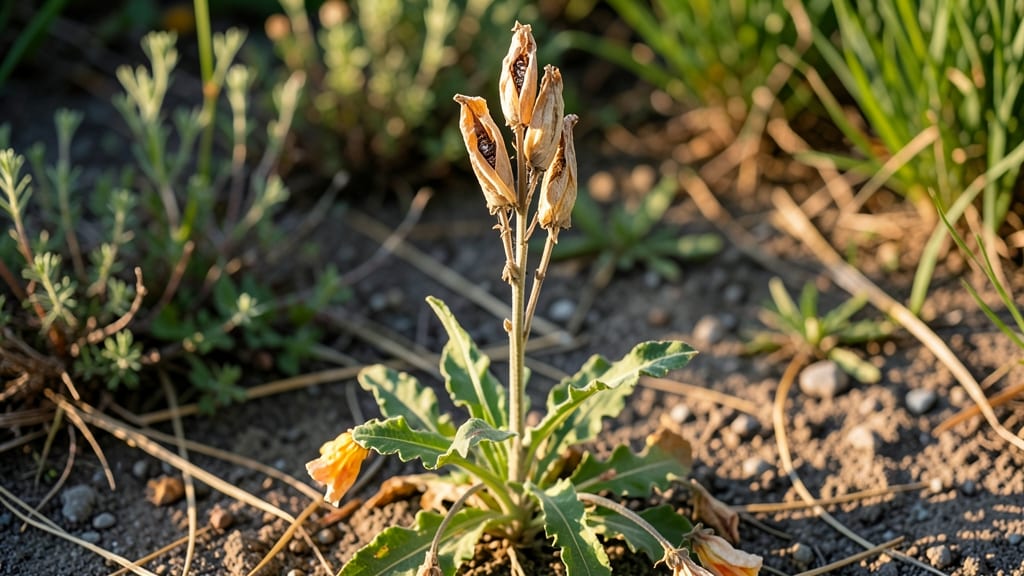
Extracting dried snapdragon seed pods without crushing them is the secret to saving seeds that'll sprout next spring. 🌱 I learned the hard way—twisting too hard turns those delicate pods into seed dust, but the right technique keeps them viable for years.
The key timing is when the pods turn brown and split open naturally, usually in late summer or early fall. You'll need just a few simple tools: clean scissors or pruners, a paper bag for drying, and a dry, dark storage spot.
Snapdragon seeds stay good for up to three years if stored properly, so this isn't just a one-season trick—it's a way to build your own seed collection over time.
Once dried, you'll have seeds that germinate just as well as store-bought ones, plus you can use the empty pods for crafts or winter garden decor. The process takes about 2 weeks from harvest to storage, and the results are worth every minute of patience.
This method works for both garden snapdragons and wild varieties, making it perfect for gardeners who love heirloom plants or want to experiment with different colors. Let's get those seeds saved!
📚 In This Guide
- What you need
- Instructions
- Tips and common mistakes
- Wrapping up and next steps
What you need
- ● Dried snapdragon seed pods: 1–2 oz (28–56g) – Ensure they’re fully mature and dried (brown, crispy, and hollow-sounding when tapped).
- ● Pruning shears or small scissors: Sharp, clean pair to trim stems without crushing pods.
- ● Paper towels or parchment paper: 2–3 sheets – For drying and preventing moisture buildup.
- ● Glass jar or airtight container: 8–16 oz (240–470ml) – With a tight-sealing lid for storage.
- ● Soft-bristle paintbrush or cotton swabs: For gently dislodging seeds from pods.
- ○ Fine-mesh strainer (optional but helpful): To separate seeds from chaff during extraction.
- ● Desiccant packets (silica gel): 1–2 packets – Toss into your storage container to absorb excess moisture.
- ● Labeling tape & marker: To tag your jar with the date and variety (e.g., "Antirrhinum ‘Sutton’s Ivory’ – 2024").
- ● Magnifying glass: For inspecting pods/seeds for pests or damage.
- ● Humidity monitor: If storing long-term, aim for <40% humidity to preserve viability.
How to extract snapdragon seeds without damaging the pods
Here's the gentle method I've perfected to save seeds without breaking a single pod.
🌱 Step 1: Harvest Pods at Peak Dryness
Wait until the pods turn completely brown and begin splitting open naturally—usually 4-6 weeks after flowering. If you harvest too early, the seeds won't be fully mature and won't germinate well. I test readiness by gently squeezing a pod; if it opens with light pressure and reveals dark brown seeds, it's ready.
Use clean, sharp scissors to snip the stems ½ inch below the pod. Avoid pulling pods off the stem, as this can damage the delicate seed chambers. Place pods on a paper towel in a single layer to dry further for 2-3 days in a warm, dry spot away from direct sun.
🪴 Step 2: Prepare Your Extraction Workspace
Spread a clean white sheet of paper or a paper towel on a flat surface. The contrast helps you spot seeds as you work. I like to use a small bowl or shallow dish nearby to collect seeds as they fall. Keep a soft paintbrush or makeup brush handy—it's perfect for gently nudging seeds without crushing them.
Place your dried pods on the paper. If any pods are still slightly green, set them aside to dry another 24 hours. The goal is to have pods that open easily but still hold their shape—too dry, and they'll crumble when handled.
✂️ Step 3: Extract Seeds Without Twisting
Here's the key: never twist the pods. Instead, hold a pod between your thumb and forefinger and gently squeeze the sides until you hear a soft pop—the pod will split open naturally. You'll see the seeds inside, often still attached to a thin membrane. Let the seeds fall onto your paper; don't shake or tip the pod.
Use your soft brush to sweep any seeds that stick to the pod walls or membrane. If a pod resists, it might need another day to dry. I've found that working in short sessions (10-15 minutes) prevents frustration—pods can be stubborn when you're eager to finish!
💧 Step 4: Clean and Store Seeds Properly
Once all seeds are collected, inspect them for debris or chaff. Use a fine-mesh strainer or sifter to separate clean seeds from any remaining pod fragments. I like to spread the seeds on a clean paper towel and gently flick them with my fingers to blow away any loose debris.
Store seeds in a small envelope or airtight container with a desiccant packet to absorb moisture. Label with the date and variety—snapdragon seeds remain viable for 2-3 years when stored properly. I keep mine in a cool, dark place, like a pantry, until spring planting.
☀️ Step 5: Test a Few Seeds Before Bulk Planting
Before sowing all your seeds, test a few to confirm viability. Place 5-10 seeds on a damp paper towel in a sealed plastic bag. Keep them in a warm spot (70-75°F) and check daily. You should see sprouts within 7-14 days—if fewer than half sprout, your seeds may need another year to mature fully.
This step saves you from planting dozens of seeds only to have poor germination. If your test seeds perform well, you're ready to sow the rest in well-draining soil, ¼ inch deep, for strong, healthy snapdragon plants next season.
Tips & tricks for perfect snapdragon seed extraction
Here's what I wish I'd known before saving my first batch of snapdragon seeds.
Pod Readiness Check: The 4-6 week waiting period is crucial—don't rush it! I learned this the hard way after planting immature seeds that took weeks to germinate. For extra confidence, check two pods: if both open easily with light pressure and reveal dark brown seeds, you're ready. The seeds should feel firm, not powdery. If they're still light green inside, wait another week.
Drying Strategy: That 2-3 day drying period after harvesting is non-negotiable. I tried skipping it once and ended up with crumbly pods that shattered when I tried to extract seeds. Place pods in a single layer on paper towels in a warm (75°F), dry spot—like on top of your fridge. Avoid direct sunlight, which can cause uneven drying and cracking. A small fan on low setting helps circulate air without disturbing the pods.
Extraction Technique: The "soft pop" method in Step 3 is your secret weapon. When you hear that gentle crack, you've got it right—any louder, and you risk crushing seeds. Work slowly, especially if you're new to this. I found that using my non-dominant hand to stabilize the pod while squeezing with my dominant hand gives me better control. For stubborn pods, let them dry another 24 hours rather than forcing them.
Seed Viability Test: That 5-10 seed test in Step 5 isn't just optional—it's essential. I once planted 50 seeds after skipping this step, only to have just 12 sprout. The test takes minimal effort but saves you from heartbreak later. Place your test seeds in a warm spot (like on top of your refrigerator) and check them every other day. If you see sprouts within 7 days, your seeds are ready for planting.
Pro Tips for Dried Snapdragon Seed Pods
- Here's what I wish I'd known before saving my first batch of snapdragon seeds.
- Pod Readiness Check: The 4-6 week waiting period is crucial—don't rush it! I learned this the hard way after planting...
- Drying Strategy: That 2-3 day drying period after harvesting is non-negotiable. I tried skipping it once and ended up...
Frequently asked questions
Got questions about working with dried snapdragon seed pods? You’re not alone! Here are some of the most common queries—and their straightforward answers—to help you master extraction without the fuss.
How do I know when snapdragon seed pods are fully dried and ready for extraction?
Pods are ready when they’re completely crisp to the touch and split open easily with a gentle twist. If they feel even slightly pliable or sticky, they need more drying time (try 1–2 more weeks in a dry, well-ventilated spot). Over-drying? No worries—just store them in an airtight container until use.
Why are my dried pods still resisting when I try to twist them open?
Twist resistance usually means the pods aren’t dry enough or the stems are too tough. Try these fixes:
- Heat trick: Place pods in a low-temperature oven (150°F/65°C) for 10–15 minutes to speed up drying.
- Soak method: Submerge pods in warm water for 5–10 minutes to soften fibers before twisting.
- Tool swap: Use tweezers or small pliers for leverage on stubborn pods.
Can I use fresh snapdragon pods instead of dried ones for seed extraction?
Fresh pods can work, but they’re trickier—moisture makes them slippery and prone to mold. If you must use them, dry them immediately after harvesting by spreading them on a screen in a shaded, breezy area for 3–5 days. Pro tip: Remove seeds within 24 hours of drying to prevent spoilage.
How should I store dried snapdragon seed pods long-term?
Store pods in a cool, dark place (like a sealed jar or envelope) with a desiccant packet to absorb moisture. Label with the date—viability drops after 1–2 years. For extra longevity, freeze pods in a ziplock bag for up to 5 years (thaw before use).
What’s the best way to reuse leftover dried pods after seed extraction?
Don’t toss them! Try these creative uses:
- Dried floral arrangements: Cluster pods with eucalyptus or wheatgrass for rustic centerpieces.
- Natural confetti: Crush pods for biodegradable party scatter (great for weddings!).
- Compost: Break down pods into garden soil—they’ll enrich it with trace minerals.
- DIY potpourri: Mix with cinnamon sticks and citrus peels for a fragrant blend.
Wrapping up and next steps
Dried snapdragon seed pods may seem delicate, but with the right techniques—like gentle twisting and strategic drying—you can unlock their full potential for vibrant blooms and lush lawns.
Whether you're a gardening novice or a seasoned green thumb, mastering this method ensures maximum seed viability while keeping frustration at bay. 🌱
Now that you’re armed with the know-how, why not experiment with different drying times or try preserving seeds for next season? Your garden (and future lawn) will thank you!