
Propagation
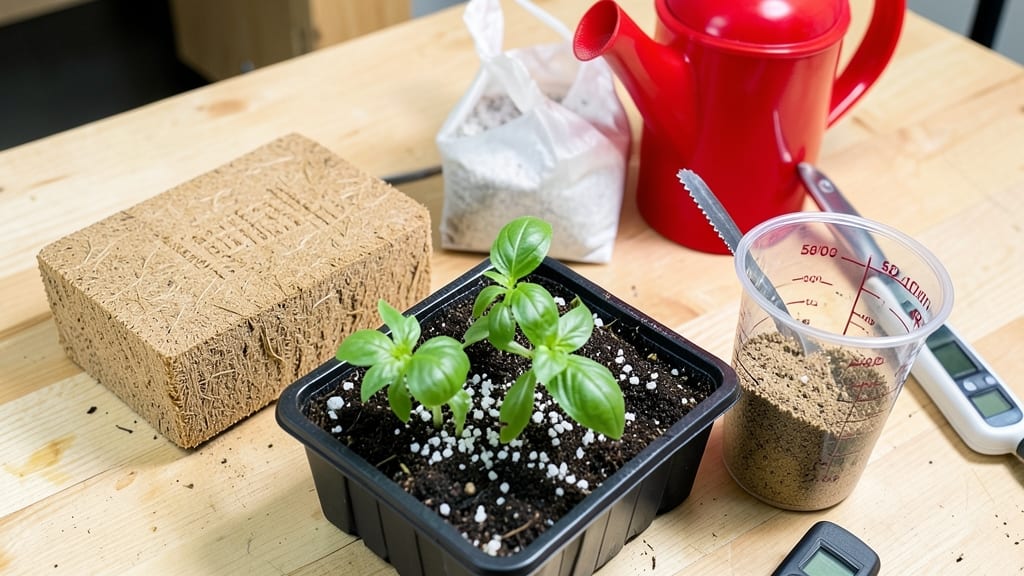
My DIY seed-starting mix with coco coir transformed my seedling failures into thriving babies—no more leggy, weak sprouts that collapse at the first touch. 🌱 The secret lies in that perfect balance of moisture retention and aeration, where roots spread like wildfire instead of circling in compacted soil.
After my third batch of seeds flopped in store-bought mix, I finally cracked the formula that works every time.
You only need three simple ingredients—coco coir, perlite, and a pinch of worm castings—to create a fluffy mix that holds moisture without drowning roots. The coco coir alone costs pennies compared to pre-mixed blends, and it stays sterile longer, cutting down on damping-off risks.
Plus, it’s lightweight enough to handle without back strain, making it perfect for small spaces or high-volume starting.
By week three, your seedlings will be stocky, dark-green powerhouses with roots reaching every corner of their tiny pots. The mix works for everything from delicate lettuce to stubborn okra, and you can reuse it for months if stored properly.
No more struggling with soggy, compacted soil—just consistent, reliable germination that actually grows.
Whether you're filling trays for a spring garden or winter sowing, this mix adapts to any seed type. The key is keeping it slightly moist but never soggy, and you'll see the difference in just days. Let's get those seeds sprouting right!
📚 In This Guide
- What you need
- Instructions
- Tips and common mistakes
- Wrapping up and next steps
What you need
- ● Coco coir (bricks or chips) – 1 block (approx. 1 cubic foot) or 4-5 cups of pre-expanded chips (hydrated). Pro tip: Look for 100% coco coir (no peat or additives) for the best results! 💡
- ● Perlite or vermiculite – 1 part (for aeration and moisture retention). Vermiculite holds water better; perlite adds extra airiness.
- ○ Worm castings or compost – ½ part (for gentle, nutrient-rich food). Optional: Add 1 tbsp of fish emulsion or seaweed extract for a nutrient boost! ✨
- ○ Lime (optional but recommended) – 1 tsp per gallon of mix (balances pH, especially if your coco coir is acidic).
- ● Large mixing bowl or 5-gallon bucket (for blending)
- ● Measuring cups or scale (for precision)
- ● Spray bottle (to mist coco coir before use)
- ● Gloves (coco coir can be dusty!)
- ● Seed trays, pots, or DIY containers (yogurt cups, egg cartons)
- ○ Optional: pH meter (to test mix acidity, ideal range: 5.8–6.5)
Step-by-step instructions for crafting a lightweight seed starting mix
Here's how I blend coco coir for a fluffy, sterile mix that gives seedlings the perfect head start.
🌱 Step 1: Measure and Hydrate the Coco Coir
Start by fluffing the 4 cups of coco coir in a large container—it should expand to about 8 cups when fully hydrated. Pour 4 cups of warm water (around 100°F) over the coir and let it soak for 10-15 minutes. You'll see it transform from compressed bricks into a light, airy texture. Gently squeeze excess water through your hands until it feels like a damp sponge—not dripping, but thoroughly moistened. This hydration step is critical; under-soaked coir won't hold moisture properly, while over-soaked mix will suffocate roots.
I like to work in a shallow tray to avoid spills. If you're using a hydrated coco coir brick, break it apart with your fingers rather than cutting—this preserves the natural fiber structure. The goal is a mix that holds moisture but drains freely, preventing both drought stress and root rot.
🌿 Step 2: Add Perlite for Aeration and Drainage
Sift in 1 cup of perlite while the coir is still damp. Perlite's tiny air pockets prevent compaction, which is deadly for delicate seedling roots. Mix thoroughly with your hands until the perlite is evenly distributed—you should see flecks throughout the coir, not clumps. This ratio (4:1 coir to perlite) gives you the ideal balance of moisture retention and airflow.
Here's the thing—don't skip this step. Pure coco coir can become too dense as it settles, cutting off oxygen to roots. The perlite keeps the mix light enough for young roots to explore freely. You'll notice the texture becomes almost fluffy, like a cross between soil and packing peanuts.
💧 Step 3: Incorporate Worm Castings for Nutrients
Stir in 1 cup of worm castings to provide gentle, balanced nutrition. These castings contain beneficial microbes that boost seedling immunity and improve nutrient uptake. Mix them in thoroughly—you want an even distribution, not pockets of concentrated fertilizer. The castings will darken the mix slightly and give it a rich, earthy scent (which means it's active and beneficial).
Real talk: I've tried synthetic fertilizers in seed mixes, but they often burn tender seedlings. Worm castings release nutrients gradually, matching the slow growth rate of young plants. If you're starting heat-loving crops like peppers or tomatoes, add a pinch of calcium (like crushed eggshells) to prevent blossom-end rot later.
✂️ Step 4: Adjust Moisture and Test the Mix
Grab a handful of the finished mix and squeeze gently. It should hold together when compressed but crumble easily when released—like a damp sponge. If it feels too dry, mist with warm water until evenly moist. If it's too wet, spread it on a tray and let it air-dry slightly. The right moisture level means water runs through cleanly but the surface stays damp, not soggy.
Fill a small container with the mix and press down lightly. When you poke your finger in, it should spring back slowly—not collapse or ooze water. This test ensures your seedlings won't drown during germination. Store any extra mix in an airtight container until use, but don't reuse it beyond 4-6 weeks—it loses sterility over time.
☀️ Step 5: Use Immediately for Germination
Fill your seed-starting trays or pots with the mix, leaving ½ inch below the rim for watering. Press gently to settle, then sow seeds at the correct depth (usually 2-3 times the seed's diameter). Water lightly from below using a spray bottle to avoid displacing seeds. Place trays in a warm spot (70-75°F) and cover with plastic wrap or a humidity dome until germination.
You'll see the difference immediately—seeds sprout faster in this airy mix because roots can spread without resistance. Within 5-7 days, you'll watch those first true leaves unfurl, proof that your mix is working. Unlike dense commercial mixes, this blend lets roots explore freely, preventing the "damping-off" that wipes out seedlings overnight.
Tips & tricks for perfect DIY seed starting mix
Let me share the insights I've gathered after years of experimenting with seedling mixes—these will help you avoid the common pitfalls that turn promising starts into frustrating failures.
Hydration Precision: The 10-15 minute soak time for your 4 cups of coco coir is non-negotiable. I learned this the hard way after watching seedlings wilt from either dry coir that couldn't hold moisture or soggy bricks that suffocated roots. Use a kitchen scale to verify your warm water (100°F) is actually at temperature—cold water shocks the coir fibers and creates uneven hydration. The mix should feel like a wrung-out sponge, not a dripping mess or a dry powder. This balance is what lets those delicate roots breathe while staying hydrated.
Perlite Distribution Technique: When mixing in that 1 cup of perlite in Step 2, think of it like adding chocolate chips to cookie dough—you want even distribution, not clumps. I use a fine-mesh sieve to sift it directly over the damp coir while gently stirring with my fingers. This prevents the perlite from sinking to the bottom where it won't help with aeration. The goal is visible speckles throughout, not just concentrated in certain areas. This 4:1 ratio isn't just a number—it's what prevents that dreaded compaction that turns your fluffy mix into dense soil overnight.
Nutrient Balance Check: That 1 cup of worm castings might seem like a small amount, but it's carefully calculated to provide just the right boost without overwhelming tender seedlings. Here's what I do: I divide the castings into four portions and sprinkle them evenly across the mix while turning. This creates that rich, earthy scent that signals active microbes at work. For heat-loving plants, I add a pinch of crushed eggshells directly to the mix during this step—just enough to cover the surface lightly. The calcium prevents blossom-end rot later, but don't overdo it or you'll create nutrient imbalances.
Moisture Test Visual: The squeeze test in Step 4 is your quality control moment. When you compress a handful, it should hold together like a damp washcloth—if it crumbles immediately, add more water; if it stays in a clump when released, it's too wet. I've found that holding the mix up to the light helps too—you should see even moisture distribution without dark, waterlogged spots. This test becomes second nature after a few batches, and it's what separates thriving seedlings from those that develop damping-off overnight.
Pro Tips for Diy Seed Starting Mix With Coco Coir
- Let me share the insights I've gathered after years of experimenting with seedling mixes—these will help you avoid the common pitfalls that turn promising starts into frustrating failures.
- Hydration Precision: The 10-15 minute soak time for your 4 cups of coco coir is non-negotiable.
- Perlite Distribution Technique: When mixing in that 1 cup of perlite in Step 2, think of it like adding chocolate chips to cookie dough—you want even distribution, not clumps.
Frequently asked questions
Got questions about whipping up your DIY seed-starting mix with coco coir? You’re not alone! Here are answers to the most common queries—so you can dive in with confidence and watch those seeds explode into life.
What’s the best ratio of coco coir to perlite/vermiculite for seed starting?
A 1:1 ratio of coco coir to perlite or vermiculite is ideal for most seeds—it balances moisture retention and aeration. For delicate seeds (like lettuce or herbs), lean slightly toward 60% coco coir and 40% perlite to keep them snug but not soggy.
Can I use regular potting soil instead of coco coir?
While you can, it’s not recommended! Regular potting soil is too dense and can suffocate seeds. Coco coir’s lightweight, sterile nature promotes faster germination and root growth. Think of it like swapping a heavy winter coat for a breathable spring jacket—your seeds will thank you!
How long does a DIY coco coir mix last before it degrades?
Your mix stays fresh for 6–12 months if stored in a cool, dry place (like a sealed bucket or bag). Over time, coco coir breaks down, but you can revive it by fluffing and adding a bit of perlite or worm castings to refresh it. Just avoid using it if it smells musty or clumps like concrete!
What if my seeds aren’t germinating in the coco coir mix?
Try these fixes:
- Check moisture: Keep the mix damp (like a wrung-out sponge) but not waterlogged.
- Warmth matters: Most seeds need 70–85°F to sprout—use a heat mat if your home is chilly.
- Light exposure: Place trays near a bright window or under grow lights 12–16 hours/day.
- Seed viability: Test old seeds by soaking them in water—if they sink, they’re likely still good!
Do I need to add fertilizer to the mix?
Not right away! Seed-starting mixes are designed to be sterile and nutrient-light to prevent overgrowth. Wait until seedlings have 2–3 true leaves before introducing a diluted liquid fertilizer (like fish emulsion or seaweed extract) or a slow-release granular option.
Wrapping up and next steps
Creating your own DIY seed starting mix with coco coir is a game-changer—it’s lightweight, nutrient-rich, and perfect for jumpstarting your seedlings! 🌱 With just a few simple ingredients, you’ve got a fluffy, well-draining medium that encourages strong root growth and healthy sprouts. Plus, it’s budget-friendly and eco-conscious!
Now that you’re ready to mix, grab those seeds and get planting! Once your seedlings are thriving, consider transitioning them to larger pots or your garden bed. Happy growing—your green thumb is about to level up! 🌿✨