
Lawn
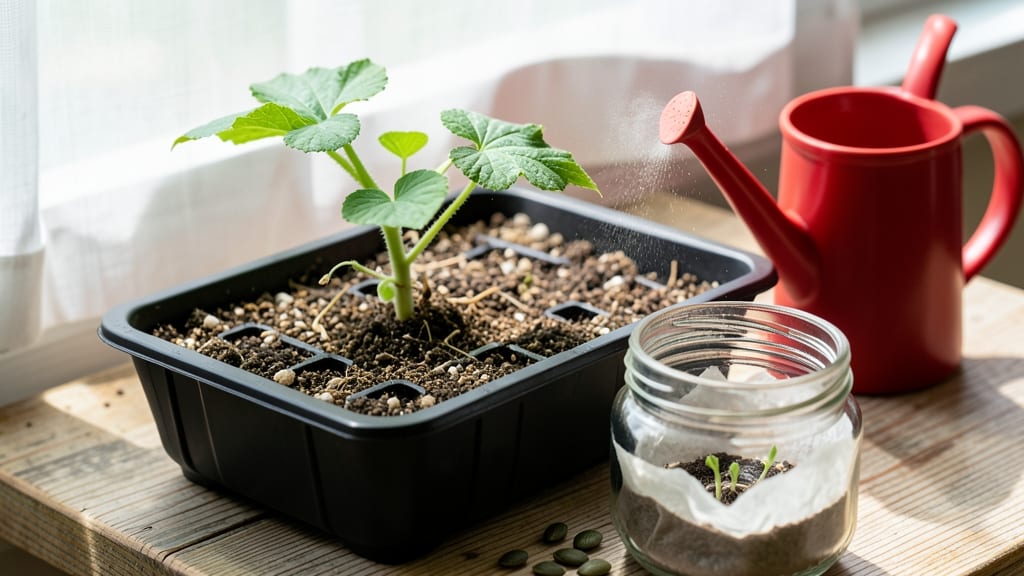
Cucumber seed sprouts appear in 7 days when you nail the right warmth, moisture, and darkness. 🌱 I’ve watched trays of seeds go from dry husks to tiny green hooks in less than a week—no fancy tricks, just consistent conditions.
The key? A cozy, humid environment that mimics spring soil without waiting for it.
Start with a seed-starting mix that’s damp but not soggy—think of it as a sponge that wrings out clean. A clear plastic dome or ziplock bag creates the humidity your seeds crave, while a heat mat keeps the soil at 80°F until sprouts break through.
No stratification needed—cucumbers are eager germinators when given the right push.
By day 5, you’ll spot the first tiny green hooks poking through the soil. Keep them under grow lights (12–14 hours daily) once they stretch, and avoid overwatering—their roots are delicate. Within a week, you’ll have sturdy seedlings ready to harden off or transplant.
This method works for both bush and vining varieties, whether you’re growing in trays, egg cartons, or recycled containers. The secret? Stay consistent with warmth and moisture, and you’ll outpace store-bought starts every time.
📚 In This Guide
- What you need
- Instructions
- Tips and common mistakes
- Wrapping up and next steps
What you need
- ● Cucumber seeds: 10–20 organic, non-GMO seeds (choose heirloom varieties like Lemon Cucumber or Straight Eight for best results).
- ● Growing medium: Option 1: Paper towels (2–3 sheets, unbleached and seed-free).
- ● Option 2: Coconut coir or peat moss (1 small pack, 50–100 mL).
- ● Option 3: Vermiculite or perlite (1 cup, for drainage).
- ● Spray bottle: 8–16 oz, with a fine mist nozzle (for gentle hydration).
- ● Plastic bag or clear lid: A zip-top bag or small container with a lid (to create humidity).
- ● Small container: A shallow tray, egg carton, or even a muffin tin (for organizing seeds).
- ● Water: Room-temperature, filtered or distilled (avoid tap water with chlorine).
- ● Labeling tags: Toed labels or a marker (to track seed varieties).
- ○ Heating mat (optional): A seedling heat mat (set to 70–75°F) for faster germination.
- ○ Grow lights (optional): LED or fluorescent lights (if sprouting indoors without sunlight).
- ○ Humidity dome (optional): A clear plastic dome or DIY version (e.g., cut plastic bottle).
- ○ Fertilizer (optional): A mild seaweed or fish emulsion spray (once sprouts emerge).
Step-by-step instructions for germinating cucumber seeds in 7 days
Here's how to coax those little cucumber seeds to sprout in record time—no fancy tricks, just smart prep.
🌱 Step 1: Soak Seeds Overnight for Faster Sprouting
Place your cucumber seeds in a small bowl and cover them with warm water (around 80°F) for 12 hours. This softens the seed coat and speeds up germination. I like to use a mesh bag or folded paper towel to keep them contained while soaking.
After soaking, drain the water completely—you don't want seeds sitting in moisture longer than necessary. The seeds will look plump and slightly swollen when ready. This step cuts germination time in half, so don't skip it. If you forget, just plant dry seeds, but expect a 2-3 day delay.
🪴 Step 2: Prepare Containers and Warm Germination Mix
Fill small seed-starting trays or individual pots with a light, fluffy seed-starting mix. Cucumbers hate compacted soil, so avoid garden soil or heavy potting mixes. Press the soil down gently—just enough to create a firm surface without packing it tight.
Moisten the mix until it feels like a damp sponge (not dripping). The goal is even moisture without waterlogging. I like to use a spray bottle for this step to avoid disturbing the soil. Keep the trays in a warm spot—75-85°F is ideal—until you're ready to plant the soaked seeds.
💧 Step 3: Plant Seeds at the Right Depth and Cover Warmly
Plant the soaked seeds ½ inch deep—about the width of your pinky finger. Cucumbers need light to germinate, so planting too deep slows them down. Place 2-3 seeds per cell (you'll thin later) and cover lightly with additional mix. Press gently to ensure good soil-to-seed contact.
Cover the entire tray with a clear plastic dome or plastic wrap to trap warmth and humidity. This creates a mini greenhouse effect that cucumbers love. Place the tray in a warm, dark spot (like a closet or under a heat mat) for 3-5 days. Check daily for condensation—if it's heavy, remove the cover for 10 minutes to prevent mold.
☀️ Step 4: Move to Light and Thin Seedlings
Once you see green sprouts breaking through (usually 3-5 days after planting), remove the cover and move the tray to a bright spot with 12+ hours of indirect light daily. Avoid direct sun at first—it can scorch tender seedlings. You'll know they're ready for more light when the first true leaves (not the initial seed leaves) appear.
Thin seedlings to the strongest one per cell when they reach 1 inch tall. Use scissors to snip the weaker stems at soil level—this prevents disturbing the roots of the remaining plant. Water gently from the bottom to avoid washing away soil around the roots.
⏰ Step 5: Maintain Warmth and Moisture for Strong Starts
Keep the soil consistently moist but not soggy—cucumber seedlings wilt fast if they dry out. Water when the top ½ inch feels dry, and avoid wetting the leaves to prevent disease. A humidity tray (pebble tray with water) helps maintain even moisture without overwatering.
Within 7 days, you should have sturdy seedlings with 2-3 true leaves. If germination slows, check the soil temperature—it should stay above 70°F. Once seedlings are this strong, they're ready for transplanting or larger containers. Harden off for 5-7 days before moving outdoors.
Tips & tricks for perfect cucumber seed sprouts
Real talk: Cucumber seeds can be stubborn little things, but these tricks will help you beat the odds and get those sprouts popping in record time.
Soaking Secret: That 12-hour soak in 80°F water is non-negotiable for speedy germination. I like to use a mesh bag because it keeps seeds contained while allowing water to circulate freely—no more seeds floating away! After draining, give them a quick rinse to remove any water residue that could cause mold later. The seeds should feel plump and look slightly swollen when ready for planting.
Temperature Matters: Maintaining that 75-85°F range is crucial during germination. If your home runs cooler, place the trays on top of your fridge or near a sunny window during the day. I've even used a seedling heat mat for stubborn batches—just don't let the soil exceed 85°F or you'll cook the seeds instead of helping them sprout.
Light Management: When those first green sprouts appear after 3-5 days, resist the urge to rush them into direct sunlight. Start with bright, indirect light for the first day or two—this prevents sunburn on delicate seedlings. I like to place my trays near an east-facing window where they get morning sun but gentle afternoon light.
Thinning Technique: When thinning to the strongest seedling at 1 inch tall, use clean scissors to snip at soil level rather than pulling. This prevents disturbing the roots of your winner. I like to work on a cloudy day or in the evening when seedlings are less stressed from light exposure. The removed seedlings can actually be replanted in another tray if you're feeling generous!
Pro Tips for Cucumber Seed Sprouts
- Real talk: Cucumber seeds can be stubborn little things, but these tricks will help you beat the odds and get those sprouts popping in record time.
- Soaking Secret: That 12-hour soak in 80°F water is non-negotiable for speedy germination.
- Temperature Matters: Maintaining that 75-85°F range is crucial during germination.
Frequently asked questions
Got questions about growing cucumber seed sprouts?
You’re not alone! Here are some of the most common queries—and their quick, no-nonsense answers—to help you get those tiny seeds sprouting in no time.
How long does it really take for cucumber seeds to sprout?
With the right conditions (warmth, moisture, and indirect light), cucumber seeds typically sprout in 3–7 days. If you’re using fresh, high-quality seeds and keeping them in a cozy, humid environment (like a seedling tray with a plastic dome), you’ll often see those first green shoots within 4–5 days.
What if my cucumber seeds aren’t sprouting after a week?
Don’t panic—just troubleshoot! First, check if your seeds are still viable by soaking a few in warm water for 24 hours. If they float, they’re likely dead. Next, ensure your soil is warm (70–90°F), consistently moist (not soggy), and well-draining. If all else fails, try a fresh batch of seeds or a different germination method, like paper towels.
Do cucumber seeds need cold stratification like some other plants?
Nope! Unlike some cool-weather crops (like peas or lettuce), cucumber seeds do NOT require cold stratification. In fact, they germinate best in warm soil. If you’re starting them indoors, a heat mat or sunny windowsill will speed things up. For outdoor planting, wait until the soil is at least 60°F to avoid slow or failed germination.
Can I grow cucumber sprouts in just water, like microgreens?
While cucumber seeds can technically sprout in water (great for quick germination tests!), they won’t develop into healthy seedlings without soil. For long-term growth, transfer sprouted seeds to a light, well-draining potting mix within 2–3 days. If you’re craving water-grown greens, try cucumber microgreens instead—they’re a delicious, nutrient-packed alternative!
What’s the best way to transplant cucumber sprouts without shocking them?
Hardening off your sprouts is key! Start by placing them in a shady, sheltered spot (like a porch or garage) for 1–2 hours a day, gradually increasing exposure over 5–7 days. Keep the soil moist and avoid transplanting on windy or hot days. Once they’re acclimated, pop them into the ground or larger pots—root disturbance is less traumatic when they’re toughened up!
Still stumped? Drop your question in the comments—we’re happy to help your cucumber seeds go from zero to hero!
Wrapping up and next steps
Growing cucumber seed sprouts in just 7 days—without stratification—is not only possible but also incredibly rewarding! Whether you're a seasoned gardener or a curious beginner, these fast-sprouting seeds open the door to a bountiful harvest of crisp, homegrown cucumbers.
With the right materials and a little patience, you’ll be well on your way to a thriving garden.
Ready to take the next step? Start with a small batch of seeds, experiment with your setup, and soon you’ll be enjoying fresh, homegrown cucumbers straight from your own sprouts! 🌱💚