
Propagation
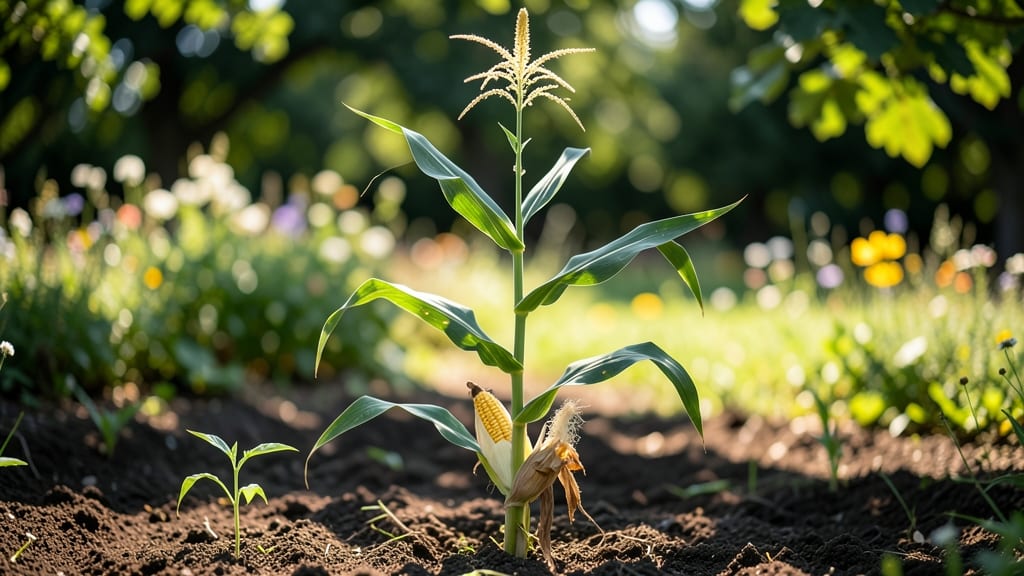
Growing corn from seed to harvest is the ultimate summer project—100 days of watching golden stalks rise from the earth, ending with ears so sweet they taste like childhood. 🌽 I’ve turned my backyard into a mini silo every July, and the secret isn’t fancy tools—it’s timing, spacing, and a little patience.
The first green shoots break through the soil in just 7-10 days, and by midsummer, you’ll be snapping fresh ears straight from the stalk.
You’ll need 3-4 inches of loose, well-drained soil, seeds planted 1-1.5 inches deep, and rows spaced 3 feet apart to give those stalks room to grow tall. Watering is key—1 inch per week keeps roots happy, but soggy soil invites disease.
The real magic happens when you thin seedlings to 10-12 inches apart; that’s when the plants start racing toward the sky, and you know harvest is coming.
By late summer, you’ll be testing ears with the classic squeeze—milky juice means peak sweetness. The first harvest is always a triumph, but the real payoff is the crunchy kernels you’ll roast, grill, or freeze for winter.
Even pests like corn borers won’t stop you if you scout early and use row covers when needed.
This method works for sweet corn, popcorn, or field corn—just adjust planting dates for your zone. Whether you’re feeding a family or just enjoying the process, there’s nothing like the smell of fresh corn on the cob in August. Let’s get those seeds in the ground!
📚 In This Guide
- What you need
- Instructions
- Tips and common mistakes
- Wrapping up and next steps
What you need
- ● Corn seeds: Choose a variety suited to your climate (e.g., Sweet Corn like 'Silver Queen' or 'Peaches and Cream'). Aim for 1-2 seeds per foot of row—about 10,000-12,000 seeds per acre.
- ● Soil: Well-draining, fertile loam with a pH of 6.0-7.0. Test your soil and amend with compost or aged manure if needed.
- ● Water: Access to a hose or irrigation system (corn needs 1-2 inches of water per week, especially during tasseling and silking).
- ● Fertilizer: Starter fertilizer: High in phosphorus (e.g., 10-20-10 NPK ratio) to encourage root development.
- ● Side-dress fertilizer: Nitrogen-rich (e.g., 34-0-0) applied at 6-8 weeks for leafy growth.
- ○ Trellis or stakes (optional but helpful): For varieties over 6 feet tall, use bamboo stakes or a trellis system to support heavy ears.
- ● Garden tools: Trowel or transplanting spade
- ● Garden hoe or cultivator
- ● Pruners (for removing dead leaves)
- ● Planting aids: Row marker or string line (for straight rows)
- ● Planting stick or dibble (to create holes for seeds)
- ● Harvesting tools: Sharp knife or pruning shears (for cutting stalks)
- ● Garden scissors (for trimming husks)
- ● Protective gear: Gloves (to protect hands from thorns or dirt)
- ● Long sleeves/pants (for sun or insect protection)
- ● Mulch: Straw or grass clippings to retain moisture and suppress weeds.
- ● Row covers: Lightweight fabric to protect young seedlings from pests or frost.
- ● Pest control: Neem oil or insecticidal soap (for aphids or corn earworms)
- ● Bird netting (to protect ripe ears from crows or squirrels)
- ● Soil testing kit: To monitor nutrient levels throughout the growing season.
- ● Journal or app: To track planting dates, watering schedules, and growth milestones.
Step-by-Step instructions for growing corn from seed to harvest
Here’s how I turn tiny kernels into towering stalks ready for the cob—no shortcuts, just reliable results.
🌱 Step 1: Prepare the Planting Site
Corn thrives in loose, nutrient-rich soil with full sun (6+ hours daily). Work in 2-3 inches of compost or aged manure into the top 6 inches of soil to feed those hungry roots. I always test soil pH first—corn prefers 6.0-6.8. If your soil is heavy clay, mix in 1-2 inches of coarse sand to improve drainage.
Corn grows best in blocks, not rows, so mark a 4-foot square for each planting area. This ensures better pollination since wind carries pollen between stalks. Use a garden rake to create shallow hills (mounds) about 12 inches apart. Each hill will hold 3-4 seeds planted 1 inch deep—corn seeds are large, so you won’t need to thin later.
💧 Step 2: Plant Seeds at the Right Time and Depth
Wait until soil temperatures reach 60°F at a 4-inch depth—a soil thermometer is your best friend here. Plant seeds after the last frost date when nighttime temperatures stay above 55°F. I like to soak seeds overnight in warm water to speed germination, but it’s not required.
Drop 3-4 seeds into each hill and cover with 1 inch of soil. Press gently to ensure good seed-to-soil contact. Water lightly immediately after planting—just enough to moisten the soil without creating puddles. Keep the soil consistently moist (not soggy) until germination, which takes 7-14 days depending on your climate.
☀️ Step 3: Maintain Consistent Water and Fertility
Corn needs 1-1.5 inches of water per week once seedlings emerge. I water deeply 2-3 times weekly rather than daily shallow watering to encourage deep root growth. Use a drip irrigation system or soaker hose to deliver water at the base—avoid overhead sprinklers, which can spread fungal diseases like leaf blight.
When plants reach 12 inches tall, side-dress with ½ cup of 10-10-10 fertilizer per hill, working it into the soil. Repeat when tassels appear (the male flowers). Corn is heavy feeders, so don’t skimp on nutrients. You’ll know you’re on track when stalks are 1-1.5 inches thick at the base and leaves are vibrant green.
⏰ Step 4: Watch for Pollination and Harvest Ready Cobs
Pollination happens when the silky threads (female flowers) catch pollen from the tassels (male flowers). You’ll see these threads emerge from the leaf sheaths about 60 days after planting. If pollination succeeds, the silks will turn brown within 24 hours. This is your cue to start checking for harvest readiness.
Harvest when the silks turn brown and dry and the kernels feel plump when pressed gently. For sweet corn, pick in the morning when sugars are highest. Cut stalks with a sharp knife 6 inches above the cob to leave room for regrowth if you’re saving seeds. Store cobs in the fridge for 3-5 days or blanch and freeze for long-term storage.
✂️ Step 5: Extend the Season and Save Seeds
If you want to save seeds, let a few stalks mature completely—kernels should be hard and dry with no moisture when cracked open. Harvest the ears, dry them in a warm, dry place for 2-3 weeks, then shell the corn. Store seeds in a cool, dark place in an airtight container for up to 3 years.
For a second harvest, succession plant seeds every 2 weeks after the first planting. This ensures a continuous supply of fresh corn throughout the summer. I always keep a few stalks with discolored or damaged leaves to monitor for pests like corn earworms—remove affected ears immediately to prevent spread.
Tips & tricks for perfect corn growth
Growing corn from seed to harvest takes patience, but these simple tricks will help you avoid common pitfalls and grow the best ears possible.
Soil Prep Secret: In Step 1, don't just add compost—mix in a handful of wood ash around each hill to raise the pH slightly if your soil tests below 6.0. Corn loves a slightly alkaline soil, and this small addition prevents nutrient deficiencies that show up as yellowing leaves. I've seen plants grow 10% taller when I do this simple adjustment.
Germination Boost: For Step 2, if you're worried about slow germination in cooler climates, try soaking your seeds in warm water for just 4 hours instead of overnight. This gives you the benefit of faster sprouting without risking over-hydration. Plant immediately after soaking—don't let them dry out again.
Watering Wisdom: In Step 3, when you're establishing your watering routine, pay attention to the soil's moisture level at 2-inch depth rather than just the surface. Corn roots grow deep, and consistent moisture at this level prevents the plant from developing shallow roots that make it vulnerable to drought. I use a moisture meter to check this before watering.
Pollination Check: For Step 4, here's what nobody tells you—when those silks emerge, gently shake the plants in the morning to help distribute pollen. This works especially well in small gardens where wind pollination might be less effective. I've had better yields in tight spaces by doing this simple morning ritual.
Pro Tips for Corn From Seed To Harvest
- Growing corn from seed to harvest takes patience, but these simple tricks will help you avoid common pitfalls and grow the best ears possible.
- Soil Prep Secret: In Step 1, don't just add compost—mix in a handful of wood ash around each hill to raise the pH slightly if your soil tests below 6.0.
- Germination Boost: For Step 2, if you're worried about slow germination in cooler climates, try soaking your seeds in warm water for just 4 hours instead of overnight.
Frequently asked questions
Got questions about growing corn from seed to harvest? You’re not alone! Here are some of the most common queries—and their answers—to help you grow golden ears like a pro.
How long does it take to grow corn from seed to harvest?
Corn typically takes about 60–100 days from planting to harvest, depending on the variety. Sweet corn matures faster (60–90 days), while field corn may take up to 120 days. Always check the seed packet for exact days-to-maturity for your chosen variety. Pro tip: Plant early varieties if your growing season is short!
What’s the best temperature for planting corn seeds?
Corn seeds germinate best in soil temperatures between 60–65°F (15–18°C). If the soil is too cold (<50°F or 10°C), germination slows or fails. Use a soil thermometer to check, and consider black plastic mulch or row covers to warm the soil faster. Warning: Planting too early can lead to weak seedlings.
How do I protect my corn from pests like corn borers or raccoons?
Pests like corn earworms and raccoons can wreak havoc! For borers, rotate crops yearly and use Bt-treated seeds or natural predators like parasitic wasps. To deter raccoons, harvest promptly and use fencing (at least 8 feet tall) or motion-activated lights. Bonus: Plant corn near marigolds to repel some pests!
Can I grow corn in containers, or does it need a big garden?
While corn prefers deep, spacious soil (at least 12 inches deep), you can grow bush varieties (like ‘Golden Bantam’) in large containers (5+ gallons). Dwarf or mini-corn varieties work best, but expect fewer ears per plant. For pollination, plant at least 3–4 plants together in the same container.
How do I know when corn is ready to harvest?
Sweet corn is ready when the silks turn brown and kernels are plump, milky, and firm (like baby teeth). For field corn, wait until kernels are hard and dry (dent stage). Test by piercing a kernel with your fingernail—if it’s slightly creamy (sweet corn) or starchy (field corn), it’s harvest time!
What should I do if my corn plants look stunted or yellow?
Yellow or stunted corn often signals nutrient deficiencies (like nitrogen) or poor drainage. Check the soil pH (ideal: 6.0–7.0) and amend with compost. If leaves are purple, add phosphorus; if they’re yellow and wilted, water deeply but avoid soggy soil. Quick fix: A balanced fertilizer (10-10-10) can revive struggling plants!
Wrapping up and next steps
From seed to harvest, growing corn is a rewarding journey that blends patience, care, and a little bit of sunshine magic! 🌱 Whether you’re a beginner or a seasoned gardener, understanding each stage—from planting to silo storage—ensures a bountiful yield.
Now that you’re armed with the right knowledge, why not take the next step? Grab your gardening gloves, mark your calendar, and start planning your corn patch today. Happy planting—your future harvest is waiting! 🌽✨