
Lawn
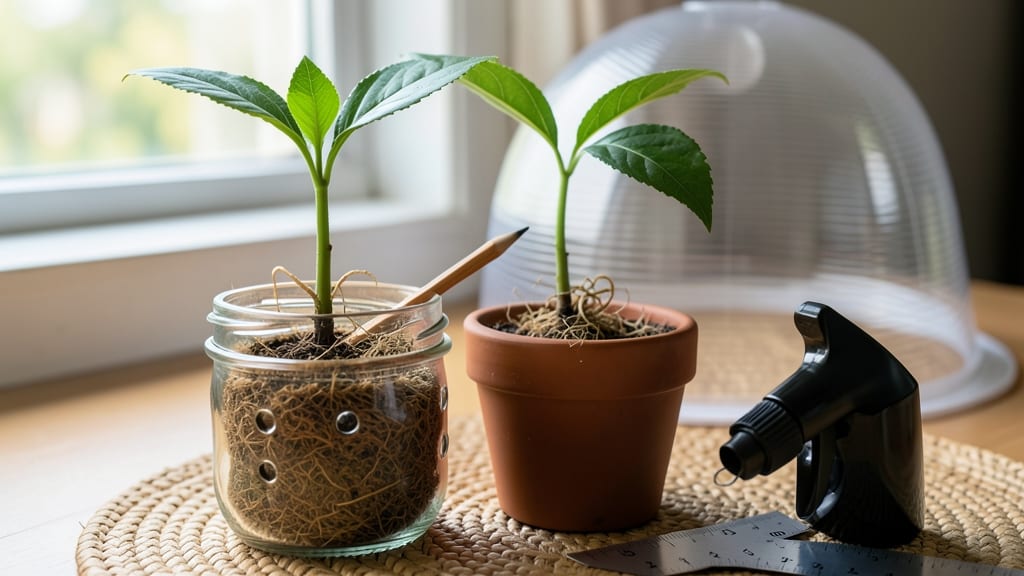
Growing an avocado from seed feels like nurturing a tiny miracle—especially when you see that first sprout after weeks of waiting. 🌱 The journey from pit to sprout happens in 60 days, but each stage has its own quirks and care needs.
I’ve tracked every wrinkle and leaf, so you don’t have to guess when to adjust water or light.
The first 30 days are all about patience: your seed will sprout roots, then a stem, and finally those first leaves—often within 2-4 weeks. After that, the real growth spurt begins, with leaves turning darker and thicker as the plant finds its footing.
The biggest mistake? Overwatering, which drowns those delicate roots before they can strengthen.
By day 60, you’ll have a 6-12 inch seedling with a sturdy stem and glossy leaves, ready for its first transplant. This is where the magic happens: with proper care, your avocado could live for decades and—with luck—eventually bear fruit.
The key is consistency: steady water, bright (but indirect) light, and a little extra love when the leaves start curling.
Whether you’re growing this as a houseplant or dreaming of a backyard tree, the early stages set the foundation. Troubleshooting mold, pests, or stunted growth comes next—but first, let’s get that seed sprouting. Here’s how to guide it through each phase without a hitch.
📚 In This Guide
- What you need
- Instructions
- Tips and common mistakes
- Wrapping up and next steps
What you need
- ● Avocado pit: 1 fresh, organic avocado pit (the larger, the better for faster sprouting). Pro tip: Choose a pit with a smooth, unblemished surface!
- ● Toothpicks (3-4): For suspending the pit in water.
- ● Small glass or jar: 8–16 oz, wide-mouthed (like a mason jar) to hold the pit and water.
- ● Water: Room-temperature, filtered or distilled (avoid tap water with chlorine).
- ● Well-draining potting soil: 1–2 gallons of a mix like cactus/succulent soil or a blend of 60% potting soil + 40% perlite.
- ○ Small pot (4–6 inches in diameter): With drainage holes. Optional: A biodegradable peat pot for transplanting later.
- ● Spray bottle: For gentle watering once the sprout emerges.
- ● Warmth: Keep the pit in a spot with 70–80°F (21–27°C) temperatures.
- ● Indirect sunlight: Place the jar near a window (avoid direct sun to prevent algae growth in water).
- ● Patience: Roots may take 2–6 weeks to appear!
- ○ Optional boosters: Hydrogen peroxide (3%): 1 tsp per quart of water to prevent bacterial growth.
- ● Rooting hormone (powder): Speeds up root development if desired.
Step-by-Step guide to growing an avocado from a seed
Here’s how to turn that grocery store pit into a thriving plant—no green thumb required.
🌱 Step 1: Prepare the Pit for Germination
Start by cleaning the avocado pit thoroughly under running water, removing any remaining fruit flesh. I like to scrub it gently with a soft brush to avoid damaging the outer shell. Pat it dry with a paper towel—moisture speeds up mold growth, and we want the pit to last.
Next, insert three toothpicks evenly around the pit, spacing them about ½ inch apart. The toothpicks should be positioned so they’ll suspend the pit above a glass of water without touching the bottom. This keeps the base submerged just enough to encourage root growth without rotting.
Fill a glass with 3-4 inches of water and place the pit on top, toothpicks acting as a bridge. The bottom ¼ inch of the pit should be submerged—any more risks rot, any less stalls germination. Set the glass in a warm spot (around 70°F) where it gets indirect light, like a kitchen counter away from direct sun.
💧 Step 2: Monitor Water and Wait for Roots
Check the water level every few days—it evaporates faster than you’d think. Keep it topped off so the pit stays submerged at the same depth. I like to use a clear glass so I can watch the roots develop without disturbing the setup.
Within 2-6 weeks, you’ll see a small root emerge from the bottom of the pit. This is your first sign of success! Once the root reaches about 2 inches long, it’s time to transition to soil. Don’t rush this step—waiting ensures the root is strong enough to support the plant as it grows.
Here’s the thing—if the water gets cloudy or smells funky, dump it and refill with fresh water. Cloudiness means bacteria are brewing, and that’ll slow down or even stop root growth. Keep the setup clean, and you’ll avoid this common pitfall.
☀️ Step 3: Plant the Rooted Pit in Soil
Fill a small pot (around 6 inches wide) with well-draining potting mix—avoid garden soil, which compacts and suffocates roots. I like to mix in a handful of perlite to improve drainage. Moisten the soil until it’s damp but not soggy, then make a hole in the center deep enough to bury half of the pit.
Gently place the pit into the hole, root-side down, and cover the top half with soil. Press lightly around the edges to secure it, but don’t pack the soil too tightly. Water lightly until it drains through the bottom, then place the pot in a bright, indirect light spot. Direct sun at this stage can scorch the delicate new plant.
You’ll notice the pit starts to sprout within 1-3 weeks. The first leaves to appear are called cotyledons—they’re thick and leathery, not the true leaves you’ll see later. These cotyledons store nutrients until the plant can photosynthesize on its own.
🌿 Step 4: Care for the Sprouting Plant
Once the plant sprouts, move it to a location with bright, indirect light for at least 6 hours daily. A south-facing window works well, but avoid harsh midday sun, which can burn the tender leaves. If your home lacks natural light, supplement with a grow light kept 6-12 inches away.
Water the plant when the top 1 inch of soil feels dry. Stick your finger in the soil—if it’s dry past your first knuckle, it’s time to water. Overwatering is the fastest way to kill a young avocado plant, so let the soil dry slightly between waterings. I use a spray bottle for the first few weeks to avoid disturbing the soil around the pit.
Fertilize lightly after the plant has 4-6 true leaves (not cotyledons). Use a balanced, water-soluble fertilizer diluted to half strength. Too much fertilizer too soon can burn the roots. I fertilize every 4-6 weeks during the growing season, but skip it in winter when growth slows.
⏰ Step 5: Transplant and Prune for Growth
When the plant reaches 12-18 inches tall and has a sturdy stem, it’s time to transplant it into a larger pot (around 10-12 inches wide). Choose a pot with drainage holes and fill it with fresh potting mix. Gently remove the plant from its current pot, loosen the roots if they’re circling, and replant at the same depth.
Prune the plant by cutting back the top set of leaves to encourage bushier growth. Use clean scissors to snip just above a leaf node (the bump where leaves grow). This might seem counterintuitive, but it helps the plant develop a stronger structure. You’ll see new branches sprout from the sides within a few weeks.
By 60 days, your avocado plant should have a few true leaves and a more established root system. Keep it in a warm spot (around 65-75°F) and continue watering and fertilizing as needed. Remember, avocado trees are slow growers—patience is key! With consistent care, you’ll have a small tree in a few years.
Tips & tricks for avocado seed Germination success
Here’s what nobody tells you about growing avocados from seeds—these tricks make all the difference between success and disappointment.
Toothpick Placement Matters: When inserting those three toothpicks around the pit in Step 1, aim for equal spacing and angle them slightly downward. This creates a more stable bridge that prevents the pit from wobbling in the water. I learned this the hard way after watching a pit tip over and sink completely—just a tiny adjustment makes a huge difference. The toothpicks should form a triangle that cradles the pit without piercing too deeply into the shell.
Lighting Secrets for Germination: While the instructions mention indirect light, I’ve found that placing the water setup near a bright window with sheer curtains actually speeds up root growth. Avocado pits need light to stimulate early root development, but direct sun can overheat the water. A north-facing window works best if you don’t have sheer curtains—just keep the temperature around that 70°F mark. Watch for condensation on the glass as a good sign your setup is in the right environment.
Root Growth Timeline: Those 2-6 weeks for root emergence can feel like an eternity, but there’s a trick to encourage faster results. Once you see the first tiny root, switch to slightly warmer water (around 75°F) to stimulate growth. I use a small heating pad under the glass for an extra boost—just make sure the water stays warm but not hot. You’ll typically see noticeable growth within 3-5 days after the first root appears when using this method.
Soil Transition Strategy: When moving your rooted pit to soil in Step 3, don’t rush the process. The root needs to be at least 2 inches long and firm to handle transplantation. Here’s my secret: Gently squeeze the root between your fingers before planting—if it feels sturdy and doesn’t break easily, it’s ready. For the first week after transplanting, I cover the pot with a clear plastic bag to create a mini greenhouse effect, which helps the young plant adjust to its new environment without stress.
Pro Tips for Avocado Seed Growing Stages
- Here’s what nobody tells you about growing avocados from seeds—these tricks make all the difference between success a...
- Toothpick Placement Matters: When inserting those three toothpicks around the pit in Step 1, aim for equal spacing an...
- Lighting Secrets for Germination: While the instructions mention indirect light, I’ve found that placing the water se...
Frequently asked questions
Got questions about growing an avocado tree from seed? You’re not alone! Here are some of the most common queries—and their straightforward answers—to help you navigate the process with confidence.
How long does it take for an avocado seed to sprout?
Patience is key! Most avocado seeds sprout within 4 to 8 weeks if given the right conditions (warmth, moisture, and consistent care). Some may take longer—don’t give up if yours hasn’t sprouted in 6 weeks. Keep the toothpicks moist and the seed in a bright, indirect spot.
Can I speed up the germination process?
While you can’t rush nature, you can optimize conditions to encourage faster sprouting. Use warm water (not hot) to soak the seed, maintain humidity with a plastic bag or tray, and place it near a sunny window (but avoid direct sunlight). A seedling heat mat can also help if your home runs cool.
What if my avocado seed starts rotting?
Rotting is a common issue caused by too much moisture or poor drainage. If you notice a foul smell or mushy texture, remove the seed from water and let it dry slightly. Rinse the toothpicks and seed with clean water, then reduce soaking time to just a few hours daily. Ensure the jar or container has drainage holes if repurposing one.
How do I know if my avocado seed is healthy enough to grow?
A healthy avocado seed will have a firm, greenish-brown exterior and a plump, intact pit. Avoid seeds that are shriveled, cracked, or moldy—these won’t sprout. Once sprouted, look for a straight, sturdy stem and small leaves. Yellowing or wilting leaves may signal overwatering or stress.
Can I grow an avocado tree indoors year-round?
Avocado trees thrive indoors with bright, indirect light (like near a south-facing window) and temperatures above 55°F (13°C). Use a well-draining potting mix and a pot with drainage holes. Rotate the plant occasionally for even growth. Just be prepared for slower growth—it may take 5–10 years to bear fruit indoors!
Wrapping up and next steps
Growing an avocado from seed is a rewarding journey that blends patience with the joy of nurturing life from something as simple as a pit! 🌱 Whether you're a gardening newbie or a green thumb, each stage—from soaking to transplanting—teaches you the magic of nature’s cycle.
Now that you’ve mastered the 60-day timeline, why not take the next step?
- Experiment further: Try growing different avocado varieties or even other fruit seeds (like citrus or mango) to expand your skills!
- Share your success: Snap photos of your sprouts and tag us—we’d love to see your progress! 📸
- Give back to nature: Once your tree matures, plant it outdoors to enjoy fresh avocados and a thriving garden.
Your tiny seed has big potential—now go make it grow! 🌿