
Lawn
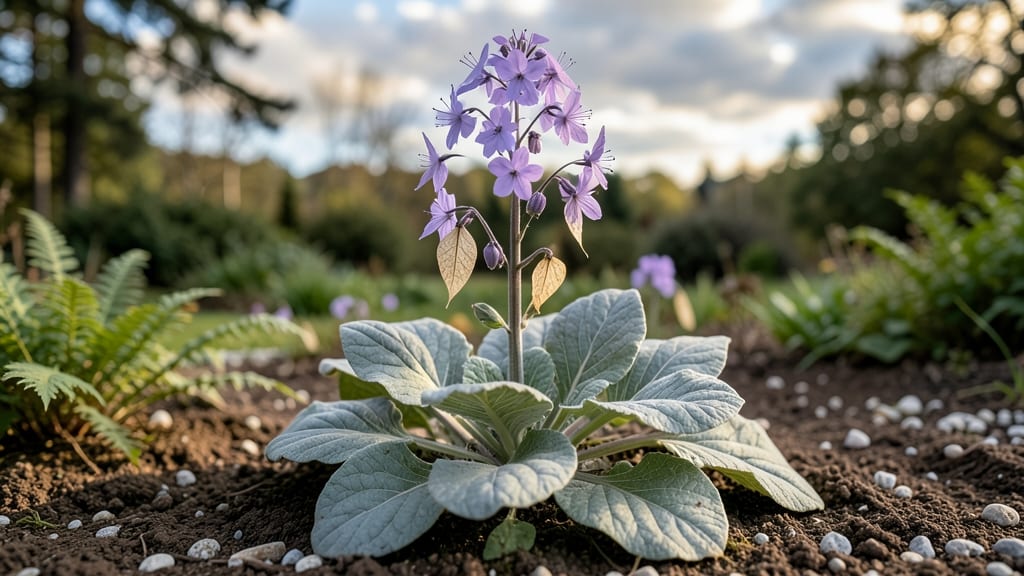
Harvesting lunaria seed pods without twisting them open is the secret to saving viable seeds year after year. 🌿 I’ve grown Lunaria annua for its striking silver-blue foliage and those iconic translucent seed pods—turns out, the key to success isn’t just patience, but knowing when to harvest them before they self-seed everywhere.
The pods start green, then turn papery and papery-brown, signaling they’re ready to be collected without damaging the delicate seeds inside.
This plant thrives in partial shade to full sun and well-draining soil, making it perfect for borders or cottage gardens. Space plants 18-24 inches apart—they’ll grow 2-3 feet tall—and expect blooms in early summer that last for weeks.
The real magic happens in late summer when those moon-like seed pods form; leave them on the plant until they’re fully dry and brittle, then gently twist them open to reveal the shiny black seeds inside.
You’ll end up with seeds that stay viable for years, plus dried pods that make stunning ornamental centerpieces or winter arrangements. The plants themselves are disease-resistant and low-maintenance, so they’re great for beginners or busy gardeners who still want a showstopper.
Plus, the silver foliage contrasts beautifully with deep purples and blues in the garden.
Works in zones 3-9, making it one of the most adaptable perennials for seed saving. Once you master the harvest, you’ll never buy seeds again—and your garden will stay filled with these charming, self-sufficient plants for decades. Ready to grow your own stash?
📚 In This Guide
- What you need
- Instructions
- Tips and common mistakes
- Wrapping up and next steps
What you need
- ● Mature Lunaria plants (e.g., Lunaria annua or Honesty plants) with fully developed seed pods (typically late summer to early fall).
- ● Pruning shears or sharp scissors – Clean, sterilized tools to avoid damaging pods or spreading disease.
- ● Paper towels or newspaper – For drying and separating seeds from pods.
- ● Brown paper bags or breathable mesh bags – 2–3 medium-sized bags (12" x 15") for airflow during drying.
- ● Small wooden sticks or toothpicks – To prop open stubborn pods if needed.
- ○ Air-tight seed storage containers – Small jars, envelopes, or resealable bags with silica gel packets (optional but recommended).
- ● Permanent marker – For labeling seeds with the date and variety.
- ● Magnifying glass – Helps inspect seeds for viability (especially useful for tiny or damaged ones).
- ● Desiccant packets – Extra silica gel or rice in bags to absorb moisture during storage.
- ● Seed tray or baking sheet – For spreading pods out to dry evenly (great for bulk harvests!).
- ○ Humidity monitor – Optional but handy to ensure pods dry to ~30–40% humidity.
- ● Gloves – If handling large quantities to protect your hands from sap or debris.
- ● Wait until seed pods turn brown and papery—they should rattle when shaken (signs of maturity!).
- ● Choose a dry, well-ventilated area (indoors or outdoors) with temps between 60–75°F (15–24°C).
- ● Harvest on a dry, sunny day to minimize mold risk.
Step-by-Step guide to harvesting Lunaria seed pods without twisting
Here's how I collect viable seeds from these stunning silver dollar plants—no frustration, just beautiful pods.
🌿 Step 1: Identify Mature Pods for Harvesting
Lunaria pods mature when they turn from green to a dry, papery brown—usually 6-8 weeks after flowering. The key is waiting until they're fully dry but haven't split open naturally. Gently squeeze a pod between your fingers; if it feels crisp and hollow rather than leathery, it's ready. I harvest mine in late summer or early fall when pods are abundant but still intact.
Look for pods that are uniformly brown with no remaining green veins. If you see tiny cracks forming, harvest immediately—they'll release seeds within days. I always work on a dry day or bring pods indoors to finish drying if needed. This prevents premature seed loss and ensures maximum viability for next season's planting.
✂️ Step 2: Cut Pods Cleanly Without Damaging Stems
Use sharp pruning shears or scissors to snip the stem 1-2 inches below the pod. The goal is to avoid tearing the delicate paper-thin walls. I make a clean cut at a slight angle to prevent water from pooling on the stem stump, which could cause rot. Never pull pods—they're attached by a thin membrane that can tear easily, ruining the seed cavity inside.
Place harvested pods in a single layer on a dry, well-ventilated surface. I use a cardboard box lined with newspaper to allow air circulation while protecting them from dust. Avoid stacking pods—this creates moisture pockets that can encourage mold growth. If you're harvesting multiple plants, work in batches to prevent overcrowding during the drying process.
🪴 Step 3: Dry Pods Completely Before Seed Extraction
Let pods dry for 2-3 weeks in a warm, dry location with good air circulation. I place them near a sunny window but out of direct sunlight to prevent overheating. The drying process is complete when the pods feel completely dry and make a crisp sound when shaken. If any pods remain slightly flexible, return them to dry for another week.
During this time, I occasionally shake the pods gently to dislodge any loose seeds that might have formed prematurely. This prevents seed loss while still allowing the main seed cavity to develop properly. Once fully dry, the pods will have that classic "silver dollar" sheen when held up to light—a sure sign they're ready for seed collection.
💧 Step 4: Extract Seeds Without Breaking the Pod Walls
Gently twist the dried pod between your fingers to open it—this is where most people struggle. The key is to apply even pressure while rotating slowly. I find that starting at the wider end and working toward the stem makes the pod separate more cleanly. If it resists, let it dry another day rather than forcing it.
Once opened, you'll see a single large seed nestled in the center. Carefully remove the seed using your fingernail or a small knife, being careful not to puncture the seed coat. I store seeds in a cool, dark place in a paper envelope until spring planting. The papery pod walls can be saved for crafts or dried flower arrangements—they're beautiful long after the seeds are gone.
Tips & tricks for perfect Lunaria seed pod harvesting
Harvesting lunaria seed pods without frustration starts with these key techniques that preserve both seeds and pod integrity.
Pod Maturity Test: In Step 1, when checking for readiness, look for pods that make a crisp sound when tapped together—this confirms they're fully dry. I also check for the classic "silver dollar" translucency when held up to light, which appears only in mature pods. If you're unsure, harvest a few extra pods to practice opening without damaging the seeds inside.
Cutting Technique: For Step 2, use the "pencil grip" method when cutting stems—hold your pruners like a pencil to maintain better control. This prevents accidental tearing of the delicate pod walls. I also recommend cutting on a clean, flat surface like a cutting board to avoid accidental snags from uneven ground or grass. The slight angle cut helps water drain away from the stem stump, preventing potential rot during drying.
Drying Strategy: During the 2-3 week drying period in Step 3, I place pods in a mesh bag or colander to allow air to circulate all around them. This prevents moisture buildup that could cause mold. If your kitchen is particularly humid, consider using a small fan on low setting to gently circulate air. The crisp sound test is your best indicator—pods should sound hollow and make a slight rattling noise when shaken.
Seed Extraction: In Step 4, when twisting pods open, I've found that using a clean, dry paper towel under your work surface prevents seeds from rolling away. Start twisting at the widest part of the pod and work toward the stem—this creates a natural separation line. If pods resist, they likely need more drying time rather than force. The seed will naturally release from the pod wall when fully mature.
Pro Tips for Lunaria Seed Pods
- Harvesting lunaria seed pods without frustration starts with these key techniques that preserve both seeds and pod in...
- Pod Maturity Test: In Step 1, when checking for readiness, look for pods that make a crisp sound when tapped together...
- Cutting Technique: For Step 2, use the "pencil grip" method when cutting stems—hold your pruners like a pencil to mai...
Frequently asked questions
about Lunaria seed pods—because every gardener deserves a little clarity!When is the best time to harvest Lunaria seed pods?
Harvest Lunaria (Honesty plant) seed pods when they’re fully mature but before they split open naturally. This usually happens in late summer to early fall (August–September in most climates). Look for dry, papery pods that turn translucent—like tiny moon-shaped lanterns! Snap them off gently to preserve seed viability.
Can I save seeds from Lunaria pods for next year?
Lunaria seeds stay viable for 2–3 years if stored properly in a cool, dry place (like a sealed envelope or jar). Just let the pods dry completely indoors for 1–2 weeks before extracting the seeds. Pro tip: Label them—some varieties (like Lunaria annua) can cross-pollinate!
What if my Lunaria pods won’t open on their own?
If pods stay closed, they’re likely not fully ripe yet. Try these fixes:
- More sunlight: Move the plant to a sunnier spot (6+ hours/day).
- Reduce water: Overwatering delays drying. Let soil dry slightly between waterings.
- Force open: If pods are dry but stubborn, gently twist or cut them open with scissors.
Are Lunaria seed pods edible or useful for anything else?
While the seeds inside aren’t edible, the dried pods make stunning ornamental decorations (think rustic centerpieces or dried flower arrangements!). They’re also non-toxic, so they’re safe for kids’ crafts. Just avoid ingesting the seeds—they’re ornamental only!
What’s a good alternative if I can’t grow Lunaria?
If Lunaria proves tricky, try these easy seed-saver alternatives with similar charm:
- Nasturtiums: Edible, self-seeding, and produce bright pods.
- Calendula: Medicinal petals + long-lasting seed heads.
- Poppies (Papaver): Dramatic pods that split open naturally.
Wrapping up and next steps
Lunaria seed pods are a gardener’s delight—offering easy, twist-free harvesting and year-round seed viability with minimal effort! Whether you’re a seasoned green thumb or just starting, these unique pods make seed-saving simple and rewarding. 🌱✨
Ready to elevate your garden game? Start by planting a few Lunaria seeds this season and experience the joy of harvesting seeds without the fuss. Happy growing!