
Lawn
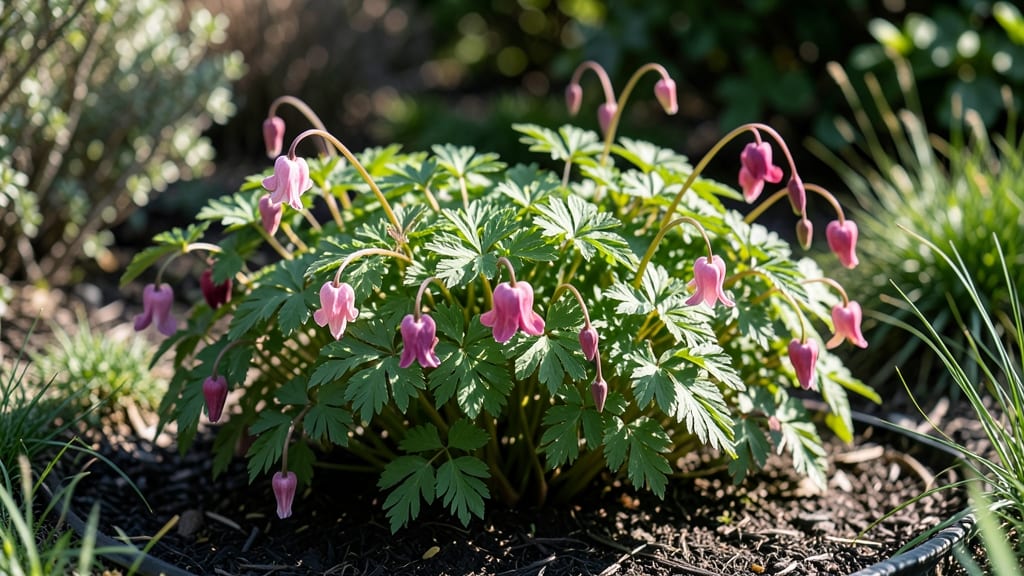
Bleeding heart seed pods hold the secret to next year's heart-shaped blooms—if you break their dormancy first. 🌱 I've learned that simply tossing them in a bag won't work; these seeds need a winter's worth of patience and the right conditions to wake up.
The key lies in mimicking nature's slow, cold preparation, turning what seems like a waiting game into a reliable way to grow your own plants.
Harvest those papery pods when they turn brown and dry in late summer, then store them in a paper bag in your fridge for 12 weeks—this cold stratification tricks the seeds into thinking winter has passed.
Most gardeners give up here, but it's exactly when they start to sprout that you'll know you're doing it right. The payoff comes in spring, when you'll have seedlings ready to transplant just as the weather warms.
What you'll end up with are lush, vigorous plants that produce those iconic pink or white heart-shaped blooms within 2-3 years—far sooner than buying mature plants.
The secret to success is consistency: keep the soil evenly moist but never soggy, and give them partial shade to mimic their woodland habitat. Even if germination rates are low (they often are!), every seedling you coax along becomes a future centerpiece for your garden.
This method works best for gardeners in zones 3-8 who can plant outdoors in early spring, though container growing extends the range. The real magic happens when you watch those first heart-shaped leaves unfurl—proof that your winter patience paid off. Here's how to make it happen without the guesswork.
📚 In This Guide
- What you need
- Instructions
- Tips and common mistakes
- Wrapping up and next steps
What you need
- ● Bleeding heart seed pods: 1–5 pods (freshly harvested or store-bought; ensure they’re fully dried and brownish-black in color).
- ● Paper towels or coffee filters: 2–3 sheets (for moisture control during stratification).
- ● Plastic zip-top bag: 1 quart-sized bag (for creating a humid environment).
- ● Water: Distilled or room-temperature tap water (¼ cup).
- ● Small container or tray: 1 (for holding seeds during stratification, e.g., a plastic takeout container with drainage holes).
- ● Potting soil: 1 bag (sterilized, well-draining mix; 10–20 lbs, depending on pot size).
- ● Seed-starting pots or trays: 6–12 small pots (3–4 inches deep) or a seed tray with cells.
- ● Scissors or pruners: 1 pair (for carefully opening seed pods).
- ○ Spray bottle: 1 (for gentle misting, optional but helpful).
- ● Plant labels: 5–10 (to track varieties and planting dates).
- ○ Gloves (optional): 1 pair (to protect hands from seed pod fibers).
- ● A cool, dark space (e.g., refrigerator or basement) for stratification (40–50°F for 6–8 weeks).
- ● Access to sunlight or grow lights (12–16 hours/day) after germination.
- ● Patience! Bleeding heart seeds can take 4–6 weeks to germinate after stratification.
How to break bleeding heart seed pod dormancy for next year’s flowers
Here’s the simple method I’ve used to coax bleeding heart seeds into vibrant spring blooms—no guesswork, just reliable results.
🌱 Step 1: Harvest and Dry the Seed Pods
Collect mature seed pods once they turn brown and papery, usually in late summer or early fall. I twist them gently off the stems—they’ll release seeds easily when fully dry. Spread them in a single layer on paper towels in a warm, dry spot for 2-3 weeks.
Turn them every few days to prevent mold. You’ll know they’re ready when the pods crack open and seeds inside look firm and dark. If they’re still green or sticky, leave them another week—overdrying kills viability.
💧 Step 2: Cold Stratify for Dormancy Break
Bleeding heart seeds need a winter-like chill to germinate. Place the dried seeds in a sealed plastic bag with a damp paper towel. I add 2-3 drops of water to keep it lightly moist but not soggy. Seal the bag and refrigerate for 8-12 weeks.
Check every 2 weeks—if the towel dries out, spritz it lightly with water. This mimics natural winter conditions. Some gardeners use a mix of sand and peat moss instead of paper towels, but I’ve found this method just as effective and far less messy.
☀️ Step 3: Sow in Early Spring
After cold treatment, sow seeds in well-draining potting mix at a depth of ¼ inch. Keep the soil consistently moist but not waterlogged—bleeding heart seeds rot easily if too wet. I use a clear plastic dome to maintain humidity until germination.
Place the container in a bright spot with indirect light (no direct sun yet). Germination takes 3-6 weeks, so be patient. You’ll see tiny green sprouts first, followed by the distinctive heart-shaped leaves that give this plant its name.
🌿 Step 4: Transplant and Care for Young Plants
Once seedlings develop 2-3 sets of true leaves (not just the first seed leaves), transplant them into individual pots. I use 3-inch pots to give roots room to establish. Harden them off by placing outside in partial shade for 1 hour daily, gradually increasing time over 1-2 weeks.
Bleeding hearts love shade and rich soil. Plant them in a spot with partial to full shade and moist, well-amended soil in early spring. Mulch heavily to retain moisture and protect roots from heat. You’ll see blooms in 2-3 years, but the wait is worth it for those iconic heart-shaped flowers.
⏰ Step 5: Overwinter for Reliable Blooms
After the first growing season, cut back foliage in late fall. Bleeding hearts go dormant naturally, so no special winter care is needed beyond protecting them from freezing temperatures. In colder climates, add a thick layer of mulch (3-4 inches) to insulate roots.
This plant thrives on neglect once established. Just remember: patience is key. The dormancy-breaking process ensures strong roots, which means bigger, more vibrant blooms next spring. Trust the timeline—your garden will thank you.
Tips & tricks for perfect bleeding heart seed pod germination
These little-known tricks will help you skip the common pitfalls and get those seeds sprouting reliably every time.
Pod Maturity Matters: Don't rush harvesting—wait until seed pods are completely brown and papery, not just turning color. I've learned this the hard way after trying to use green pods that never germinated. The pods should crack open easily when dry, revealing firm, dark seeds inside. If they're still green or sticky, leave them another week—overdrying kills viability faster than underdrying.
Stratification Setup: For the 8-12 week cold treatment, I use a simple plastic bag with a damp paper towel and just 2-3 drops of water. The key is keeping it lightly moist—not soggy. Some gardeners swear by sand/peat mixes, but I've found this method works just as well and is far less messy. Place the bag in your fridge's crisper drawer where temps stay consistently cold (around 35-40°F).
Germination Patience: Those 3-6 weeks of waiting can feel endless, but don't rush it! I've seen seeds sprout in as little as 2 weeks (especially with warm stratification) but more often it takes the full 6 weeks. The tiny green sprouts will appear first, followed by those distinctive heart-shaped leaves. Keep the soil consistently moist during this time—bleeding heart seeds rot easily if too wet, but they won't germinate if too dry.
Transplant Timing: Wait until seedlings have 2-3 sets of true leaves before transplanting—those are the second set of leaves that look like miniature versions of the mature plant, not the first seed leaves. I use 3-inch pots for this stage and harden them off gradually over 1-2 weeks. Start with just 1 hour of outdoor exposure daily in partial shade, then slowly increase time. This prevents shock when you eventually plant them outdoors.
Pro Tips for Bleeding Heart Seed Pods
- These little-known tricks will help you skip the common pitfalls and get those seeds sprouting reliably every time.
- Pod Maturity Matters: Don't rush harvesting—wait until seed pods are completely brown and papery, not just turning co...
- Stratification Setup: For the 8-12 week cold treatment, I use a simple plastic bag with a damp paper towel and just 2...
Frequently asked questions
Got questions about bleeding heart seed pods?
You’re not alone! Whether you’re a first-time gardener or a seasoned plant enthusiast, these common concerns will help you navigate dormancy, planting, and care like a pro. Let’s dive in!
Why won’t my bleeding heart seed pods germinate?
Bleeding heart seeds (Dicentra spectabilis) are notorious for needing dormancy to break. Without cold stratification (mimicking winter), germination rates drop dramatically. Try soaking seeds in water for 24 hours, then refrigerate them in a damp paper towel for 4–6 weeks before planting. Patience is key—some seeds take months to sprout!
How long do bleeding heart seed pods take to sprout?
Timing varies, but expect germination in 4–12 weeks under ideal conditions (60–70°F soil temps, consistent moisture). If nothing emerges after 3 months, the seeds may need another round of stratification or could be non-viable. Test a few pods—some years are just more finicky than others!
Can I plant bleeding heart seed pods directly in the ground?
Yes, but success depends on your climate. In warmer zones (USDA 6+), sow seeds outdoors in fall to experience natural winter chilling. For colder regions, start indoors in late winter using seed trays. Mulch heavily after planting to protect tender seedlings from temperature swings.
What’s the best alternative if my seed pods fail to grow?
If germination proves tricky, consider dividing mature plants or buying rooted cuttings from a nursery. Bleeding hearts spread slowly via rhizomes, so sharing with fellow gardeners is a great backup! For instant color, opt for pre-grown nursery starts—they’ll bloom in their first or second year.
Why are my seed pods turning black or moldy?
Black/moldy pods signal rot or fungal issues, often from overwatering or poor drainage. Ensure pots/trays have drainage holes and use a sterilized seed-starting mix. Reduce watering once seeds sprout—keep soil moist but not soggy. Fungicide (like neem oil) can help if mold appears.
Wrapping up and next steps
Bleeding heart seed pods may seem delicate, but with the right dormancy-breaking tricks, you’re just one step away from stunning spring blooms! 🌸 Whether you’re soaking, scarifying, or chilling, these methods unlock their full potential—so don’t hesitate to experiment.
Ready to transform your garden? Grab those pods, follow your chosen technique, and watch your patience bloom into beauty next season.
🌱 Next Steps:
- Plant soon! Once prepped, sow seeds in well-draining soil and keep them moist.
- Mark your calendar. Spring’s the perfect time for these tender blooms to shine.
- Share the love. Snap progress pics and tag us—we’d love to see your garden glow!