
Flowers
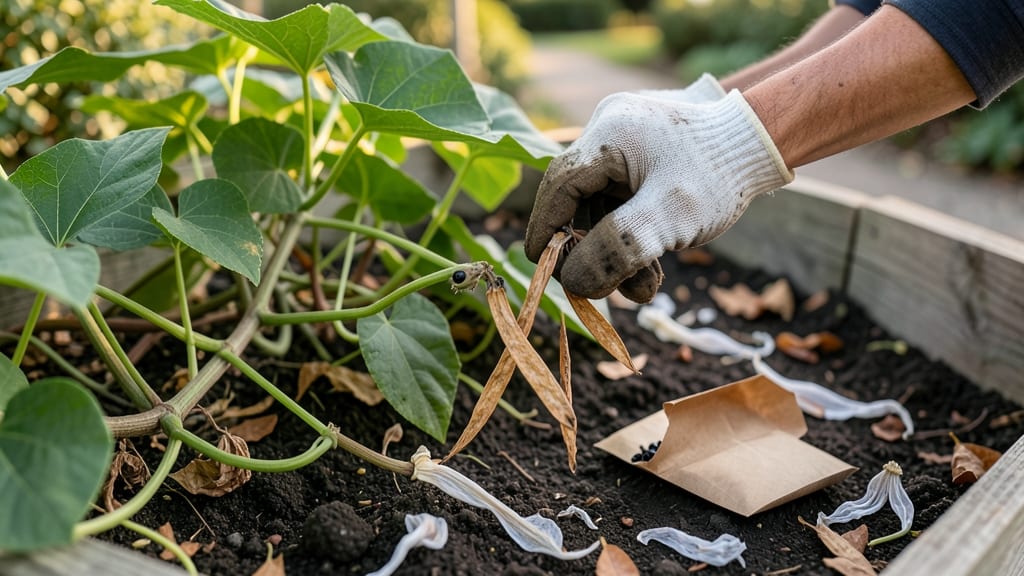
Moon flower seed pods hold the promise of next summer’s silvery-white blooms that glow at dusk. 🌙 I’ve saved seeds from my own moonflower vines for years, and the key to success lies in proper drying and a little winter magic called stratification—both simpler than they sound.
You’ll need just a few tools: scissors, paper bags for drying, and a sealed container for cold storage. The process takes about 6-8 weeks total, with most of that time spent in the fridge. Moonflower seeds need this cold period to break dormancy, mimicking nature’s winter cycle.
Once stratified, you’ll plant them in well-draining soil under bright light, keeping the soil lightly moist. Within 10-14 days, you’ll see those first tiny leaves unfurling—proof that your patience paid off. The result? Plants that bloom earlier and more prolifically than store-bought varieties.
This method works for both beginner gardeners and seasoned growers, though I’ve learned the hard way that fresh pods must dry completely to avoid mold. Here’s how to do it right without losing any seeds along the way.
📚 In This Guide
- What you need
- Instructions
- Tips and common mistakes
- Wrapping up and next steps
What you need
- ● Moon flower seed pods – Collect fully mature, dried pods (brown, papery texture) from healthy plants. Aim for 10–20 pods for experimentation.
- ● Paper bags or brown lunch bags – 2–3 bags (1 per 5–7 pods) for drying. Use unbleached, breathable paper to prevent mold.
- ● Plastic zip-top bags – 1–2 resealable bags (quart-size) for stratification storage.
- ● Permanent marker – To label bags with collection date and variety (if applicable).
- ● Pruning shears or scissors – For harvesting pods cleanly from stems.
- ○ Desiccant (optional) – A small silica gel packet (placed in the drying bag) speeds up moisture removal.
- ● Refrigerator or cool, dark space – For cold stratification (40–50°F).
- ● Notebook or app – To track drying dates and germination progress.
How to harvest, dry, and stratify moon flower seed pods
Preserving moon flower seeds for next season is easier than you think—just follow these simple steps.
🌱 Step 1: Harvest Ripe Seed Pods at the Right Time
Wait until the seed pods turn brown and papery—this signals they’re fully mature and ready for collection. I like to harvest on a dry morning after the dew has evaporated, as moisture can encourage mold during drying. Use clean, sharp scissors or fingers to snip the pods from the stem, leaving a small portion attached to prevent damage.
Don’t rush—if you pick them too early, the seeds won’t germinate properly. A good rule of thumb is to harvest when the pods split open slightly on their own, revealing the dark seeds inside. Collect pods in a paper bag (not plastic) to allow airflow and prevent dampness.
🌿 Step 2: Dry the Seed Pods Properly
Spread the harvested pods in a single layer on a clean, dry surface like a mesh screen or a piece of cardboard. Place them in a warm, dry, shaded spot—direct sunlight can overheat and crack the pods. I use a small fan on low to circulate air gently, which speeds up drying without damaging the seeds.
Drying takes 1-2 weeks, depending on humidity. You’ll know they’re ready when the pods feel lightweight and brittle to the touch. If any pods develop mold (fuzzy spots), remove them immediately—they’ll ruin the whole batch. Store dried pods in a paper envelope in a cool, dry place until you’re ready to stratify.
⏰ Step 3: Stratify Seeds for Better Germination
Moon flower seeds benefit from stratification, a cold treatment that mimics winter conditions. Place the dried pods in a sealed plastic bag with a damp paper towel—just enough moisture to keep things damp, not soggy. Seal the bag and refrigerate for 4-6 weeks at 35-40°F. Check weekly to ensure the towel stays moist but not dripping.
This cold period breaks dormancy, so seeds sprout more reliably in spring. After stratification, remove the seeds from the bag and plant them in well-draining soil at a depth of ½ inch. Keep the soil consistently moist (not waterlogged) until germination, which typically takes 10-14 days in warm conditions.
☀️ Step 4: Plant Stratified Seeds for Next Season
Sow the seeds outdoors after the last frost or indoors 8-10 weeks before the last frost date. Use a light, fertile soil mix and space seeds 6-8 inches apart—they’ll spread quickly once established. Water gently to avoid displacing seeds, and place the container in a bright, indirect light area until sprouts appear.
Moon flowers thrive in full sun but can tolerate partial shade. Once seedlings reach 2-3 inches tall, thin them to the strongest 3-4 plants per 4-foot section of garden bed. Mulch around the base with 2-3 inches of organic mulch to retain moisture and suppress weeds.
Tips & tricks for perfect moon flower seed preservation
These simple strategies will help you maximize your moon flower seeds' viability and ensure next year's garden thrives.
Harvesting Timing: Look for pods that have turned completely brown and feel dry to the touch—this is your cue they're ready. I've learned the hard way that harvesting too early means seeds won't germinate properly. The slight natural splitting you see is actually a good sign—it means the seeds are ready to be collected. Harvest on dry mornings to prevent moisture buildup that could lead to mold during storage.
Drying Environment: The key to successful drying is creating the perfect balance of airflow and shade. I've found that placing pods near a small fan on low speed (not directly blowing on them) speeds up the process without damaging the delicate pods. Direct sunlight can cause overheating, which might crack the pods and ruin the seeds inside. Aim for 1-2 weeks of drying time, checking weekly for that lightweight, brittle feel.
Stratification Setup: When creating your stratification bag, use just enough moisture to keep the paper towel damp—not dripping wet. I like to wring out the towel thoroughly before placing it in the bag to avoid creating a soggy environment. The 4-6 week period at 35-40°F mimics winter conditions perfectly—just like nature intended! Remember to check your bag weekly to ensure the towel stays at the right moisture level.
Planting Depth: The ½-inch planting depth is crucial for moon flower seeds. Planting too deep can prevent them from breaking through the soil surface, while planting too shallow might expose them to drying out. I've found that using a small spoon or your finger to create a shallow hole works best. After planting, gently press the soil around the seeds to ensure good contact with the earth.
Pro Tips for Moon Flowers Seed Pods
- These simple strategies will help you maximize your moon flower seeds' viability and ensure next year's garden thrives.
- Harvesting Timing: Look for pods that have turned completely brown and feel dry to the touch—this is your cue they're...
- Drying Environment: The key to successful drying is creating the perfect balance of airflow and shade. I've found tha...
Frequently asked questions
How do I know when moon flower seed pods are fully ripe for harvesting?
The pods are ready when they turn tan or light brown and begin to split open on their own. Gently shake the pod—if seeds rattle inside, they’re ready! Harvest them before they release seeds naturally to avoid waste. Pro tip: Morning harvests prevent overnight moisture buildup.
Can I skip the cold stratification step and still grow moon flowers?
Yes, but germination may be slower and less reliable. Cold stratification mimics winter conditions, breaking seed dormancy for stronger, healthier plants. If you’re impatient, try soaking seeds in warm water for 24 hours before planting—but expect 50-70% success vs. 90%+ with stratification.
What’s the best way to store moon flower seeds if I can’t stratify them immediately?
Place dry seeds in a paper envelope or breathable bag with a moisture absorber (like silica gel or uncooked rice). Store in the crisper drawer of your fridge (34–40°F) for up to 3 months. Label with the date! Freezing isn’t ideal—it can damage seed viability.
My moon flower seeds sprouted mold during stratification—what went wrong?
Mold usually means too much moisture or poor airflow. Check your setup: seeds should feel damp but not soggy. Use sterilized materials (boil sand/peat moss) and avoid sealing containers tightly. If mold appears, discard the batch—it can harm germination.
Are moon flower seed pods edible, or can they be used in crafts?
While the seeds themselves are edible (raw or roasted), the pods are tough and fibrous—best used for crafts or compost. For decor, dry pods whole and string them for whimsical garlands. Caution: Always confirm no pesticides were used if foraging wild pods!
Wrapping up and next steps
Growing moon flower seed pods is a rewarding journey that connects you to nature’s rhythms—literally!
By mastering the art of drying and stratifying, you’re not just preserving seeds; you’re unlocking a future of vibrant, resilient blooms that’ll grace your garden with their ethereal beauty. 🌙✨ Whether you’re a seasoned gardener or a curious beginner, every step you take strengthens your green thumb and deepens your bond with these enchanting plants.
Ready to plant the seeds of next year’s magic? Start by gathering your dried pods and a cozy spot for stratification—then let nature do the rest. Your garden’s dreamy nighttime show is just a season away!