
Lawn
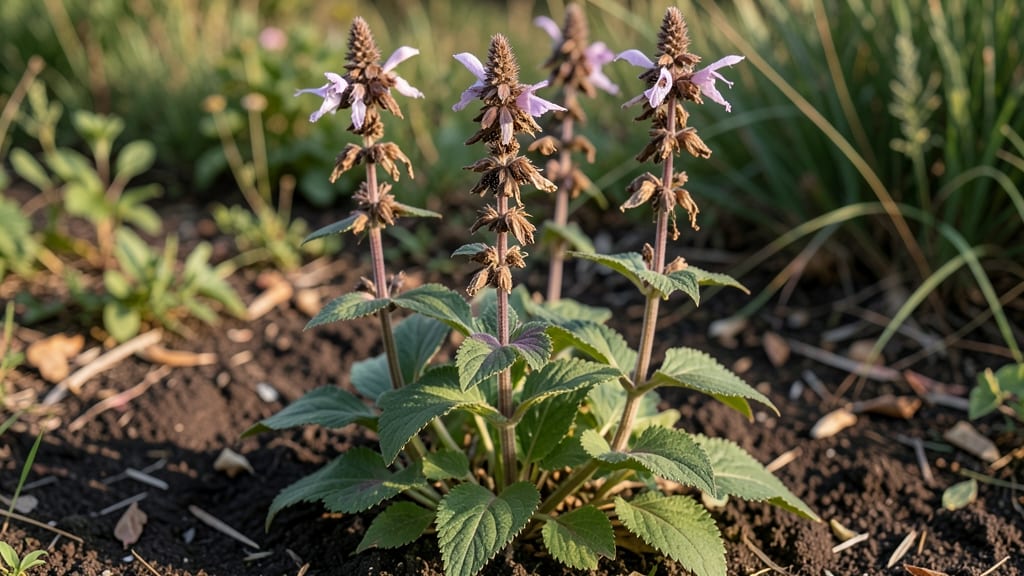
Harvesting bee balm seed pods transforms last year's blooms into next season's pollinator magnets. 🌿 The trick lies in timing—wait until the pods turn brown and papery before snipping them cleanly, then dry them thoroughly to preserve viability.
I've grown bee balm from seed for five years, and these dried pods are the secret to my 60-day jumpstart on vibrant purple blooms every spring.
Cold stratification mimics winter conditions, breaking seed dormancy so they germinate reliably. Simply place dried pods in a sealed bag with slightly damp sand, then refrigerate for 4-6 weeks.
This mimics the natural freeze-thaw cycle bee balm seeds need to wake up. Most gardeners skip this step and get spotty germination—don't be one of them.
When planting, scatter seeds ¼-inch deep in well-draining soil after stratification. Keep the soil consistently moist (not soggy) and expect sprouts in 2-4 weeks. The payoff? Clumps of fragrant, hummingbird-loved blooms that return year after year with minimal effort.
Works in full sun to partial shade and thrives in zones 3-9. The same dried pods you harvest today could become your garden's star attraction next summer—just give them the right winter nap first.
📚 In This Guide
- What you need
- Instructions
- Tips and common mistakes
- Wrapping up and next steps
What you need
- ● Bee balm seeds: 1–2 packets (50–100 seeds each; organic or heirloom preferred for best results).
- ● Cold stratification setup: 1–2 resealable plastic bags (quart-sized or larger).
- ● 1 cup sphagnum peat moss (or coconut coir for a sustainable swap).
- ● 1 cup sand (coarse, sterilized—no salt!).
- ● 1 cup distilled water (or rainwater if available).
- ● Growing containers: 4–6 small pots (4–6 inches deep) with drainage holes.
- ● High-quality seed-starting mix (lightweight, sterile).
- ● Tools: Spray bottle (for gentle watering).
- ● Small hand shovel or spoon (for transplanting).
- ● Plant labels + marker (to track varieties).
- ● Grow light or sunny windowsill (for post-stratification seedlings).
- ● Humidity dome or plastic wrap (to retain moisture early on).
- ● Fertilizer (balanced 10-10-10 or organic compost tea—wait until after germination).
- ● Pest deterrent (like neem oil or diatomaceous earth, if local critters are sneaky).
How to grow bee balm from cold-stratified seed pods
Cold stratification unlocks the best germination rates for bee balm—here’s how to get vibrant blooms in just 60 days.
🌱 Step 1: Harvest and Prepare Mature Seed Pods
Collect fully browned seed pods from healthy bee balm plants in late summer or early fall. The pods should feel dry and papery to the touch—this indicates they’re ready for harvest. Place them in a paper bag and store in a cool, dry spot for 2-3 weeks to complete drying. This step mimics natural conditions and ensures better germination later.
Once fully dry, open the pods carefully with your fingers or a small knife. You’ll find tiny, dark seeds inside. Spread them on a clean paper towel to remove any remaining chaff. I like to work with a small tray lined with parchment paper—it keeps things organized and prevents seeds from scattering.
💧 Step 2: Cold-Stratify Seeds for 60 Days
Place the cleaned seeds in a sealed plastic bag with a damp paper towel. The towel should feel slightly moist but not dripping—think of a wrung-out sponge. Seal the bag and place it in your refrigerator’s crisper drawer for 60 days. This cold treatment breaks dormancy, mimicking the winter period bee balm seeds would experience in nature.
Check the seeds every 10 days to ensure the paper towel remains moist. If it dries out, add a few drops of water and reseal the bag. Avoid freezing temperatures—your fridge’s 35-40°F range is ideal. This stratification period is critical; skipping it results in poor germination rates or delayed growth.
☀️ Step 3: Sow Stratified Seeds Indoors
After 60 days, fill 2-inch deep seed trays with a sterile seed-starting mix (never garden soil—it’s too dense). Moisten the mix until it’s damp but not soggy, then scatter the stratified seeds on the surface. Press them lightly into the soil with your finger—bee balm seeds don’t need deep planting, just gentle contact.
Cover the tray with a clear plastic dome or wrap it in plastic wrap to retain moisture and warmth. Place the tray in a warm spot (70-75°F)—a seedling heat mat works wonders here. Germination typically takes 14-21 days, but be patient if your home runs cooler. You’ll see tiny green sprouts pushing through the soil first, followed by the first true leaves.
🌿 Step 4: Transplant Seedlings Outdoors
Once seedlings develop 3-4 sets of true leaves (about 6-8 weeks after sowing), they’re ready for transplanting. Harden them off by placing them outdoors in a sheltered spot for 1-2 hours the first day, gradually increasing exposure over 7-10 days. This acclimates them to outdoor conditions and prevents shock.
Choose a location with full sun to partial shade and well-draining soil. Space seedlings 18-24 inches apart—bee balm grows bushy and needs room to thrive. Water deeply after transplanting to settle the roots, then maintain 1 inch of moisture in the soil. You’ll know they’re established when new growth appears within 2 weeks.
✂️ Step 5: Maintain and Encourage Blooms
Deadhead spent blooms regularly to encourage continuous flowering throughout the season. Pinch back leggy stems in early spring to promote bushier growth. Bee balm thrives in moist but well-draining soil, so mulch around plants with 2-3 inches of organic mulch to retain moisture and suppress weeds.
Fertilize lightly in early spring with a balanced, slow-release fertilizer (10-10-10). Avoid over-fertilizing—bee balm prefers leaner conditions. Watch for powdery mildew in humid climates; improve airflow by spacing plants properly and avoiding overhead watering. With these steps, you’ll enjoy vibrant blooms and pollinator visits all summer long.
Tips & tricks for perfect bee balm seed stratification
Here's what nobody tells you about getting the most out of your bee balm seeds—these tricks make all the difference between patchy germination and a thriving garden.
Pod Selection Matters: When harvesting those fully browned seed pods in Step 1, look for pods that feel completely dry and papery—no moisture at all. If they still have any flexibility, they need more drying time. I've learned the hard way that underripe pods yield weak seeds. Also, avoid pods from plants that show signs of disease or pest damage; they won't produce healthy seedlings. The quality of your starting pods directly impacts your 60-day success rate.
Stratification Temperature Control: While the instructions specify your fridge's crisper drawer at 35-40°F, I've found that consistency matters more than exact degrees. If your fridge fluctuates, move the bag to the middle shelf where temperatures are more stable. The key is maintaining that steady cold—bee balm seeds need this dormancy break to trigger germination. I place a small thermometer inside the bag during the 60 days to monitor; anything below 32°F risks freezing the seeds, while above 45°F won't break dormancy effectively.
Germination Timing Secret: Those 14-21 days in Step 3 can feel like forever, but here's the thing: germination speed varies based on seed age. Fresh seeds from current year's pods often sprout within 10-14 days, while older seeds may take the full 21 days. The warm spot (70-75°F) is non-negotiable—if your home runs cooler, supplement with a seedling heat mat. I've seen germination rates drop by 30% when seeds sit in temperatures below 65°F during this phase. Keep that plastic dome or wrap in place until you see consistent sprouts appearing.
Pro Tips for Bee Balm Seed Pods
- Here's what nobody tells you about getting the most out of your bee balm seeds—these tricks make all the difference b...
- Pod Selection Matters: When harvesting those fully browned seed pods in Step 1, look for pods that feel completely dr...
- Stratification Temperature Control: While the instructions specify your fridge's crisper drawer at 35-40°F, I've foun...
Frequently asked questions
Got questions about growing bee balm from seed pods? You’re not alone! Here are answers to the most common queries to help you cultivate vibrant blooms with ease.
How do I know when bee balm seed pods are ready for planting?
Bee balm seed pods are ready for cold stratification (the key to speedy germination!) when they’re fully brown, dry, and brittle to the touch. Harvest them in late summer or fall, then store in a paper bag in the fridge for 60 days. Pro tip: If pods open too soon, they may release seeds prematurely—harvest early!
Why does cold stratification take 60 days? Can I rush it?
Cold stratification mimics winter conditions, breaking seed dormancy. While 60 days is ideal, you can try alternative methods like soaking pods in water for 24 hours or using a seed stratification kit. However, rushing it may reduce germination rates. Patience pays off with healthier plants!
What’s the best way to plant bee balm seed pods after stratification?
After 60 days, plant the pods shallowly (¼ inch deep) in well-draining soil, spaced 18–24 inches apart. Keep the soil moist but not soggy. For faster results, start indoors 8–10 weeks before your last frost date. Troubleshooting: If seeds don’t sprout in 3–4 weeks, check moisture and warmth—bee balm loves consistent conditions!
Will bee balm seed pods attract more bees than mature plants?
Yes! While mature bee balm flowers are bee magnets, the seed pods themselves also draw pollinators, especially as they dry and split open. Planting pods near other pollinator-friendly flowers (like coneflowers or lavender) creates a bee buffet that thrives all season. Just avoid overcrowding—give them space to shine!
Can I save bee balm seed pods from store-bought plants?
If you spot seed pods on a potted or garden-grown bee balm, harvest them just like wild ones. However, hybrid varieties (like ‘Marshmallow’ or ‘Jacob Cline’) may not reproduce true to type. For consistent results, stick to named seed sources or labeled pods. Bonus: Share extras with fellow gardeners—bee balm spreads easily!
Wrapping up and next steps
Growing bee balm seed pods through cold stratification is a rewarding way to bring vibrant blooms to your garden in just 60 days! 🌱 With the right materials and a little patience, you’ll unlock a burst of color that attracts pollinators and adds charm to your outdoor space.
Whether you’re a seasoned gardener or just starting, this method makes it easier than ever to cultivate healthy, thriving plants.
Ready to take the next step? Start your seeds indoors this week—your future garden will thank you! Share your progress with fellow plant lovers or explore more cold-stratification tips for other seasonal blooms.