
Lawn
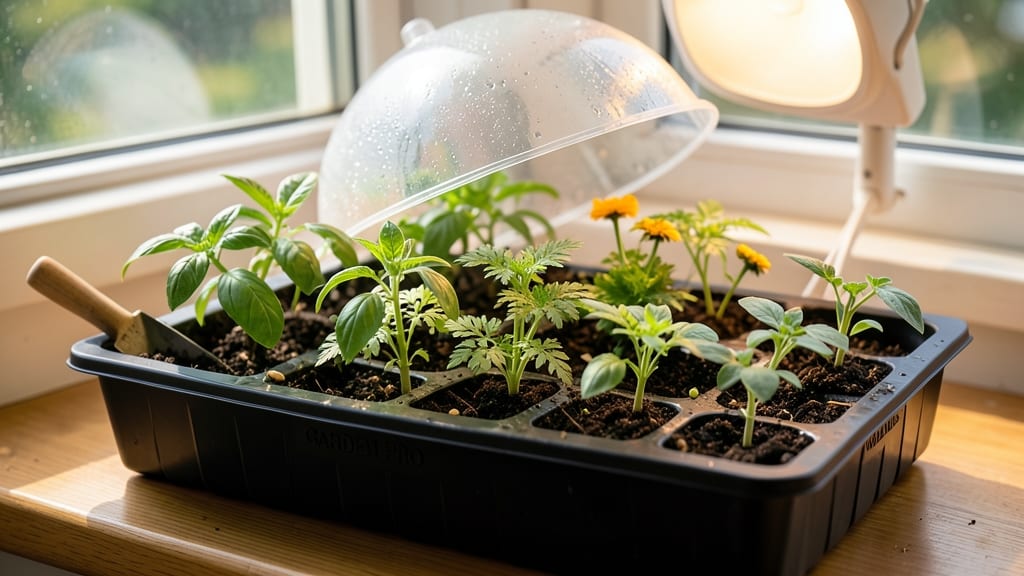
My deep seed trays transformed my seed-starting game by keeping roots happy and moisture steady—no more leggy, thirsty seedlings. 🌱 The secret lies in that extra depth, which gives young roots room to explore while the layered soil holds just the right amount of dampness.
I went from struggling with weak transplants to sturdy seedlings that outperform store-bought plants every time.
Choose trays that are at least 4-6 inches deep for most vegetables and herbs—this depth prevents root binding while keeping the soil consistently moist.
Fill them with a light, well-draining mix (I use 60% peat or coco coir, 30% perlite, and 10% compost) and plant seeds according to their depth requirements. The key is keeping the top inch of soil damp, not soggy, which these deeper trays help regulate naturally.
You’ll notice stronger stems and deeper root systems within just 10-14 days, setting seedlings up for a smoother transition to the garden. The trays also make it easier to harden off plants—simply move them outdoors gradually, and the deep roots adapt better to transplant shock.
For space-saving, stackable trays, you can fit twice as many seedlings in the same footprint as shallow trays.
Common mistakes? Overwatering (which causes damping off) or letting the soil dry out completely. I also recommend labeling trays by planting date—this helps track when to transplant. Works perfectly for tomatoes, peppers, and leafy greens, but avoid for tiny seeds like lettuce that prefer shallower sowing.
📚 In This Guide
- What you need
- Instructions
- Tips and common mistakes
- Wrapping up and next steps
What you need
- ● Deep seed trays: 1–3 trays (10–12" deep, with drainage holes) – plastic or biodegradable options work best.
- ● Quality seed-starting mix: 5–10 lbs (depending on tray size) – sterilized, lightweight, and well-draining.
- ● Seeds: Your chosen variety (follow packet instructions for spacing/depth).
- ● Watering can or spray bottle: With a fine mist nozzle to avoid displacing seeds.
- ● Clear plastic dome or plastic wrap: To create a humidity tent (cut to fit tray snugly).
- ● Flat rocks or pebbles: 1–2 lbs – for bottom layer drainage.
- ● Trowel or small shovel: For gentle soil layering.
- ● Label markers & tags: To track seed types and planting dates.
- ● Heating mat: For faster germination (especially for cool-season seeds).
- ● Grow lights or sunny windowsill: 12–16 hours of light daily.
- ● Fertilizer (low-dose): Organic starter mix or diluted liquid fertilizer for nutrient boost.
- ● Thermometer/hygrometer: To monitor soil temp/humidity (ideal: 65–75°F).
- ● Seedling cloche or mini greenhouse: For extra protection in chilly climates.
Step-by-step guide to mastering deep seed trays for optimal germination
Here's how I transform simple trays into germination powerhouses—keeping moisture perfect while preventing rot.
🌱 Step 1: Prepare Trays with Strategic Moisture Zones
Start by lining the bottom of each deep tray with a ¼-inch layer of coarse perlite or vermiculite. This creates a drainage reservoir that prevents soggy bottoms while holding moisture near the roots. I always use a fine-mesh screen (like hardware cloth) over the drainage holes to keep this layer in place—no more perlite escaping when you water.
Next, add 2 inches of your seed-starting mix on top. Press it down gently with your fingers until it's firm but still crumbly. The goal is to eliminate air pockets while maintaining that loose, breathable structure. Tap the tray lightly on the table to settle everything evenly—this ensures consistent moisture distribution from the bottom up.
💧 Step 2: Create a Moisture Gradient for Even Germination
Water the bottom layer first by adding ½ inch of water to the reservoir at the base. Let it wick upward for 10-15 minutes until the top layer looks uniformly damp but not saturated. You'll see the moisture climb steadily—this is how deep trays work their magic. Use a moisture meter if you're unsure; the reading should be in the 60-70% range at the root zone.
Here's the thing—I avoid watering from above until after germination. Top-watering can disturb the delicate moisture balance and bury seeds too deep. Instead, I check moisture by pressing a finger 1 inch down—if it feels dry, add a ¼-inch layer of water to the reservoir. This method keeps seeds perfectly hydrated without the risk of damping-off.
☀️ Step 3: Sow Seeds at the Correct Depth for Each Species
Plant seeds according to their specific depth requirements, but never deeper than twice their diameter. For tiny seeds like lettuce, I use the toothpick method: press a moistened toothpick into the soil, lift a seed onto it, then place it gently in the tray. This prevents burying them too deep. Larger seeds like beans get a ½-inch deep planting, while delicate ones like snapdragons only need ¼ inch of coverage.
I label each tray with the seed type and date—after a week, identical sprouts can look completely different based on species. Space seeds ½ inch apart in rows, leaving 1 inch between rows for airflow. Crowding leads to weak, leggy seedlings that compete for light and nutrients. Once planted, give the trays a light misting to settle the seeds into place.
⏰ Step 4: Maintain Ideal Conditions Without Overwatering
Cover the trays with clear plastic domes or plastic wrap to retain humidity, but remove them immediately once you see 50% germination. This prevents fungal growth while keeping the environment moist. Place trays on a seedling heat mat set to 75-80°F—this warmth speeds germination dramatically. Without one, expect 3-5 extra days of waiting.
Check moisture daily by lifting the tray—if it feels noticeably lighter, add 2-3 tablespoons of water to the reservoir. The top layer should stay barely damp; you'll see condensation on the dome if humidity is too high. Rotate trays ¼ turn daily so all seedlings get even light exposure. Leggy growth? Your light source is too far away—move it within 2-3 inches of the tallest sprouts.
🌿 Step 5: Transition to Independent Growth
Once seedlings show their first true leaves (not the initial seed leaves), remove the dome completely. This forces them to strengthen their cell walls and prepares them for life without artificial humidity. Reduce watering to every 2-3 days, checking the top ½ inch of soil for dryness. Overwatering now causes root rot—you'll see yellowing leaves and a foul smell if this happens.
When seedlings reach 2-3 inches tall, thin them to 1 plant per cell if needed. Use sharp scissors to snip at soil level—this prevents disturbing roots. For deep trays, I transplant directly into larger containers by sliding the entire cell out. The deep root structure you've cultivated will give them a 2-week head start over shallow-started plants.
Tips & tricks for perfect deep seed trays
These simple strategies will help you maximize your seedling success with minimal effort.
Layering Technique: The secret to deep trays lies in their vertical structure. After adding your ¼-inch layer of coarse perlite or vermiculite and 2 inches of seed-starting mix, press the soil firmly but gently—this creates tiny air pockets that improve drainage while maintaining moisture. I find tapping the tray lightly on the table helps settle everything evenly without compacting too much. This layered approach prevents the dreaded "soggy bottom" syndrome that ruins so many shallow trays.
Moisture Monitoring: Those 10-15 minutes you wait after adding water to the reservoir are crucial. This is when the wicking action happens—you'll see moisture climb visibly from the bottom. For visual confirmation, I press my finger 1 inch down—if it feels damp but not wet, you're golden. Too dry? Add another ¼-inch layer of water to the reservoir. The key is consistency: aim for that 60-70% moisture range at all times.
Species-Specific Planting: Never guess when planting seeds—each type has unique needs. For tiny seeds like lettuce, my toothpick method ensures they're only ¼ inch deep without being buried. Larger seeds like beans get ½-inch coverage, while delicate snapdragons stay barely covered. I always label trays immediately with seed type and date—after germination, identical-looking seedlings can be completely different species!
Light Management: Leggy seedlings are a dead giveaway that your light source is too far away. The moment you see them stretching toward the light, move your grow lights within 2-3 inches of the tallest sprouts. I rotate trays ¼ turn daily to ensure even growth—this prevents lopsided seedlings that lean toward the light source. A simple timer for 14-16 hours of light daily mimics natural daylight cycles perfectly.
Pro Tips for Deep Seed Trays
- These simple strategies will help you maximize your seedling success with minimal effort.
- Layering Technique: The secret to deep trays lies in their vertical structure. After adding your ¼-inch layer of coar...
- Moisture Monitoring: Those 10-15 minutes you wait after adding water to the reservoir are crucial. This is when the w...
Frequently asked questions
Got questions about deep seed trays?
You’re not alone! Here are some of the most common concerns—plus quick, practical answers to help you grow like a pro.
What’s the ideal depth for deep seed trays?
Most deep seed trays range from 2 to 6 inches deep, depending on the seed type. Smaller seeds (like lettuce or basil) thrive in shallower trays (2–3 inches), while larger seeds (e.g., beans or peas) need deeper trays (4–6 inches) to develop strong roots before transplanting.
How long should seeds stay in deep seed trays?
Keep seeds in trays until they’ve developed 2–4 true leaves (not just seed leaves). This usually takes 2–4 weeks, depending on the plant. Overcrowding or leaving them too long can stunt growth—check your seed packet for species-specific timing!
Do deep seed trays need drainage holes?
Yes, absolutely!
Without drainage, roots suffocate in soggy soil, leading to rot. If your trays lack holes, poke them yourself with a nail or drill. For extra insurance, place trays on a saucer or elevated stand to catch excess water.
Can I reuse deep seed trays?
Clean trays with soapy water and a 10% bleach solution (1 part bleach to 9 parts water) to kill pathogens. Rinse thoroughly and let dry in the sun. Pro tip: Sterilize between different seed types to prevent cross-contamination.
What’s a good alternative if I don’t have deep seed trays?
No trays? No problem! Use:
- Plastic containers (yogurt cups, milk jugs) with drainage holes.
- Biodegradable pots (made from peat or coconut coir).
- DIY layered trays with cardboard boxes lined with moist paper towels.
Why are my seeds rotting in deep seed trays?
Overwatering or poor drainage are the top culprits. Let the top inch of soil dry between waterings, and avoid cold, damp conditions. If mold appears, remove affected seeds and improve airflow with a small fan. Preventative tip: Use a well-draining seed-starting mix!
Wrapping up and next steps
Deep seed trays are a game-changer for gardeners aiming for healthier, more resilient sprouts—and you’re now equipped with all the know-how to make them work for you! 🌱 By mastering moisture control, material selection, and proper care, you’ll set your seedlings up for success from day one.
Whether you’re a beginner or a seasoned green thumb, these trays simplify the process and boost your chances of a thriving garden.
Ready to grow? Start small—try a single tray with your favorite seeds this season, and watch your confidence (and sprouts!) flourish. Happy planting! 🌿