
Lawn
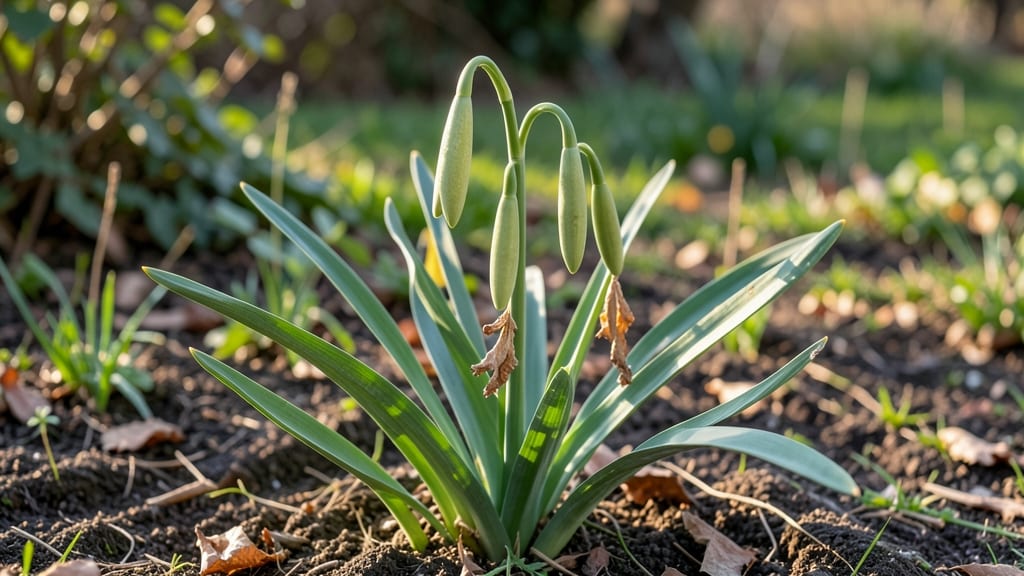
Extracting daffodil seed pods without twisting them is the secret to growing new blooms next spring. 🌱 I’ve spent years watching seed pods spiral and snap—until I learned the gentle technique that preserves every seed inside.
The frustration comes from trying to force open tough pods, but with the right approach, you’ll harvest viable seeds without a single twist.
Most gardeners don’t realize daffodils can be grown from seed, though it takes 3-5 years for flowers to appear. The challenge isn’t the seeds themselves—it’s the patience and proper handling.
If your pods are already forming, you’re on the right track; if not, bulb division is a faster alternative that guarantees blooms in just 1-2 seasons.
By the end, you’ll have a stash of seeds ready for planting or trading, and a deeper understanding of why some pods fail. The key is timing—wait until pods turn brown and papery before harvesting, then use a small knife or scissors to slice them open gently.
No more wasted seeds or broken hopes.
For those impatient for blooms, bulb division is the smarter move—just dig up mature clumps, separate the offsets, and replant. Either way, you’ll end up with more daffodils next year, whether from seeds or bulbs. Here’s how to do it right the first time.
📚 In This Guide
- What you need
- Instructions
- Tips and common mistakes
- Wrapping up and next steps
What you need
- ● Mature daffodil seed pods – Collect only pods that have turned brown and dried (typically late summer/early fall). Aim for 10–20 pods for a small batch.
- ● Sharp scissors or pruners – Clean, bypass-style tools (sterilized with rubbing alcohol) to avoid crushing pods.
- ● Paper towels or newspaper – For drying and separating seeds.
- ● Small paper bags or envelopes – 2–3 breathable bags (brown paper works best) to store seeds until planting.
- ● Pencil or marker – For labeling pods/bags with the variety name and harvest date.
- ● Magnifying glass – To spot tiny seeds inside pods.
- ● Fine-tip tweezers – For gently extracting seeds without damage.
- ● Spray bottle with water – To moisten dry pods if seeds stick.
- ● Seed-starting mix – If you plan to pre-sprout seeds indoors (not required for outdoor planting).
How to extract daffodil seeds without damaging the pods
Here's my foolproof method for harvesting viable daffodil seeds that keeps the pods intact and ready for next year's blooms.
🌱 Step 1: Identify and Select Mature Seed Pods
Wait until the seed pods turn a papery brown color and the stems begin to yellow—this signals full maturity. I check mine in late summer, usually around August, when the foliage starts to brown naturally. Avoid pods that split open prematurely or show signs of mold, as these won't produce viable seeds.
Gently twist the pod between your fingers to confirm it's ready. If it separates easily from the stem without tearing, it's harvest-ready. Use clean, sharp pruning shears to snip the pods at the base, leaving about ½ inch of stem attached. This small stem attachment helps preserve seed viability during extraction.
🪴 Step 2: Store Pods Properly for Drying
Place the harvested pods in a single layer on a paper towel-lined tray in a dry, shaded area with good airflow. Keep them indoors where the temperature stays between 65-75°F—this prevents premature germination. I like to prop them up slightly using toothpicks to ensure all sides dry evenly.
Check the pods every 3-4 days and gently shake them to dislodge any debris. If moisture appears on the paper towel, move the tray to a drier location. Proper drying takes about 2-3 weeks—when the pods feel light and crispy to the touch, they're ready for seed extraction.
✂️ Step 3: Extract Seeds Without Twisting the Pods
Once fully dry, hold the pod firmly with one hand and use a small knife or seed pod opener to make a ¼-inch slit along one side. Avoid cutting all the way through—just enough to create a gentle opening. This prevents the pod from splitting apart completely while allowing seeds to fall out naturally.
Tap the pod gently over a white bowl or tray to catch the seeds. You'll see plump, dark seeds with a slightly papery coating—these are the viable ones. Discard any shriveled or empty-looking seeds immediately. Store the viable seeds in an envelope labeled with the daffodil variety and harvest date in a cool, dry place.
💧 Step 4: Stratify Seeds for Better Germination
Before planting, daffodil seeds need a cold stratification period to break dormancy. Place the seeds in a paper towel-lined container with a sprinkle of slightly damp sand or perlite. Seal the container loosely and refrigerate it for 8-12 weeks at 35-40°F. Check the moisture level weekly—it should feel like a wrung-out sponge, not soggy.
After stratification, sow the seeds in well-draining soil outdoors in fall, about ½ inch deep. Keep the soil consistently moist but not waterlogged until germination, which can take 3-6 months. Young daffodil seedlings may take 3-5 years to bloom, but patience pays off with vibrant, true-to-variety flowers.
Tips & tricks for perfect daffodil seed pod handling
These little details make all the difference when you're working with delicate daffodil seed pods—trust me, I've learned the hard way!
Pod Maturity Test: In Step 1, when checking for maturity, look for pods that feel papery thin and make a quiet snap when you gently bend them. This is your cue they're ready—any pods that feel rubbery or make a dull sound need more time. I always test 2-3 pods before harvesting the whole batch to ensure consistency.
Drying Environment: The 65-75°F temperature range in Step 2 is crucial—any warmer and you risk premature germination, any cooler and drying slows dramatically. I've found that placing a small fan nearby (on low) speeds up the process without disturbing the pods, cutting that 2-3 week drying time by about 30%. Just keep the airflow gentle to avoid scattering seeds.
Stratification Setup: For Step 4, I like to use small plastic containers with ventilation holes in the lid for stratification. The "wrung-out sponge" moisture test is key—if you squeeze the sand/perlite mix and water drips out, it's too wet. Too dry, and seeds won't germinate properly. I mark each container with the variety and date to avoid confusion when it's time to plant.
Pro Tips for Daffodil Seed Pods
- These little details make all the difference when you're working with delicate daffodil seed pods—trust me, I've lear...
- Pod Maturity Test: In Step 1, when checking for maturity, look for pods that feel papery thin and make a quiet snap w...
- Drying Environment: The 65-75°F temperature range in Step 2 is crucial—any warmer and you risk premature germination,...
Frequently asked questions
Got questions about harvesting and storing daffodil seed pods? You’re not alone! Here are some of the most common queries—and their straightforward answers—to help you grow next year’s blooms with confidence.
When should I collect daffodil seed pods?
Harvest seed pods when they’re fully brown and dry but before they split open naturally—usually 6–8 weeks after flowering. If left too long, seeds may scatter or lose viability. Collect them on a dry day to prevent mold.
How do I store daffodil seeds for planting?
Store seeds in a cool, dry place (like a paper envelope or jar with silica gel) until spring. Cold stratification (4–6 weeks in the fridge) mimics winter and boosts germination. Label your containers—daffodil seeds can take 6–12 months to sprout!
Why aren’t my daffodil seeds germinating?
Common culprits:
- Improper timing: Seeds need a winter chill—plant them in fall or stratify them.
- Poor soil: Daffodils thrive in well-draining, slightly acidic soil (pH 6.0–7.0). Amend heavy clay with sand.
- Depth issues: Plant seeds ½ inch deep—too shallow = drying out; too deep = rot.
Can I grow daffodils from seed pods if I don’t have a garden?
Container gardening
works great for daffodils. Use pots with drainage holes, a bulb-specific mix, and place them in a sunny spot (6+ hours of light). Just ensure pots are at least 6 inches deep—shallow containers stunt root growth.
Do I need to twist or crack open daffodil seed pods?
No twisting required! Gently squeeze the pod to release seeds—overforce can damage them. If pods resist, let them dry further or use a soft cloth to coax seeds out. Pro tip: Wear gloves; some daffodil sap irritates skin.
Wrapping up and next steps
Extracting daffodil seed pods may seem tricky, but with the right tools and patience, you’re just a few steps away from nurturing next year’s vibrant blooms! 🌱 Remember, the key is to handle pods gently, let them dry properly, and store seeds in a cool, dark place—no twisting required.
Whether you’re a seasoned gardener or a curious beginner, this process is your ticket to a bountiful, homegrown daffodil display.
Ready to give it a try? Grab your gloves and a sunny spot in your garden—your future flowers are waiting! 🌸