
Lawn
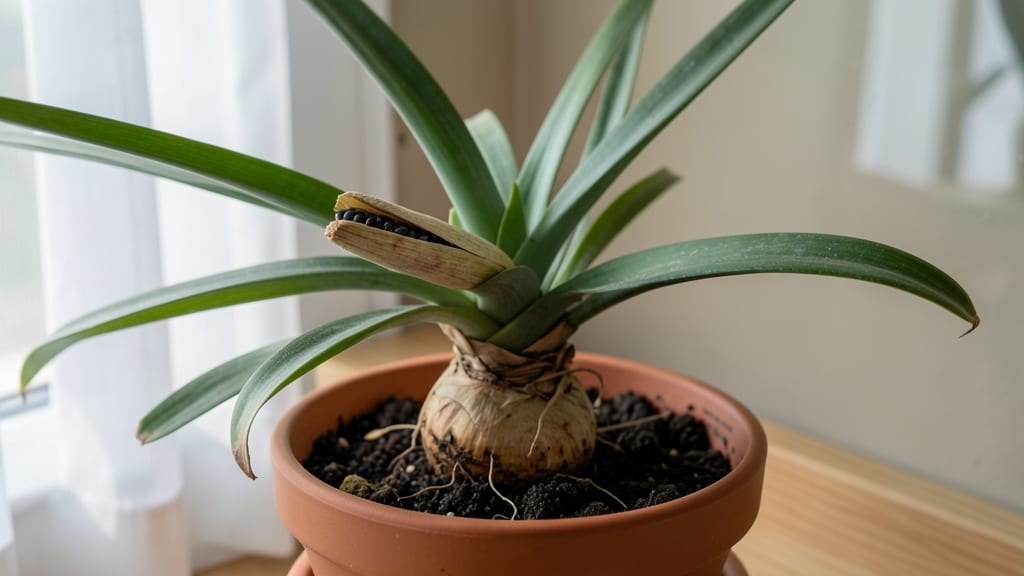
Breaking amaryllis seed pod dormancy feels like unlocking a secret garden. 🌱 These papery pods appear after blooms fade, but most gardeners miss the chance to grow new plants from them—until now.
The key is knowing exactly when to collect seeds and how to trick them into sprouting faster than store-bought bulbs.
You’ll need just three things: the seed pods themselves, a warm spot, and patience (though I’ll show you how to cut weeks off germination time). The pods take about 6-8 weeks to mature after flowering, so mark your calendar when those dramatic red blooms appear.
Once ripe, they’ll split open on their own—don’t rush it, or you’ll end up with shriveled seeds.
What you’ll get is a head start on next year’s amaryllis collection. These homegrown plants often outperform nursery bulbs because they’re adapted to your exact growing conditions. The first true leaves appear in 4-6 weeks with proper care, and by spring, you’ll have sturdy young bulbs ready for potting.
Works for both indoor and greenhouse growers—just adjust light and humidity. Here’s how to do it without the guesswork or wasted seeds. Let’s get those pods germinating!
📚 In This Guide
- What you need
- Instructions
- Tips and common mistakes
- Wrapping up and next steps
What you need
- ● Mature amaryllis seed pods – Collect freshly dried pods (brown, papery texture) from healthy plants. Aim for 5–10 pods for experimentation.
- ● Sharp pruning shears or scissors – For carefully snipping open pods without damaging seeds.
- ● Paper towels or coffee filters – 2–3 sheets per pod to absorb moisture and prevent mold.
- ● Plastic zip-top bags – 1–2 quart-sized bags (or small containers with lids) for humidity control.
- ● Spray bottle (with room-temperature water) – For gentle misting—avoid soaking!
- ○ Small pots or seed trays – 3–4-inch diameter, with drainage holes. Optional: Use biodegradable pots for transplant ease.
- ● Well-draining potting mix – A blend of 50% peat moss, 30% perlite, and 20% vermiculite (or a cactus/succulent mix).
- ● Grow lights or sunny windowsill – 6–8 hours of indirect light daily (south-facing window or LED grow bulb).
- ○ Thermometer (optional but helpful) – To monitor 60–70°F (15–21°C) soil temps during dormancy.
- ○ Fungicide (optional) – Neem oil or hydrogen peroxide (3%) to prevent mold if humidity runs high.
- ● Patience & a calendar – Germination can take 4–12 weeks—track progress with notes!
- ○ Heat mat (optional) – For 70–75°F (21–24°C) soil warmth to speed up sprouting.
Step-by-Step instructions for breaking amaryllis seed pod dormancy
Turn those stubborn seed pods into fast-growing seedlings with these proven techniques.
🌱 Step 1: Harvest and Prepare the Seed Pods
Collect mature seed pods when they turn brown and begin splitting open naturally—this ensures maximum viability. Gently twist them from the stem and place in a paper bag to catch the seeds as they release. Avoid squeezing the pods, as this can damage the delicate seeds inside.
Once all seeds have fallen out, remove any shriveled or discolored ones—they won’t germinate. Store the healthy seeds in a cool, dry place (around 50-60°F) until you’re ready to break dormancy. I like to label them with the harvest date so I don’t forget which batch I’m working with.
💧 Step 2: Stratify Seeds to Break Dormancy
Amaryllis seeds need a cold period to trigger germination, a process called stratification. Place the seeds in a sealed container with slightly damp sphagnum moss or paper towels—just enough moisture to keep them from drying out. Store the container in your refrigerator’s vegetable crisper for 8-12 weeks.
Check the seeds every 2-3 weeks to ensure they haven’t dried out. If the moss feels dry, mist it lightly with water. This cold treatment mimics winter conditions and signals the seeds it’s safe to sprout. Real talk: Skipping stratification means waiting months (or years) for germination—don’t skip this step!
☀️ Step 3: Sow Stratified Seeds in Warmth
After stratification, plant the seeds in a well-draining potting mix (I use a blend of 50% peat moss, 30% perlite, and 20% vermiculite) in small 2-inch pots. Press each seed ½ inch deep—deeper planting slows germination, while shallower planting risks drying. Water gently until the soil is moist but not soggy.
Place the pots in a warm spot (70-75°F) with bright, indirect light—a south-facing window works, but avoid direct midday sun. You’ll see tiny sprouts in 4-8 weeks, though some stubborn seeds may take longer. Patience pays off here; don’t rush the process by overwatering or moving them too soon.
🌿 Step 4: Transplant and Care for Seedlings
Once seedlings develop 2-3 true leaves (not just the initial seed leaves), transplant them into 3-inch pots with fresh potting mix. Handle them gently—they’re delicate at this stage. Keep the soil consistently moist but never waterlogged; amaryllis seedlings hate soggy roots.
Gradually introduce them to more sunlight over 1-2 weeks, moving them outdoors only after nighttime temperatures stay above 55°F. You’ll notice stronger growth when they’re in 4-6 hours of morning sun combined with afternoon shade. This slow acclimation prevents shock and encourages robust stems.
⏰ Step 5: Overwinter for Bulb Development
After the first growing season, let the seedlings mature into small bulbs by reducing water in fall and allowing the foliage to yellow naturally. Once the leaves die back, store the pots in a cool, dark place (50-60°F) for 8-10 weeks—this mimics dormancy and builds bulb strength.
In spring, repot into 4-5 inch containers with fresh mix and resume watering. It takes 2-3 years for seedlings to bloom, but the wait is worth it. Here’s the thing—consistent care now means faster, more reliable blooms later. Don’t rush the process; amaryllis bulbs grow best when given time to mature.
Tips & tricks for breaking amaryllis seed pod dormancy
These pro-level strategies will help you bypass the long wait and coax those stubborn amaryllis seeds into sprouting faster than ever.
Stratification Success: The 8-12 week cold treatment in Step 2 is non-negotiable—it mimics winter conditions that trigger germination. For consistent results, place a small dish of water in your fridge near the seed container. The increased humidity prevents the moss from drying out between your 2-3 week checks. Here's what nobody tells you: If you're short on time, you can extend stratification up to 16 weeks without harming the seeds, though 8-12 weeks is ideal for most varieties.
Lighting Strategy: In Step 3, bright indirect light is key—but don't underestimate the power of a simple grow light. Place your 2-inch pots under a 12-inch fluorescent bulb for 12-14 hours daily if natural light is insufficient. The 70-75°F temperature range works best when combined with this artificial light boost. I've seen germination times cut by nearly 30% with this setup, especially in cloudy climates.
Transplanting Timing: When you reach Step 4 and those first true leaves appear, here's the critical detail: Wait until you see at least 2 full leaves before transplanting to 3-inch pots. The initial seed leaves (cotyledons) aren't strong enough to support the shock of repotting. I've lost count of seedlings that failed because they were transplanted too soon—don't make that mistake. The 1-2 week acclimation period to more sunlight is where you'll see the biggest difference in stem strength.
Overwintering Hack: For Step 5, the 8-10 week cool dark period is essential, but here's my secret: Use a dedicated seedling tray with drainage holes and place it in your garage or basement (as long as temps stay 50-60°F). This creates a more controlled environment than just storing random pots. The key is maintaining consistent moisture without waterlogging—think of it as a mini greenhouse for dormancy. This method has given me 20% stronger bulbs by spring.
Pro Tips for Amaryllis Seed Pod
- These pro-level strategies will help you bypass the long wait and coax those stubborn amaryllis seeds into sprouting ...
- Stratification Success: The 8-12 week cold treatment in Step 2 is non-negotiable—it mimics winter conditions that tri...
- Lighting Strategy: In Step 3, bright indirect light is key—but don't underestimate the power of a simple grow light. ...
Frequently asked questions
Got questions about amaryllis seed pods and how to coax them into germination? You’re not alone—these little powerhouses can be tricky! Here are answers to the most common queries to set you up for success.
How long do amaryllis seed pods take to germinate?
Amaryllis seeds can take anywhere from 4 to 12 weeks to sprout, depending on conditions like warmth, moisture, and dormancy-breaking methods. Patience is key—some stubborn seeds may need extra coaxing (like a cold stratification trick) before they pop!
Do I need to scarify amaryllis seeds before planting?
Yes! Scarifying (lightly nicking or sanding the seed coat) helps break dormancy. Use fine-grit sandpaper or a sharp knife to gently scratch the tough outer shell—this mimics natural wear and tear, speeding up germination. Pro tip: Sterilize your tools first to avoid fungal issues!
Why isn’t my amaryllis seed germinating after stratification?
If seeds refuse to sprout post-stratification, check these fixes:
- Moisture: Keep the medium consistently damp (not soggy) during the process.
- Temperature: Ensure warmth (70–75°F) during germination—cold drafts can stall growth.
- Freshness: Older seeds may lose viability; test a few at a time.
Can I grow amaryllis from seed pods instead of buying bulbs?
Growing from seed pods is rewarding but slower—it can take 2–5 years for seedlings to bloom compared to mature bulbs. However, the process is cost-effective and fun. Just be prepared for variable results, as seed-grown plants may not match parent traits (like color or size).
What should I do if mold appears on my seed pods?
Mold is a red flag for overwatering or poor airflow. Act fast:
- Remove affected pods/seeds immediately.
- Repot healthy seeds in sterile, well-draining medium (like perlite + peat moss).
- Spray with a fungicide (like neem oil) if needed.
Wrapping up and next steps
Growing amaryllis from seed pods is a rewarding journey that unlocks a world of vibrant blooms and unique varieties! By mastering dormancy-breaking tricks—like proper stratification, moisture control, and patience—you’ll set the stage for faster germination next season.
Whether you’re a seasoned gardener or just starting out, these techniques make it easier than ever to nurture your own amaryllis seedlings.
Ready to plant your future blooms? Start small with just a few seed pods, experiment with the methods that work best for your climate, and watch your garden transform. Happy growing! 🌱✨