
Lawn
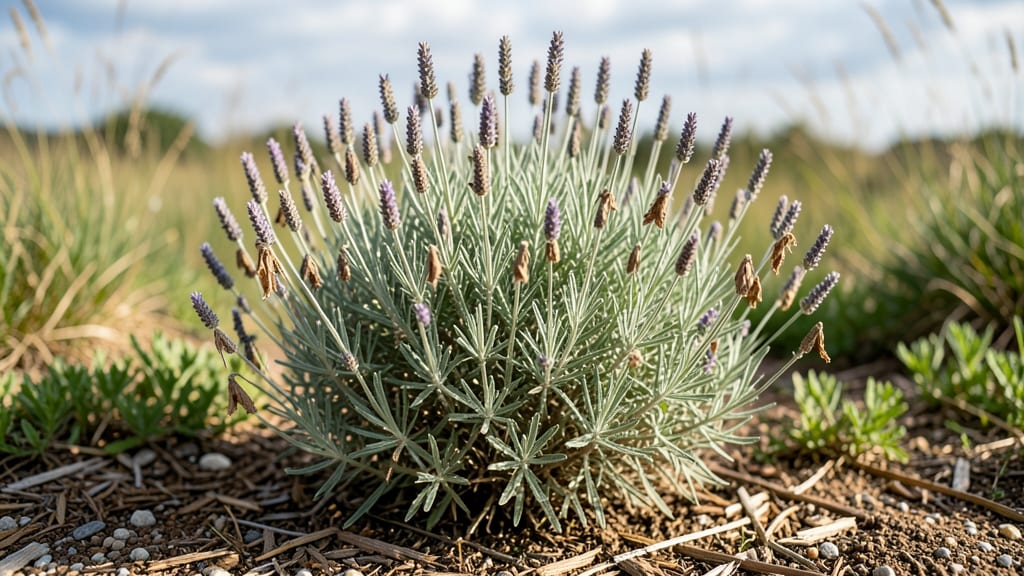
Twisting lavender seed pods the wrong way ruins everything—here’s how to harvest them without breaking the stems. ✨ I’ve spent years watching my lavender blooms turn into brittle husks, until I learned the gentle technique that keeps the pods intact for planting or decorating.
The key is patience and timing: wait until the pods turn from green to light brown, then use your fingers to coax them free, not force.
You’ll need just three things: a pair of clean pruning shears, a paper bag for drying, and a sunny spot indoors. The pods must stay dry—moisture turns them moldy in days. Once harvested, hang them upside down in bundles or lay them flat on a mesh screen until completely crisp.
This usually takes 2-3 weeks, and you’ll know they’re ready when they rattle like tiny maracas.
What you end up with is a treasure trove of fragrant, viable seeds for next year’s garden—or stunning dried decorations for wreaths and potpourri. The best part? These pods stay potent for years if stored in an airtight container with a silica packet.
Just don’t skip the drying step: damp pods won’t germinate, and they’ll attract pests faster than you can say “lavender disaster.”
Works for English lavender, French lavender, and even the fuzzy Spanish varieties. Whether you’re saving seeds for a new border or crafting winter centerpieces, this method keeps your lavender’s legacy alive—without the frustration. Here’s how to do it right the first time.
📚 In This Guide
- What you need
- Instructions
- Tips and common mistakes
- Wrapping up and next steps
What you need
- ● Lavender seed pods: 5–10 mature, dried pods from a healthy lavender plant (ensure they’re fully brown and crispy—no green or soft spots!)
- ● Well-draining potting mix: 1–2 gallons (pre-mixed cactus/succulent soil works great or blend 60% potting soil + 40% perlite/sand)
- ● Containers: 4–6" diameter pots (with drainage holes!) or seed trays with cells (1 pod per cell)
- ● Gravel or perlite: Small handful for the pot’s bottom layer (1–2 inches) to prevent root rot
- ● Pruning shears or scissors: For harvesting seed pods (sterilized with rubbing alcohol)
- ● Spray bottle: With room-temperature water for gentle misting
- ○ Trowel: For transplanting seedlings (optional but handy!)
- ● Grow lights or sunny windowsill: 6–8 hours of indirect light daily (south-facing window or LED grow lights)
- ● Seed-starting heat mat ($10–$20) to speed up germination (70–75°F ideal)
- ● Humidity dome or plastic wrap to retain moisture during early growth
- ● Slow-release fertilizer (like 5-10-5) for post-germination boost
- ● Label markers to track varieties (if mixing types!)
Step-by-step instructions for harvesting and saving lavender seed pods
Here's how to collect, dry, and store lavender seed pods for next year's fragrant blooms.
🌿 Step 1: Identify and Select Mature Seed Pods
Wait until late summer or early fall when the lavender flowers have fully bloomed and the buds begin turning brown. Look for seed pods that are plump, slightly papery, and have turned a light tan color—these are ready for harvest. Avoid any pods that are still green or have started to split open naturally.
I like to harvest on a dry, sunny morning when the dew has evaporated. This prevents moisture from sticking to the pods and potentially causing mold later. Use clean, sharp scissors or pruning shears to snip the seed stems just above the first set of leaves. This keeps the plant healthy and encourages more blooms next season.
✂️ Step 2: Harvest and Prepare the Seed Pods
Gently twist the seed pods off the stems by hand—this is where most people struggle. Instead of forcing them, I find it easier to hold the stem with one hand and twist the pod gently with the other. If they resist, let them dry on the plant a few more days. Once detached, place the pods in a paper bag (not plastic—it traps moisture).
Real talk: Don't rush this step. If you pull too hard, you'll damage the plant or break the pods. A few stubborn pods are better than a ruined harvest. Once you have all the pods in the bag, tie it loosely with twine or a rubber band. This allows air to circulate while keeping the pods contained.
☀️ Step 3: Dry the Seed Pods Properly
Find a warm, dry, and well-ventilated spot to dry the pods. I use a mesh laundry bag hung in a closet with a small fan blowing gently on it. This ensures even drying without direct sunlight, which can overheat the pods. Let them dry for 2-3 weeks until they rattle when shaken—this means the seeds inside are fully mature and ready for storage.
Check daily for signs of mold or pests. If you see any dark spots or tiny insects, remove those pods immediately and start fresh with a new batch. The drying process is complete when the pods feel light and brittle to the touch. Once dry, gently open a few pods to confirm the seeds are dark brown and fully formed.
🪴 Step 4: Store the Seed Pods for Next Season
Transfer the dried pods to an airtight container, like a glass jar or a resealable plastic bag with a silica gel packet. Label the container with the lavender variety and the harvest date. Store it in a cool, dark place—like a pantry or basement—where the temperature stays between 40-50°F.
Seeds remain viable for 2-3 years when stored properly. To test their freshness, plant a few pods in the spring. If they germinate within 2-4 weeks, your storage method worked. If not, try again with a newer batch. I always plant a few extra pods each year to ensure I have enough for next season's garden.
Tips & tricks for perfectly preserved lavender seed pods
These simple strategies will help you avoid common pitfalls and maximize your harvest's potential for next season.
Timing is Everything: Harvest your lavender seed pods in the morning after the dew has evaporated. This reduces moisture buildup that can lead to mold during the drying process. I've found that harvesting between 8-10 AM gives me the best results, as the pods are fully dry from overnight but haven't yet started to overheat in the afternoon sun.
Gentle Harvesting Technique: When twisting the pods from the stems in Step 2, use a slow, steady motion rather than forcing them. I've learned this the hard way—twisting too quickly can damage both the pod and the plant. If a pod resists, let it stay on the plant for another day or two. The pods will release more easily when they're perfectly mature and ready.
Drying Environment Matters: While you can dry the pods in many locations, I've found that a mesh laundry bag hung in a closet with gentle airflow works best. Direct sunlight can overheat the pods and cause them to crack open prematurely. The 2-3 week drying time is crucial—don't rush it! Test for doneness by gently shaking the pods; they should rattle when fully mature and ready for storage.
Storage Wisdom: For long-term storage, I recommend using glass jars over plastic bags. Glass provides better protection against moisture and pests, and it's easier to see the condition of your seeds through the clear glass. The 40-50°F temperature range is ideal for maintaining seed viability—this is why basements or pantries work so well. I always include a silica gel packet in my storage containers to absorb any residual moisture.
Pro Tips for Lavender Seed Pods
- These simple strategies will help you avoid common pitfalls and maximize your harvest's potential for next season.
- Timing is Everything: Harvest your lavender seed pods in the morning after the dew has evaporated. This reduces moist...
- Gentle Harvesting Technique: When twisting the pods from the stems in Step 2, use a slow, steady motion rather than f...
Frequently asked questions
Got questions about lavender seed pods?
You’re not alone! Here are answers to the most common queries—from timing to troubleshooting—to help you grow lavender successfully and harvest viable seeds for next year.
When do lavender seed pods appear after flowering?
Lavender seed pods typically form 4–6 weeks after flowering, once the blooms fade and turn brown. If you’re waiting for pods but see no signs, check if your lavender received enough sunlight (6+ hours daily) and well-draining soil. Overwatering can stunt pod development—let the soil dry slightly between waterings!
How do I know when lavender seed pods are ready to harvest?
Harvest pods when they’re dry, brown, and slightly papery—they should rattle when shaken. Avoid harvesting green or moist pods, as they won’t store well. Use clean scissors to snip the pods just above the stem, then dry them in a cool, dark place (like a paper bag) for 1–2 weeks before opening.
Can I grow lavender from seed pods, or should I buy seeds?
You can grow lavender from seed pods, but it’s hit-or-miss—many pods yield sterile seeds. For reliable results, buy certified lavender seeds (like Lavandula angustifolia) from a nursery. If you harvest pods, soak them overnight to soften the hull before planting, and expect germination in 2–4 weeks (if successful).
Why aren’t my lavender seed pods opening or producing seeds?
Twisted or empty pods? Common culprits include:
- Lack of pollination: Lavender relies on bees! Plant near pollinator-friendly flowers (like thyme or marigolds) to boost seed production.
- Improper pruning: Over-pruning in late summer/fall can remove potential seed heads. Prune after flowering (late summer) to allow pods to form.
- Disease or pests: Fungal issues (like powdery mildew) or aphids can weaken plants. Treat with neem oil if needed.
How long do harvested lavender seed pods stay viable?
Freshly dried lavender seed pods stay viable for 1–2 years if stored in a cool, dark, and dry place (like a sealed jar in the fridge). For longer storage, freeze pods in an airtight container. After 2 years, germination rates drop significantly—test a few seeds first if you’re unsure!
Wrapping up and next steps
Growing lavender seed pods is a rewarding way to ensure next year’s blooms while embracing sustainable gardening! With the right tools—like sturdy gloves and sharp pruners—you’ll master twist-resistant harvesting in no time.
Whether you’re a seasoned gardener or just starting, these tips will help you preserve viability and nurture your lavender’s future.
Ready to take the next step? Try harvesting a few pods today and experiment with drying methods. Your garden—and future lavender blooms—will thank you! 🌿✨