Lawn
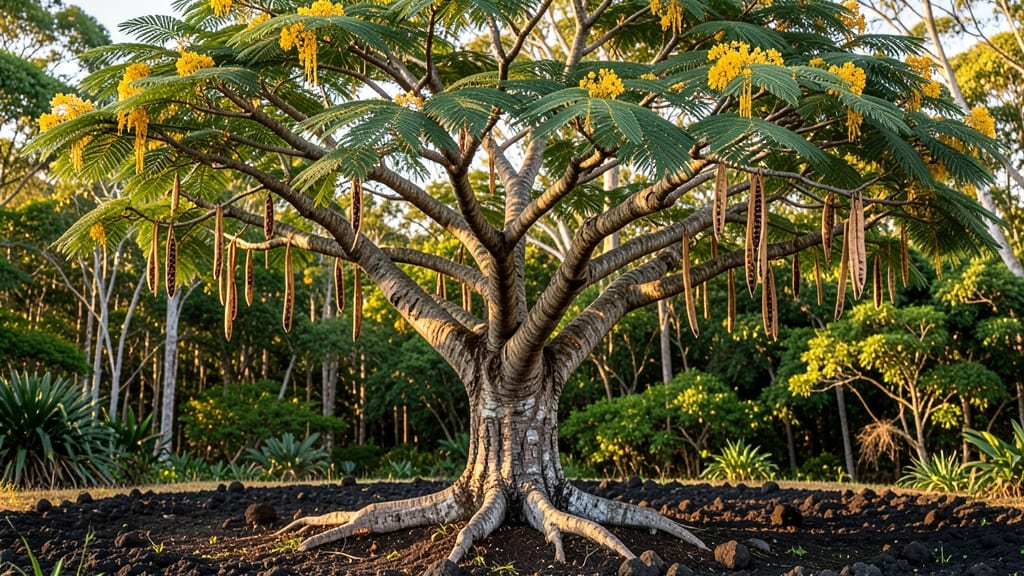
Acacia seed pods hold the secret to fast-growing trees that transform bare spots into shady havens. 🌱 The trick lies in breaking dormancy through proper stratification—something I learned after struggling with slow germination on my first batch of Acacia koa seeds.
A few simple steps can turn those tough pods into thriving seedlings in just 4-8 weeks instead of months. First, you’ll need the right tools: a sharp knife for pod opening, a container for stratification, and a warm, humid spot.
Some species like Acacia senegal require scarification, while others benefit from cold-moist stratification. The key is mimicking nature’s timing—whether that’s a dry heat period or winter chill—to trick the seeds into thinking spring has arrived.
Once stratified, planting is straightforward: sow seeds ¼-inch deep in well-draining soil and keep them consistently moist. Within 2-3 weeks, you’ll see those first tiny leaves pushing through the soil—a reward for patience that’s worth every step.
The early care focuses on protecting young seedlings from pests like aphids and ensuring they get enough light without scorching. This method works for both backyard plantings and larger restoration projects.
Whether you’re growing Acacia koa for its fragrant blooms or Acacia senegal for its drought-resistant qualities, the stratification timeline is your shortcut to success. Let’s get those seeds sprouting!
📚 In This Guide
- What you need
- Instructions
- Tips and common mistakes
- Wrapping up and next steps
What you need
- ● Acacia seed pods: 50–100 fresh, mature pods (harvested in late summer/fall for best results). Pro tip: 💡 Avoid dried or cracked pods—they may not germinate well!
- ● Germination medium: Option 1: Potting mix (sterilized, well-draining blend—look for a mix labeled for seed starting or cactus/succulents). Quantity: ~2–3 gallons.
- ● Option 2: Coconut coir (100% coir, no peat—great for moisture retention). Quantity: 1–2 cubic feet.
- ● Option 3: Vermiculite (for a lightweight, airy mix). Quantity: 1–2 bags (4–8 qt total).
- ● Containers: Seed trays with drainage holes (10x20" or 12x24" for bulk germination) or small pots (3–4" diameter) for individual pods.
- ● Watering can or spray bottle: With a fine mist nozzle (to avoid displacing seeds).
- ● Plastic wrap or humidity dome: Clear plastic sheeting or a propagator lid to retain moisture.
- ● Refrigerator or cold stratification setup: A standard fridge (34–40°F) or a cold frame (if outdoors).
- ● Seed pod opener: Small pruning shears or a butter knife (to gently split pods without damaging seeds).
- ● pH test kit: To check soil pH (ideal range: 6.0–7.0 for acacia).
- ○ Heating mat (optional): For post-stratification warmth (70–75°F) to speed up germination. Pro tip: 🌡️ Skip this if your home stays warm—patience is key!
- ● Grow lights: LED or fluorescent (12–16 hours/day) if natural light is limited.
- ● Label markers: To track stratification dates and pod varieties.
How to stratify acacia seed pods for reliable germination
Acacia seeds need a little patience—but this method cuts weeks off the process.
🌱 Step 1: Harvest and Clean the Pods
Collect mature, dry acacia pods when they naturally open or split them open with a clean knife. Remove the seeds and soak them in lukewarm water for 24 hours to soften the hard outer coating. This step mimics natural rain exposure and helps break dormancy faster.
After soaking, gently rub the seeds between your fingers to remove any remaining fibrous material. You’ll see a smooth, dark seed inside—this is your signal the outer shell is loosened. Pat them dry with a paper towel and let them air-dry for 12 hours before stratification. Skipping this drying step risks mold during cold treatment.
❄️ Step 2: Cold Stratify for 4-6 Weeks
Place the cleaned seeds in a sealed plastic bag with a moist paper towel (not dripping wet—just damp like a wrung-out sponge). Store them in your refrigerator’s crisp drawer, where temperatures stay around 35-40°F. This cold period mimics winter conditions and signals the seed it’s time to germinate.
Check the seeds weekly. If you see condensation inside the bag, open it for 30 minutes to air them out. The goal is consistent moisture without soggy conditions. After 4-6 weeks, the seeds should feel slightly softer when pressed—this means stratification is working.
☀️ Step 3: Warm Up and Plant
Remove the seeds from cold storage and let them sit at room temperature (70-75°F) for 24-48 hours before planting. This gradual warm-up prevents shock. Fill small pots with well-draining seed-starting mix and plant the seeds ½ inch deep, spacing them 1 inch apart.
Water lightly but keep the soil surface dry until you see sprouts—usually within 7-14 days. Overwatering now can cause rot before germination begins. Place the pots in bright, indirect light until the seedlings emerge, then move them to full sun for strong growth.
🌿 Step 4: Monitor and Transplant
Once seedlings reach 2-3 inches tall and develop their first true leaves (not the initial seed leaves), they’re ready to transplant. Acacia seedlings grow quickly, so don’t wait too long—crowding stresses them. Choose a sunny spot with well-draining soil and plant them 6-8 inches apart.
Water deeply after transplanting to help roots establish, but avoid soggy soil. Young acacias are drought-tolerant once established, but consistent moisture in the first 4-6 weeks ensures strong root development. You’ll see new growth within 2-3 weeks if conditions are right.
Tips & tricks for perfect acacia seed germination
Here's what nobody tells you about acacia seed stratification—these tricks cut weeks off your timeline without sacrificing results.
Soaking Secret: The 24-hour lukewarm water soak isn't just about softening—it's about mimicking natural rain cycles. Use water that's warm enough to feel comfortable in a bathtub (around 90-95°F), not boiling. I've found that adding a drop of dish soap to the water prevents fungal spores from clinging to the seeds during this critical first step. After soaking, give those seeds a thorough rinse to remove any soap residue before drying.
Cold Treatment Precision: That 4-6 week cold stratification window is your magic number, but refrigerator placement matters. The crisp drawer maintains the ideal 35-40°F range, but if your fridge runs cooler, consider placing the bag on a shelf near the back where temps are most stable. I've seen seeds fail to germinate when stored near the door where temperatures fluctuate wildly. Pro tip: Place a small thermometer inside the bag during the first week to verify the temperature—this prevents wasted time if your fridge isn't cold enough.
Weekly Check Strategy: The 30-minute ventilation you do weekly isn't just about preventing condensation—it's about monitoring progress. After about 3 weeks, you should notice the seeds developing a slight crack or becoming more pliable when pressed between your fingers. This is your signal that stratification is working. If you're impatient and open the bag too frequently, you risk drying out the seeds before they complete their dormancy cycle.
Transplant Timing: Waiting until seedlings reach 2-3 inches with true leaves might seem arbitrary, but there's a method to it. The first set of leaves (cotyledons) are for energy storage, while true leaves indicate the plant has established its photosynthetic system. I've found that transplanting at this stage gives seedlings enough root mass to handle the shock while still being small enough to establish quickly in their new location.
Pro Tips for Acacia Seed Pods
- Here's what nobody tells you about acacia seed stratification—these tricks cut weeks off your timeline without sacrificing results.
- Soaking Secret: The 24-hour lukewarm water soak isn't just about softening—it's about mimicking natural rain cycles.
- Cold Treatment Precision: That 4-6 week cold stratification window is your magic number, but refrigerator placement matters.
Frequently asked questions
Got questions about acacia seed pods? You’re not alone! Here are some of the most common queries—plus quick, practical answers to help you grow these unique seeds like a pro.
How long does it take for acacia seed pods to dry before planting?
Fresh acacia seed pods contain a hard, waxy coating that prevents germination. To break dormancy, pods must dry completely—typically 4–8 weeks in a warm, dry place (like a paper bag or mesh sack). Test readiness by gently squeezing: if the pod cracks open easily, it’s dry and ready for stratification or planting.
What’s the best stratification method for acacia seeds?
Acacia seeds thrive with cold stratification (mimicking winter). Place dry pods in a sealed bag with moist peat moss or vermiculite, then refrigerate for 3–6 months. For faster results, try heat stratification: soak pods in warm water (120–130°F) for 24–48 hours before planting. Pro tip: Some gardeners scarify seeds with sandpaper to speed up germination!
Can I plant acacia seed pods directly in the ground?
Yes! If your climate is warm (USDA Zones 9–11), you can sow dry pods directly in well-draining soil after a light scarification (nick the pod with a knife). For cooler zones, stratify first to avoid rot. Plant ½-inch deep in spring, spacing pods 6–12 inches apart. Water lightly—acacias hate soggy roots!
Why aren’t my acacia seeds germinating after stratification?
Common culprits:
- Improper drying: Pods must be bone-dry before stratification.
- Wrong moisture levels: Too wet = mold; too dry = dormancy. Aim for damp (not soggy) peat moss.
- Temperature issues: Cold stratification needs 34–40°F; heat stratification requires 120–130°F.
- Old seeds: Acacia seeds lose viability after 2–3 years.
Are acacia seed pods toxic to pets or wildlife?
Most acacia pods are non-toxic to pets and wildlife, but some species (like Acacia melanoxylon) contain tannins that may cause mild stomach upset if ingested in large quantities. Always monitor pets near new plantings. Bonus: Acacias attract pollinators and birds—great for eco-friendly gardens!
Wrapping up and next steps
Acacia seed pods may seem tricky, but with the right stratification timeline and patience, you’ll unlock their full potential for lush, thriving lawns or gardens! 🌱 Whether you’re a seasoned gardener or just starting, understanding the cold-moist stratification process makes all the difference.
Now that you’re armed with the best materials and answers to common questions, it’s time to roll up your sleeves and give these resilient seeds the care they deserve.
Your next step? Start your stratification process today! Keep an eye on those pods, stay consistent with moisture checks, and soon enough, you’ll be rewarded with vibrant new growth. Happy gardening! 🌿