
Propagation
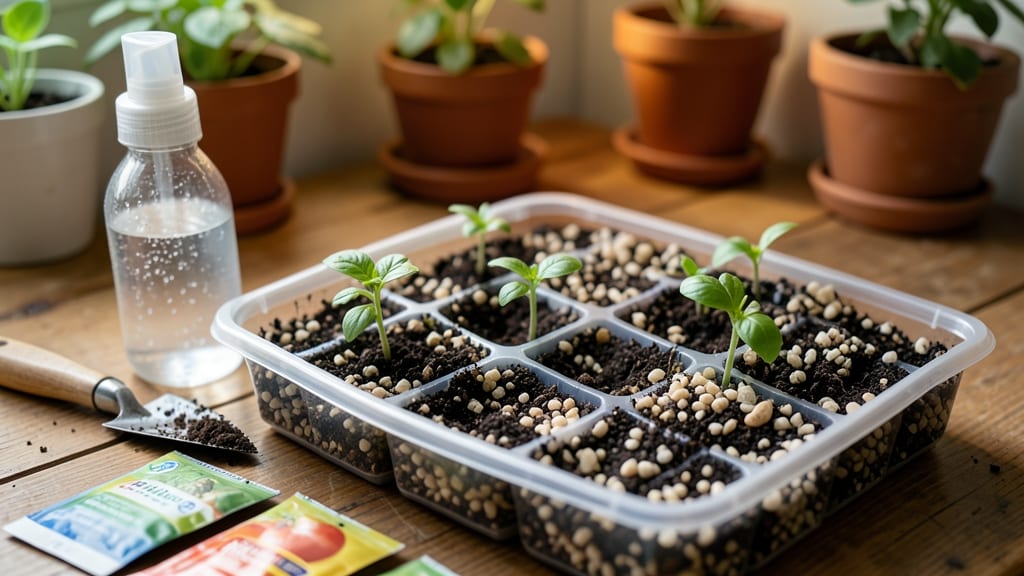
Starting seeds with vermiculite cuts germination time nearly in half. 🌱 I’ve watched finicky seeds like parsley and snapdragons pop up in days instead of weeks—all thanks to this lightweight wonder that holds just enough moisture while letting roots breathe.
The magic is in the mix: combine 1 part vermiculite with 2 parts peat moss (or coconut coir) for most seeds. For tiny seeds like lettuce, add 10% perlite to prevent crusting.
Sterilize your mix by baking it at 200°F for 30 minutes—this kills fungal spores that could rot your seedlings before they even sprout. You’ll notice seedlings emerge stronger and faster, with fewer leggy stems. The secret?
Vermiculite’s ability to wick moisture to roots while keeping the surface dry—no more damp, moldy trays. Once your babies have their first true leaves, you can transplant them without disturbing the delicate root systems.
Works for everything from tomatoes to herbs, and it’s especially helpful in cool climates where slow germination is the norm. Let’s get those seeds sprouting!
📚 In This Guide
- What you need
- Instructions
- Tips and common mistakes
- Wrapping up and next steps
What you need
- ● Vermiculite: 1–2 bags (1–2 cubic feet per batch, depending on seed quantity). Opt for sterilized horticultural-grade vermiculite (avoid non-organic types).
- ● Seeds: Choose your favorite varieties (veggies, herbs, or flowers). Check seed packets for spacing/quantity needs.
- ● Seed trays or containers: 1–2 shallow trays (10x20 inches) with drainage holes, or small pots (2–4 inches deep).
- ● Water: Room-temperature, dechlorinated water (let tap water sit 24 hours or use filtered/distilled).
- ● Spray bottle: 1 (for gentle hydration—avoid overwatering!).
- ● Grow lights or sunny windowsill: Seeds need 12–16 hours of light/day (grow lights are ideal for consistent results).
- ● Mixing tray or bucket: For blending vermiculite with other amendments (like perlite or compost).
- ○ pH tester: Optional but helpful—vermiculite is neutral (pH 6.5–7.5), but seeds may prefer slight adjustments (e.g., 6.0–6.8 for veggies).
- ○ Heat mat: Optional for cold-weather starts (keeps soil 70–85°F for faster germination).
- ● Labels & markers: To track seed types/planting dates.
- ● Fine mesh or cheesecloth: For covering trays (prevents crusting if seeds need darkness to germinate).
- ○ Fertilizer (starter solution): Optional—use a diluted seaweed or fish emulsion (½ strength) after sprouts emerge.
Step-by-Step guide to starting seeds with vermiculite
This lightweight wonder speeds up germination while keeping roots healthy—here’s how to use it right.
🌱 Step 1: Prepare Your Containers and Vermiculite Mix
Start with clean, shallow containers—seed trays or small pots work best. Vermiculite’s lightweight nature means it won’t compact like soil, so you don’t need deep trays. Fill each container with 2-3 inches of vermiculite, leaving about ½ inch of space at the top for watering. The fluffy texture should feel like dampened packing peanuts—if it clumps, it’s too wet.
I like to sterilize the vermiculite first by microwaving it in a bowl for 2 minutes (covered with a damp paper towel). This kills any hidden pathogens that could slow germination. Let it cool completely before handling—hot vermiculite can damage seeds.
💧 Step 2: Moisten the Vermiculite Gently
Vermiculite dries out fast, so you’ll need to keep it consistently moist but never soggy. Fill a spray bottle with lukewarm water (cold water can shock seeds) and mist the vermiculite until it’s evenly damp—like a wrung-out sponge. You should see moisture beads form on the surface, but it shouldn’t pool at the bottom.
Here’s the trick: Don’t overwater now. Too much moisture at this stage can suffocate seeds. Instead, check moisture by squeezing a handful—it should hold together but not drip. If water runs through, let it drain completely and try again with less.
🌱 Step 3: Plant Seeds at the Right Depth
Vermiculite’s loose texture means seeds won’t sink on their own, so you’ll need to press them in lightly. For most seeds, plant them at a depth of ¼ to ½ inch—small seeds like lettuce go on top, while larger seeds like beans can be buried slightly deeper. I use a toothpick to make tiny divots, then tap the seeds into place.
Cover them with a thin layer of additional vermiculite (just enough to hide the seeds). Press gently but don’t compact—you want roots to push through easily. Label your containers now if you’re starting multiple varieties, because vermiculite alone won’t tell you what’s growing!
☀️ Step 4: Provide Warmth and Humidity for Germination
Seeds germinate fastest in 70-80°F soil temperatures, so place your containers on a seedling heat mat or in a warm spot (like on top of the fridge). Cover the trays with clear plastic wrap or a humidity dome to trap moisture—this mimics the cozy conditions seeds crave in nature.
Check daily for condensation on the plastic. If it’s foggy inside, your humidity is perfect. If it’s dry, mist the vermiculite lightly and reseal. Most seeds sprout in 5-10 days, but some (like peppers) can take 2-3 weeks. Patience is key—don’t disturb them until you see green shoots breaking through.
🌿 Step 5: Transition to Light and Care
The moment you see first true leaves (not the initial seed leaves), remove the plastic wrap immediately. Vermiculite dries out fast, so move your seedlings under grow lights or bright sunlight (at least 12-14 hours daily). Place lights 2-3 inches above the plants—too far away, and they’ll stretch leggy.
Water from the bottom by placing trays in ½ inch of water for 10 minutes, then drain excess. You’ll know it’s time to water again when the top ½ inch feels dry to the touch. Once seedlings have 2-3 sets of true leaves, transplant them into soil—vermiculite lacks nutrients, so this is temporary!
Tips & tricks for perfect seed starting with vermiculite
Here's what nobody tells you about getting the most out of your vermiculite—these tricks make all the difference.
Sterilization Secret: That 2-minute microwave sterilization isn't just about killing pathogens—it also helps activate the vermiculite's moisture-retaining properties. After microwaving, let it cool completely before handling, and then give it a quick shake to redistribute the fluffy texture. This ensures even moisture distribution when you plant your seeds in Step 1, which is crucial since vermiculite's lightweight nature means it won't hold water like soil.
Moisture Test Trick: When checking moisture in Step 2, squeeze a handful of vermiculite—it should hold together like a damp sponge but not drip. If water runs through your fingers, you've overdone it. The key is to mimic nature: seeds need consistent moisture, not soggy conditions. I've found that misting in short bursts (2-3 seconds) works better than long continuous spraying, which can create pockets of dryness.
Depth Visualization: For Step 3's planting depth, think of a standard pencil—small seeds like lettuce should sit at the tip level (just on top), while larger seeds like beans go down to the eraser level (¼ inch). Using a toothpick to make divots prevents over-deepening, which can suffocate seedlings. Remember, vermiculite's loose texture means seeds won't sink naturally, so gentle pressure is all you need to cover them.
Light Transition Strategy: When moving seedlings to light in Step 5, start with 12-14 hours of light but gradually increase to 16 hours as they grow. This prevents shock and encourages strong stem development. I place my grow lights on a timer to automate this—it's one less thing to remember when you're busy watching for those first true leaves to appear.
Pro Tips for Seed Starting Vermiculite
- Here's what nobody tells you about getting the most out of your vermiculite—these tricks make all the difference.
- Sterilization Secret: That 2-minute microwave sterilization isn't just about killing pathogens—it also helps activate the vermiculite's moisture-retaining properties.
- Moisture Test Trick: When checking moisture in Step 2, squeeze a handful of vermiculite—it should hold together like a damp sponge but not drip.
Frequently asked questions
about seed starting with vermiculite—because every gardener deserves clarity! Here are answers to the most common questions to help you grow with confidence.Is vermiculite safe for seed starting?
Yes! Vermiculite is non-toxic, sterile, and free from pests or diseases, making it an excellent choice for seed starting. However, avoid inhaling its dust—wear a mask when handling it. Always rinse it before use to remove any residual dust.
How long does vermiculite last for seed starting?
Vermiculite retains moisture and nutrients well, so it can last for multiple seed-starting cycles if stored properly in a dry, sealed container. For best results, reuse it no more than 2-3 times before refreshing with new fertilizer or compost.
What’s a good alternative to vermiculite for seed starting?
If vermiculite isn’t available, consider perlite (for aeration), coco coir (for moisture retention), or a mix of peat moss and sand. Each has trade-offs—perlite drains faster, while coco coir holds moisture longer. Experiment to see what works best for your seeds!
Why are my seeds rotting in vermiculite?
Overwatering or poor drainage are the usual culprits. Ensure your seed trays have drainage holes and water only when the top inch feels dry. Mixing vermiculite with a lightweight medium like perlite (50/50 ratio) can also improve airflow and prevent rot.
Does vermiculite need heat mats for germination?
Not always! While heat mats speed up germination for slow starters (like tomatoes or peppers), vermiculite’s moisture-retention helps create a warm microclimate naturally. For faster results, especially in cool climates, a heat mat (70–85°F) can be a game-changer.
Wrapping up and next steps
Starting seeds with vermiculite is a game-changer for gardeners eager to see quick, healthy germination. This lightweight, moisture-retentive medium creates the perfect environment for tiny roots to thrive while keeping pests and disease at bay.
Whether you're a beginner or a seasoned pro, vermiculite simplifies the process and sets your seedlings up for success.
Now that you’re armed with the know-how, why not give it a try? Grab your supplies, follow the steps, and watch your garden grow from seed to sprout in no time! For even more tips, check out our guide on transplanting seedlings to keep the momentum going. 🌱✨