
Flowers
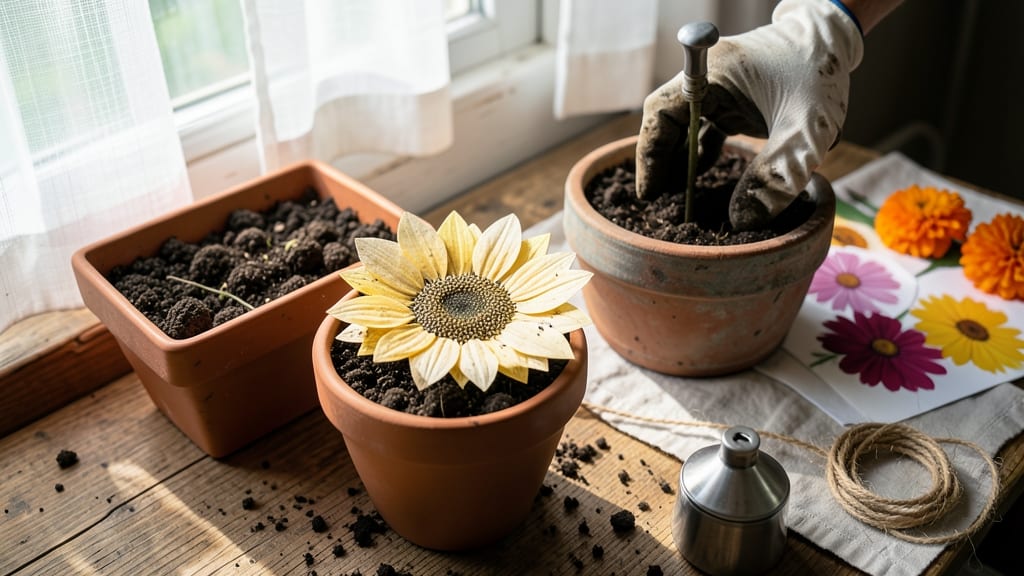
Creating seed paper flowers that bloom and dissolve into the earth is like making a tiny, temporary garden. 🌸 These biodegradable crafts transform into living flowers, then return to soil—no mess, no waste.
The process is simple enough for kids but magical enough to impress anyone who loves flowers that give back to the land. You’ll need just three things: wildflower seeds, paper pulp, and a little water. Mix them together, press into molds, and let dry.
When you’re ready, plant the paper directly in soil—it’ll break down while the seeds sprout. Perfect for weddings, memorials, or just adding a touch of nature to any event.
The first blooms appear in as little as 2-3 weeks, and the flowers last longer than you’d expect from something so delicate. You’ll watch them grow, then fade naturally—leaving only happy memories and a little extra nutrition for the soil.
Use them as confetti, gift tags, or even temporary ground cover. The possibilities are endless, and every seed paper flower tells a story of growth and renewal.
📚 In This Guide
- What you need
- Instructions
- Tips and common mistakes
- Wrapping up and next steps
What you need
- ● Seed paper sheets – Pre-made or DIY (1-2 sheets per flower, depending on size). Look for wildflower seed paper (e.g., sunflower, marigold, or clover seeds) for best results.
- ● Water – A spray bottle or small bowl for dampening.
- ● Scissors or a craft knife – For cutting shapes (sharp-tipped scissors or a metal ruler + craft knife for precision).
- ● Bone folder or smooth object – A spoon, popsicle stick, or credit card to crease folds.
- ○ Glue or double-sided tape – Optional, for securing layers (e.g., white glue or mod podge for durability).
- ● Decorative elements – Glitter, dried flowers, or waterproof ink for personalization.
- ● Cardstock or backing paper – To reinforce stems or add texture.
- ● Twine or string – For hanging finished flowers.
- ● Acrylic paint or markers – For coloring seed paper before folding (use eco-friendly brands!).
How to make seed paper flowers that grow and disappear
This eco-friendly craft turns into living blooms—here's how to make it work every time.
🌱 Step 1: Gather Your Materials and Prepare the Base
You'll need wildflower seeds (choose a fast-growing variety like cosmos or marigolds), 1 cup unbleached paper pulp (or shredded paper blended into pulp), 1 cup water, and 1 tablespoon psyllium husk powder (the key binder). I like to use a blender for the pulp—tear paper into small pieces first so it blends smoothly.
Mix the pulp and water in the blender until you get a thick, paste-like consistency. Add the psyllium husk and blend again for 10-15 seconds until fully incorporated. The mixture should hold its shape when pressed between your fingers. If it's too runny, add a little more pulp; if too stiff, add a splash of water.
💧 Step 2: Shape the Flower Petals and Let Them Dry
Pour the mixture onto a flat, non-stick surface like parchment paper or a silicone mat. Use a spoon or your fingers to spread it into thin, petal-like shapes about ¼-inch thick. Press the seeds into the edges of each petal—about 5-6 seeds per flower—so they'll sprout when planted. I like to make 4-5 petals per flower for a natural look.
Let the petals dry completely for 24-48 hours in a warm, dry place. They should feel crisp and hold their shape when touched. Avoid direct sunlight at first—it can cause uneven drying and cracking. Once fully dry, gently peel them off the parchment and store in a dry place until ready to plant.
☀️ Step 3: Plant the Flowers and Water Gently
Dig small holes in well-draining soil, about ½-inch deep, spaced 6-8 inches apart. Press each petal into the soil so the seeds are facing downward—this mimics natural seed dispersal. Water lightly right after planting, just enough to moisten the soil without disturbing the petals. Overwatering now can cause the paper to disintegrate too quickly.
Place the planted flowers in a spot with full sun to partial shade (6+ hours of sunlight daily). You'll see the first sprouts in 7-14 days, depending on the seed variety and weather. The paper will break down naturally as the plants grow, leaving no trace behind—just vibrant blooms where you planted them.
⏰ Step 4: Care for Your Blooming Flowers
Once the seedlings emerge, water them once a week (or when the top inch of soil feels dry). Avoid soaking the plants—seed paper flowers thrive on gentle moisture. You'll notice the paper dissolving within 2-3 weeks, but the roots will have already established themselves in the soil.
Deadhead spent blooms to encourage more flowers, and watch as your craft transforms into a living garden. The entire process from planting to full bloom takes about 6-8 weeks, depending on the seed type. It's magical to see something you made by hand grow into real, thriving plants!
Tips & tricks for perfect seed paper flowers
Here's what I learned after making dozens of these—simple tricks that make a huge difference in your craft's success.
Blending Technique: For the smoothest pulp in Step 1, tear your paper into 1-inch squares before blending. This prevents clogging and ensures even blending. Run the blender in short bursts—10-15 seconds at a time—until fully smooth. The pulp should feel like thick paint when you press it between your fingers. If it's too stiff, add 1 teaspoon of water at a time until it reaches the right consistency.
Seed Placement: When pressing seeds into the petal edges in Step 2, arrange them in a slightly curved line along the outer edge. This mimics natural seed dispersal and helps the roots establish better when planted. I like to use a toothpick to gently press seeds into place—it gives you more control than just pressing with your fingers.
Drying Strategy: The 24-48 hour drying time is crucial—don't rush it! Place your petals on a cooling rack over a baking sheet to allow air to circulate on all sides. Avoid stacking them, as this can cause uneven drying and cracking. If your kitchen is humid, extend the drying time to 48 hours or use a fan on low to speed up the process. The petals should feel completely dry and crisp when you gently peel them off the parchment.
Planting Depth: In Step 3, the ½-inch deep holes are perfect for most wildflower seeds, but adjust slightly based on seed size. Larger seeds like sunflowers can go a bit deeper (¾-inch), while tiny seeds like clover should only be ¼-inch deep. Press the petals firmly into the soil so the seeds make direct contact with the earth—this ensures better germination.
Pro Tips for Seed Paper Flowers
- Here's what I learned after making dozens of these—simple tricks that make a huge difference in your craft's success.
- Blending Technique: For the smoothest pulp in Step 1, tear your paper into 1-inch squares before blending. This preve...
- Seed Placement: When pressing seeds into the petal edges in Step 2, arrange them in a slightly curved line along the ...
Frequently asked questions
Got questions about seed paper flowers?
You’re not alone! Here are answers to the most common queries—so you can craft with confidence and let your creations bloom (and decompose) beautifully.
Can seed paper flowers really grow into full plants?
When planted in soil and kept moist, the embedded seeds will sprout into wildflowers, herbs, or grasses—depending on the seed mix. Most seed paper flowers bloom within 4–8 weeks, though some varieties may take longer. Just remember: patience is key!
How long does it take for seed paper flowers to decompose?
Seed paper typically breaks down naturally in 3–6 months when buried or left in soil. In water or compost, the process speeds up—sometimes as little as 2–4 weeks! For long-lasting displays, opt for thicker paper or seal with a waterproof varnish (but skip this if you want full biodegradability).
What’s the best way to store unused seed paper flowers?
Keep them dry in a cool, dark place (like a sealed envelope or airtight container) to prevent premature sprouting. Avoid humidity or direct sunlight, which can weaken the paper or trigger germination. If stored properly, seed paper can last 6–12 months—though the longer you wait, the less vibrant the colors may appear.
Are there eco-friendly alternatives to seed paper flowers?
Yes! Try dried flower petals (press your own for zero waste), recycled paper flowers made from old books/magazines, or biodegradable glitter for a shimmery touch. For a functional twist, use seed-embedded confetti or wildflower seed bombs instead of full blooms.
Why won’t my seed paper flowers sprout?
Common culprits: dry soil, lack of sunlight, or old seeds. Troubleshoot by:
- Watering gently but consistently (keep soil damp, not soggy).
- Placing them in a sunny spot (6+ hours of light daily).
- Testing a small piece of seed paper in a separate pot to check viability.
Wrapping up and next steps
Seed paper flowers are more than just a creative craft—they’re a thoughtful, eco-friendly way to bring beauty and life while giving back to the planet.
Whether you’re gifting them, brightening up your space, or simply enjoying the process, these biodegradable blooms prove that small actions can make a big impact. 🌱
Ready to turn your green thumb into a green legacy? Start small—try making a single flower today, then explore more projects, share your creations, or even inspire others to join the movement. Every seed planted is a step toward a greener tomorrow!