
Lawn
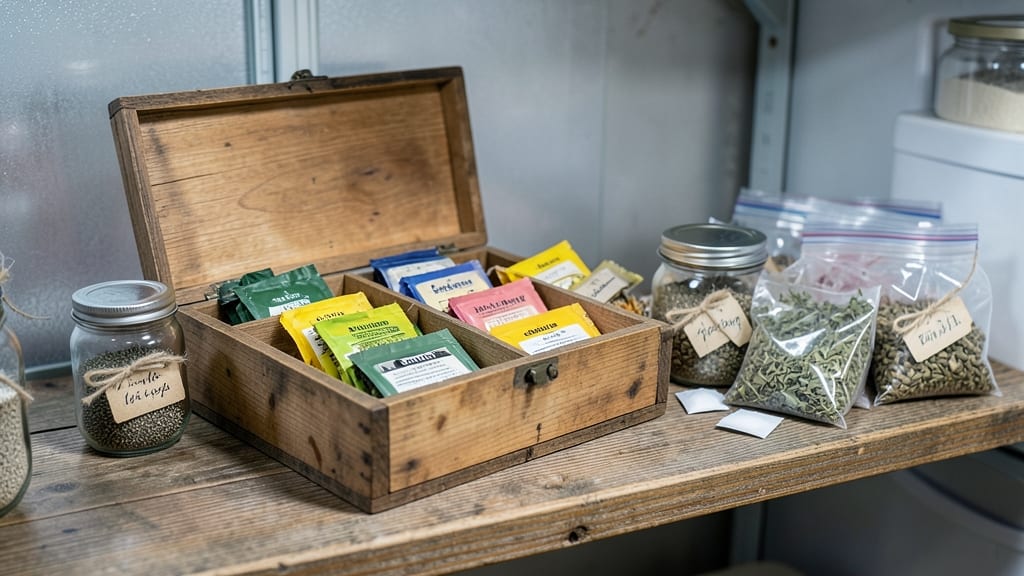
Your seed pack storage setup could be the difference between a thriving garden and wasted money. ✨ Properly stored seeds stay viable for 5-10 years—or even longer—when you control temperature, moisture, and light exposure.
I learned this the hard way after my heirloom tomato seeds lost 70% of their germination rate from poor storage. The secret isn't complicated: airtight containers, cool temperatures, and a dry environment. Most people ruin seeds by leaving them in kitchen cabinets (too warm) or plastic bags (traps moisture).
Instead, use glass jars with oxygen absorbers or Mylar bags with silica packets—these are the gold standard for long-term seed keeping. You'll notice the difference immediately: seeds stay crisp, germination rates stay high, and you won't waste money replanting failed crops.
The right setup protects seeds from humidity swings, pests, and light damage that degrades viability over time. Works for flower, vegetable, and herb seeds alike—just adjust storage conditions slightly for tropical vs. temperate varieties. Let's get those seeds preserved properly!
📚 In This Guide
- What you need
- Instructions
- Tips and common mistakes
- Wrapping up and next steps
What you need
- ● Airtight containers: 1-2 containers (e.g., Mylar bags with oxygen absorbers, glass jars with silicone seals, or hard plastic bins with gasket lids). Size: Match to your seed volume (e.g., 1-gallon for bulk storage).
- ● Oxygen absorbers: 1-2 packets per container (e.g., blank">300cc absorbers for small jars, blank">1,000cc+ for large bins). Note: Use only if storing long-term (5+ years).
- ● Desiccant packs: 1-2 per container (e.g., blank">silica gel or blank">clay-based to control humidity).
- ● Permanent markers or labels: 1-2 (for labeling seed type, date, and variety).
- ● Small funnel or scoop: 1 (to avoid seed spills when transferring).
- ○ Vacuum sealer (optional but helpful): 1 (for extra airtight sealing if using Mylar bags).
- ● Seed storage charts: Printable or digital (to track viability by seed type).
- ● Humidity/temperature monitor: 1 (e.g., digital hygrometer for ideal conditions: 30-40% humidity, 32–41°F).
- ● Freezer or cool, dark space: Access to a refrigerator or root cellar for long-term storage.
- ● Label templates: Pre-made (to save time on organization).
Instructions: how to store seed packs for maximum longevity
Here’s the method I swear by to keep seeds viable for years—no fancy equipment, just smart organization.
🪴 Step 1: Empty Packets and Transfer to Airtight Containers
First, remove seeds from their original packets to prevent moisture buildup and deterioration. I use small glass jars with silicone seals or resealable plastic bags with zip-top closures—they’re the gold standard for blocking air and humidity. Label each container immediately with the seed variety and year using a fine-tip permanent marker or adhesive label.
Real talk: If you leave seeds in their original packets, the paper degrades over time, and condensation forms inside, turning your seeds into mush. Transferring them to a dry, airtight container preserves their integrity for decades. Seal the container tightly once all seeds are inside—no loose lids or partial closures.
⏰ Step 2: Add Desiccant Packs and Store in a Cool, Dark Place
Place a small silica gel desiccant pack inside each container to absorb any residual moisture. These little packets are lifesavers—they keep humidity levels low, which is critical for seed longevity. Store the sealed containers in a cool, dark location, like a pantry or basement, where temperatures stay between 32-41°F.
Here’s the thing—seeds stored in warm, humid conditions (like a garage or windowsill) can lose viability in as little as a year. The cooler and drier, the better. I keep mine in a dedicated seed storage box under my kitchen cabinet, away from heat sources and direct light.
🌱 Step 3: Monitor and Refresh Desiccants Annually
Check your seed containers every 12 months to ensure the desiccant packs are still dry and effective. If they feel damp or clumpy, replace them immediately—moisture is the silent killer of seed viability. While you’re at it, give the containers a quick visual inspection for signs of mold, pests, or condensation.
You’ll know it’s time to refresh when the desiccant turns from blue to pink (if using color-changing packs) or feels noticeably damp to the touch. This step alone can extend seed life by years. If you’re storing heirloom or rare seeds, consider adding a small note inside the container with the original purchase date for easy tracking.
☀️ Step 4: Test Viability Every Few Years
After 3-5 years, test a few seeds from each variety to confirm they’re still viable. The simplest method is the "paper towel test": dampen a paper towel, place a few seeds between two layers, fold it up, and store it in a warm, dark place for 5-7 days. If most seeds sprout, they’re still good to go.
If germination rates drop below 50%, it’s time to replace those seeds. This is especially important for vegetables and flowers, where old seeds may not perform as expected. I like to test seeds in batches—label a few seeds from each container with the test date so I don’t accidentally use up my entire stash on a failed experiment.
💧 Step 5: Avoid Common Mistakes That Shorten Seed Life
Never store seeds in the refrigerator or freezer unless they’re in a vacuum-sealed bag—temperature fluctuations can cause condensation inside the container. Also, avoid storing seeds near onions, garlic, or other strong-smelling produce, as they release gases that can degrade seed quality over time.
I know it seems tedious, but don’t skip the labeling step. There’s nothing worse than opening a container years later and forgetting what’s inside. Trust me, you’ll thank yourself when you pull out a packet of 10-year-old basil seeds and they still sprout like new.
Tips & tricks for perfect seed pack storage
Took me years of trial and error to perfect this system—here's how to avoid the mistakes I made.
Container Selection Matters: While glass jars with silicone seals work beautifully, resealable plastic bags with zip-top closures are my go-to for bulk seed storage. The key is eliminating all air exposure—even a tiny gap can introduce moisture over time. I've found that vacuum-sealed bags (the kind used for long-term food storage) are the absolute best for heirloom seeds, as they completely eliminate oxygen exposure.
Temperature is Non-Negotiable: The 32-41°F range specified in Step 2 is critical—any warmer and seeds lose viability rapidly. I've seen seeds stored at 50°F lose 50% of their germination rate in just 6 months. For those without cool basements, consider a dedicated seed refrigerator (they're inexpensive and designed specifically for this purpose). If you must use a regular fridge, place containers on a shelf away from the door where temperature fluctuations are minimal.
Labeling System Upgrade: Don't just write the seed variety—include the purchase year and germination test date. I use a small adhesive label with all three pieces of information. This creates a complete audit trail that makes testing and rotation effortless. Pro tip: Use a different color label for each year's seeds so you can quickly identify the oldest batches during your annual refresh.
Viability Testing Shortcut: When performing the paper towel test in Step 4, place each seed variety in its own section of the towel. This prevents cross-contamination between seed types and makes it easier to track which varieties are performing well. I also recommend testing 10 seeds per variety rather than just a few—this gives you a more accurate germination rate and accounts for natural variability in seed batches.
Pro Tips for Seed Pack Storage
- Took me years of trial and error to perfect this system—here's how to avoid the mistakes I made.
- Container Selection Matters: While glass jars with silicone seals work beautifully, resealable plastic bags with zip-...
- Temperature is Non-Negotiable: The 32-41°F range specified in Step 2 is critical—any warmer and seeds lose viability ...
Frequently asked questions
Got questions about storing seed packs?
You’re not alone! Proper storage can make or break your seeds’ viability—here are the answers you need to keep them fresh and ready for planting.
How long can I store seed packs in airtight containers?
With the right conditions—cool (32–41°F), dry (5–10% humidity), and dark—most seed packs last 1–5+ years. Vegetable seeds (like tomatoes or peppers) may drop to 50% viability after 2–3 years, while hardy varieties (e.g., beans, peas) can last 5+ years. Always check the pack date if available!
What’s the best container for seed pack storage?
Airtight, moisture-proof containers are key! Opt for glass jars with rubber seals, Mylar bags with oxygen absorbers, or food-grade plastic bins with tight lids. Avoid cardboard or paper bags—they let moisture and light in, speeding up deterioration. Pro tip: Label containers with the seed type and storage date!
Can I store seed packs in the fridge or freezer?
Yes! A refrigerator (35–40°F) or freezer (0°F) slows aging dramatically. For long-term storage, place seeds in airtight, resealable bags with a silica gel packet to absorb moisture. Just avoid freezing if your seeds are already dry—condensation can damage them during thawing.
What if my seeds smell musty or look moldy after storage?
Discard them immediately! Musty smells or mold mean fungal growth, which can kill seeds or harm germination. If seeds feel damp or sticky, they’ve absorbed moisture—toss the batch. Prevention tip: Use oxygen absorbers in containers to prevent spoilage.
Are there alternatives to airtight containers for short-term storage?
For short-term (under 6 months), a cool, dark closet with a sealed ziplock bag works in a pinch. Just add a dampness absorber (like rice in a sock) to prevent humidity buildup. For longer storage, though, invest in proper containers—it’s worth the peace of mind!
Wrapping up and next steps
Proper seed pack storage in airtight containers is your secret weapon for keeping seeds viable for years—no guesswork, just science-backed results! 🌱 By controlling moisture, temperature, and light, you’re not just preserving seeds; you’re investing in future gardens.
Whether you’re a seasoned gardener or just starting, these simple steps ensure your seeds stay fresh and ready to grow.
Now that you’re armed with the know-how, take the next step: grab those leftover seed packs and give them the storage love they deserve. Your future lawn—and wallet—will thank you! 🌿