
Lawn
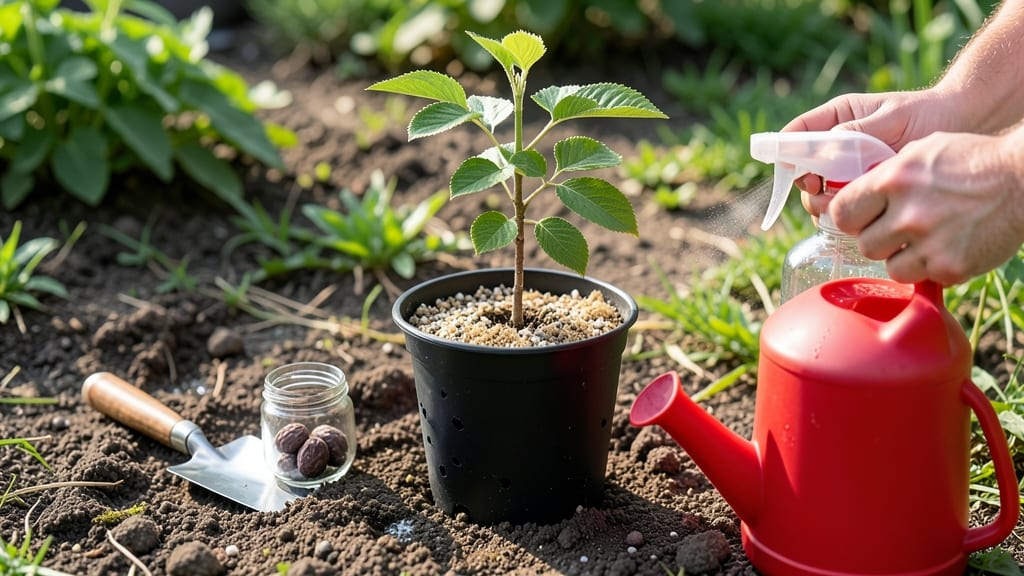
Growing cherry trees from seed means waiting years for fruit—but the journey starts with cold stratification, the secret that breaks dormancy and turns those tiny pits into saplings. 🌱 My first attempt failed because I rushed the process, but after learning the trick of mimicking winter in my fridge, I now have a thriving young tree that’ll bear fruit in 5-7 years.
The key? Patience and understanding how nature prepares seeds for spring.
You’ll need fresh pits from sweet or sour cherries (avoid store-bought—those are pasteurized), a damp paper towel or peat moss, and a sealed container for the cold treatment. Sweet cherries produce edible fruit, while sour cherries are often ornamental but equally rewarding.
The stratification process takes 6-12 weeks in your fridge, where the seeds experience the cold, moist conditions they’d get in winter.
Once sprouted, plant the seeds ½ inch deep in well-draining soil, keeping them in partial shade until they’re a few inches tall. Cherry seedlings grow slowly at first, but with consistent moisture and sunlight, they’ll develop strong roots and branches.
By year 3, you’ll see real growth spurts—just don’t expect fruit until years 5-7, depending on the variety.
Common mistakes? Overwatering (which causes rot) or impatience (skipping stratification). But with the right approach, you’ll end up with a tree that’s uniquely yours—one that grows from a seed you nurtured through winter’s quiet magic. Here’s how to make it work without the guesswork.
📚 In This Guide
- What you need
- Instructions
- Tips and common mistakes
- Wrapping up and next steps
What you need
- ● Cherry seeds: 5–10 fresh, plump seeds (harvested from ripe, organic cherries—avoid store-bought varieties with chemical treatments).
- ● Cold stratification supplies: 1 small plastic bag or container with a secure seal (e.g., ziplock bag or airtight jar).
- ● Moistened peat moss or vermiculite (1 cup).
- ● Refrigerator (set to 34–40°F / 1–4°C for stratification).
- ● Germination setup: Small seedling pots (3–4 inches deep) or a shallow tray with drainage holes.
- ● Well-draining potting mix (1 bag, ~2–3 cubic feet).
- ● Spray bottle (for gentle watering).
- ○ Growth support (optional but helpful): Mini greenhouse or clear plastic dome to retain humidity.
- ● Grow lights (if natural light is limited).
- ● Humidity tray (a shallow tray with pebbles and water).
- ● Basic gardening tools: Small trowel, tweezers (for handling seeds), and a ruler (to track seed depth).
- ● Knowledge: Patience! Cherry seeds can take 4–12 weeks to germinate—stratification is key!
- ● Space: A sunny windowsill or indoor grow area (or outdoor spot after last frost).
Instructions for germinating cherry tree seeds using cold stratification
Here’s how to break dormancy and coax those stubborn cherry pits into sprouting—no matter the season.
🌱 Step 1: Extract and Prepare the Seeds
Start by removing the pits from fresh, ripe cherries—never use dried or store-bought fruit, as their seeds may not germinate. Crack open the pits with a nutcracker or hammer, then carefully pry out the single seed inside. The seed coat is tough, so I like to nick it lightly with a sharp knife (about 1/16 inch deep) to help water penetrate later.
Place the seeds in a bowl of lukewarm water for 24 hours to soften the outer shell. This step mimics natural weathering and speeds up germination. After soaking, let them air-dry on a paper towel for 12 hours—this prevents mold while keeping them moist enough to start stratification.
🥶 Step 2: Stratify for Dormancy Break
Mix the seeds with a damp peat moss or coconut coir in a sealed plastic bag. I use a ratio of 1 part seeds to 3 parts moist medium to ensure even moisture without sogginess. Squeeze the bag gently to remove excess air, then place it in your refrigerator’s crisper drawer (the coldest spot without freezing).
Keep the bag at 35-40°F for 6-8 weeks. Check monthly by opening the bag—if the medium feels dry, mist it lightly with water. The goal is to maintain consistent moisture without rot. You’ll know stratification is working when the seeds develop a tiny white root (about 1/4 inch long) after 4-6 weeks.
☀️ Step 3: Plant Stratified Seeds in Germination Medium
Fill 4-inch pots with a sterile seed-starting mix (avoid garden soil—it’s too dense). Plant each seed 1/2 inch deep, spacing them 2 inches apart in the pot. Gently firm the soil around the seeds to eliminate air pockets, then water lightly until the surface is evenly damp but not saturated.
Cover the pots with clear plastic wrap or a humidity dome to trap warmth and moisture. Place them in a warm, bright spot (like a sunny windowsill or under grow lights) where temperatures stay between 65-75°F. Germination should begin in 2-4 weeks, signaled by the first tiny green shoot breaking through the soil.
🌿 Step 4: Transition to Light and Nurture Seedlings
Once sprouts emerge, remove the plastic cover immediately to prevent damping-off. Move the pots under 14-16 hours of grow light daily—cherry seedlings need strong light to avoid becoming leggy. I use a full-spectrum LED bulb positioned 3-4 inches above the seedlings, adjusting the height as they grow.
Water when the top inch of soil feels dry, using room-temperature water to avoid shocking the roots. Fertilize lightly with a diluted fish emulsion (5-5-5) after 4 weeks to support early growth. Watch for first true leaves (not the initial seed leaves)—this confirms the seedling is established and ready for gradual hardening.
⏰ Step 5: Harden Off and Transplant Young Trees
After 8-10 weeks of growth (when seedlings reach 6-8 inches tall), begin hardening them off. Place the pots outside in partial shade for 1 hour daily, increasing exposure by 1 hour each day until they tolerate full sun. This process takes 2-3 weeks and prepares them for outdoor conditions.
Transplant to the ground or larger containers after the last frost, spacing saplings 15-20 feet apart if growing multiple trees. Cherry seedlings are sensitive to root disturbance, so I dig a hole twice as wide as the root ball and backfill with native soil mixed with compost. Water deeply after planting to settle the soil and encourage root expansion.
Tips & tricks for perfect cherry tree germination
Cold stratification might sound intimidating, but these pro insights will help you navigate each critical step with confidence.
Seed Preparation: That 1/16-inch nick in Step 1 is crucial—it creates microscopic channels for water to penetrate the tough seed coat. Use a sharp knife or nail file to score the seed without cutting too deeply, which could damage the embryo inside. I've found that seeds nicked on the flatter side (not the pointed end) germinate more consistently. After the 24-hour soak, test the seed's readiness by gently pressing it between your fingers—it should feel slightly pliable but not mushy.
Stratification Success: The 6-8 week cold period mimics winter conditions that break cherry seeds' natural dormancy. Place your sealed bag on a refrigerator shelf where the temperature consistently hovers between 35-40°F—avoid the crisper drawer if it gets colder than 35°F, as this can slow or even halt germination. I like to label each bag with the date and seed type to track progress. After 4-6 weeks, check for root development by carefully opening the bag—you'll see tiny white roots emerging from the seeds if stratification is working.
Germination Environment: Once planted in Step 3, maintaining 65-75°F is essential for successful germination. A sunny windowsill works for short periods, but for reliable results, use a grow light positioned 3-4 inches above the seedlings. I've noticed that seedlings grown under grow lights develop stronger stems and leaves than those relying solely on natural light. Keep the humidity dome in place until you see sprouts emerge, then remove it immediately to prevent damping-off—a fungal disease that attacks tender new growth.
Light Management: Cherry seedlings need 14-16 hours of light daily to prevent legginess. If using natural light, rotate your seedlings quarter-turn daily to ensure even growth. I've had the best success with full-spectrum LED bulbs, which provide the spectrum needed for healthy development. Watch for the first true leaves (not the initial seed leaves) to appear—this confirms the seedling is established and ready for gradual hardening.
Pro Tips for Seed Of Cherry
- Cold stratification might sound intimidating, but these pro insights will help you navigate each critical step with c...
- Seed Preparation: That 1/16-inch nick in Step 1 is crucial—it creates microscopic channels for water to penetrate the...
- Stratification Success: The 6-8 week cold period mimics winter conditions that break cherry seeds' natural dormancy. ...
Frequently asked questions
Got questions about growing cherry tree seeds? You’re not alone!
Here are answers to the most common queries—from timing to troubleshooting—to help you nurture your future tree with confidence.
How long does cold stratification take for cherry seeds?
Cold stratification typically requires 60–90 days in the fridge (34–41°F). For sweet cherries, 3 months is ideal, while sour cherries may need up to 4 months. Place seeds in a damp paper towel or peat moss, then check monthly for moisture—consistency is key!
Can I skip cold stratification and plant cherry seeds right away?
Not recommended! Cherry seeds have a hard outer shell and dormancy requirement. Skipping stratification often results in slow, uneven germination (or none at all). If you’re impatient, try scarification (nick the seed with a file) after 2–4 weeks of cold treatment for a slight boost.
What’s the best soil mix for germinating cherry seeds?
Use a light, well-draining mix like:
- 50% peat moss or coconut coir (retention)
- 30% perlite or vermiculite (aeration)
- 20% sand or compost (nutrients)
Sterilize the mix first (bake at 200°F for 30 mins) to prevent mold. Keep humidity high with a clear plastic dome or spray bottle.
Why aren’t my cherry seeds sprouting after stratification?
Check these common culprits:
- Improper moisture: Soil too dry or soggy? Use a spray bottle to keep it damp (not wet).
- Temperature swings: Ideal germination temp is 65–75°F. Avoid drafts or heat sources.
- Old seeds: Cherry seeds lose viability after 1–2 years. Test freshness by cutting one open—white center = good; brown = discard.
- Patience: Germination can take 4–12 weeks. Resist the urge to dig!
Still stuck? Try soaking seeds in lukewarm water for 24 hours before replanting.
How do I transplant cherry seedlings outdoors?
Wait until seedlings have 2–3 true leaves and are 3–4 inches tall. Harden them off for 1–2 weeks by gradually exposing them to outdoor temps. Plant in full sun, spacing them 15–20 feet apart (cherry trees need room to thrive!). Mulch with wood chips to retain moisture and protect roots.
Wrapping up and next steps
From understanding the unique needs of cherry seeds to mastering cold stratification techniques, you’re now equipped to grow your own cherry tree year-round! 🌱 Whether you’re a patient gardener or a curious beginner, these tricks will help you bypass dormancy and nurture life from a tiny seed.
Ready to take the next step?
🌿 Your Action Plan:
- Gather your supplies—you’ve got this!
- Follow the stratification steps with confidence.
- Plant and wait—patience is key, but the reward is sweet!
Now grab those seeds and get growing—your future cherry tree is waiting! 🍒✨