
Propagation
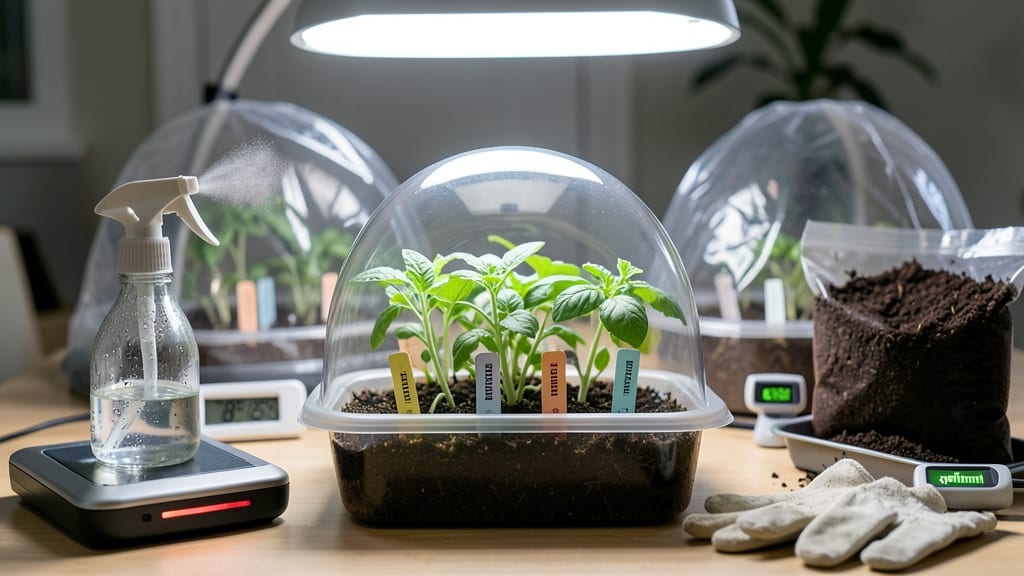
Understanding seed germination requirements is what separates a thriving seedling tray from a sad pile of unused packets. Moisture, temperature, and light aren't just details—they're the foundation of every successful sprout.
I've learned the hard way that skipping these basics means wasted seeds and empty trays, but getting them right transforms your seed-starting game forever.
The right conditions vary wildly by plant: fast germinators like radishes need 70°F soil and stay moist for just days, while stubborn seeds like okra demand 85°F+ and patience for weeks.
Too cold? Seeds rot. Too dry? They sleep forever. The key is matching each seed's needs—check the packet or look up your varieties, because every plant has its own personality.
You'll know you're doing it right when those first pale roots break through, followed by tiny green hooks reaching for the light. The air smells different—earthy, alive, like nothing else.
That's the moment you remember why you started gardening in the first place. No more guessing games, just reliable growth every time.
This works for everything from windowsill starts to greenhouse setups, though container materials affect moisture retention. The same principles apply whether you're growing tomatoes for summer or delicate herbs for winter. Let's get those seeds sprouting right the first time.
📚 In This Guide
- What you need
- Instructions
- Tips and common mistakes
- Wrapping up and next steps
What you need
- ● Seeds: Choose high-quality, fresh seeds (check the packet for germination rates—aim for 80% or higher). Quantity depends on your project (e.g., 10–20 seeds for testing, 50+ for larger setups).
- ● Germination containers: Seed trays with drainage holes (6–12 cell packs work well for small seeds).
- ○ Optional: Paper towels, dampened coffee filters, or peat pellets for delicate seeds (e.g., orchids, succulents).
- ● Growing medium: Seed-starting mix (sterile, lightweight, and well-draining—look for labels like "seedling mix" or "organic potting soil").
- ○ Optional: Vermiculite or perlite (10–20% mix) to improve aeration for moisture-sensitive seeds.
- ● Water: Room-temperature, filtered, or distilled water (avoid tap water with high chlorine—let it sit out for 24 hours if needed).
- ● Spray bottle: Fine-mist setting to avoid disturbing seeds.
- ○ Heat mat (optional but helpful): Electric seedling heat mat (70–85°F/21–29°C range) for warm-season seeds (e.g., peppers, tomatoes).
- ● Budget alternative: A warm, sunny windowsill or a DIY setup with a lamp and thermometer.
- ● Humidity dome or plastic wrap: To retain moisture (critical for seeds needing high humidity, like lettuce or herbs).
- ● Grow lights or natural light source: Required for indoor setups: LED grow lights (12–16 hours/day, 10–15 inches above seeds).
- ● Natural light: South-facing window (6+ hours of sunlight daily).
- ● Thermometer & hygrometer: Digital probes to monitor temperature (ideal range: 65–85°F/18–29°C) and humidity (40–70% for most seeds).
- ● Labels & markers: Waterproof labels to track seed types and planting dates.
- ● Research your seeds: Every plant has unique needs—check the packet for specific moisture, temperature, and light requirements (e.g., cold stratification for maple seeds or scarification for tough seed coats).
- ● Sterilize tools: Clean containers and tools with a 10% bleach solution (1 part bleach to 9 parts water) to prevent mold.
- ● Pre-soak (if needed): Some seeds (e.g., chia, lentils) benefit from a 4–12 hour soak in water before planting.
- ● Patience is key: Germination times vary—from 2–3 days (basil) to weeks or months (some trees)!
Step-by-step guide to achieving perfect seed germination
Germination success hinges on three key factors—master these, and you'll see strong, uniform sprouts every time.
Establish Ideal Moisture Conditions
Seeds need consistent moisture to activate enzymes that break down stored nutrients. Use a spray bottle to dampen the soil or seed paper until it feels like a wrung-out sponge—neither bone-dry nor soggy. The goal is for moisture to penetrate evenly without pooling at the bottom. I like to mist until water beads form on the surface, then let them evaporate naturally before covering.
Overwatering here creates anaerobic conditions that suffocate seeds, while too little moisture halts metabolic activity. Check daily: the soil should remain damp to the touch but not cling when squeezed. For paper towels, fold them into a sandwich around the seeds and mist until evenly moist—never soaking wet, as that triggers rot.
Maintain Precise Temperature Control
Most seeds germinate best within a 68-75°F range, though some tropical varieties need 75-85°F and cool-season crops thrive at 55-65°F. A seedling heat mat set to 70°F solves this perfectly, especially in cooler climates. Place your germination setup directly on the mat—never under it, as trapped heat creates uneven conditions.
For paper towel germination, seal the seed sandwich in a plastic bag with a few air holes and place it on top of the heat mat. Check temperatures twice daily, especially if your home runs cooler at night. If seeds remain dormant after 10-14 days, they may need warmer conditions or stratification (cold treatment for dormant seeds).
Manage Light Exposure Strategically
Seeds germinate best in complete darkness until they break through the soil. Light triggers premature sprouting above ground, which exhausts the seed's energy reserves. Cover containers with a dark cloth or place them in a cabinet until you see white radicles (root tips) emerge—this confirms germination has begun without light interference.
Once seedlings emerge, move them to bright, indirect light immediately. South-facing windows work, but supplement with a grow light if natural light is weak. Leggy seedlings (long, thin stems) signal insufficient light—position the light 2-3 inches above the plants and adjust as they grow. Avoid direct sunlight at this stage, as it can scorch tender new leaves.
Monitor and Adjust for Optimal Conditions
Germination speed varies by species—fast growers like radishes sprout in 3-5 days, while slow germinators like peppers may take 14-21 days. Track progress by marking dates on your setup. If no sprouts appear after 2 weeks, the seeds may be nonviable or require scarification (lightly sanding the seed coat) to break dormancy.
Humidity drops and temperature fluctuations are the biggest enemies here. Use a small humidifier near your setup if your home runs dry, and avoid drafts from windows or vents. The moment you see cotyledons (first true leaves) push through, thin seedlings to 1 inch apart in their final containers—this prevents competition and encourages stronger root development.
Tips & tricks for perfect seed germination
Here's what nobody tells you about creating the ideal environment for your seeds to thrive.
Moisture Precision: The key to consistent moisture is patience—don't just give up water and walk away. After misting, check the surface every 30 minutes until you see those telltale water beads evaporate naturally. This prevents the dreaded "mud puddle effect" that suffocates seeds. For paper towel setups, fold the towels into a loose sandwich around seeds rather than tightly wrapping them—this allows better air circulation while maintaining moisture. I've ruined three batches by over-misting, so trust me on this.
Temperature Troubleshooting: That 68-75°F range is your sweet spot, but real life gets in the way. If your home runs cooler at night, place your heat mat on a small insulated tray to prevent heat loss. For tropical varieties needing 75-85°F, consider a seedling heat mat with adjustable settings—some models let you dial in exact temperatures. And remember: the mat should be directly under your setup, not underneath it where trapped heat creates uneven conditions.
Light Transition Strategy: The moment you spot those white radicles, it's time to act fast. Move your seedlings to bright, indirect light immediately—delaying this step by even an hour can cause energy depletion. I recommend placing them near a south-facing window during daylight hours, then supplementing with a grow light for 12-14 hours daily. The light should be just 2-3 inches above the seedlings, close enough to see their leaves cast shadows but not so close it causes overheating.
Species-Specific Timing: Don't be discouraged if radishes sprout in 3-5 days while peppers take 14-21 days—they're on completely different schedules. Mark your setup with the expected germination window for each seed type. If you're working with multiple varieties, consider labeling each container with both the seed type and expected sprouting date. This simple tracking system saves you from unnecessary worry and helps identify potential issues early.
Pro Tips for Seed Germination Requirements
- Here's what nobody tells you about creating the ideal environment for your seeds to thrive.
- Moisture Precision: The key to consistent moisture is patience—don't just give up water and walk away. After misting,...
- Temperature Troubleshooting: That 68-75°F range is your sweet spot, but real life gets in the way. If your home runs ...
Frequently asked questions
Got questions about getting your seeds to sprout like a pro? Here are some of the most common ones—plus the answers you need to avoid seedling setbacks!
What’s the fastest way to check if my seeds are still viable?
Test viability by placing a few seeds between damp paper towels in a sealed bag. Keep them warm (around 70°F) for 3–5 days. If they sprout, they’re good to go! If not, try fresh seeds or consider soaking them in water for 24 hours before replanting.
How long should I wait before giving up on germination?
Germination times vary by seed type—fast growers like radishes sprout in 3–5 days, while slowpokes (e.g., okra or peanuts) can take 2–4 weeks. After twice the expected time, check moisture, temperature, and light. If nothing changes, the seeds may be old or damaged.
Can I overwater seeds during germination?
Overwatering suffocates seeds by cutting off oxygen. Keep soil or growing medium consistently moist (not soggy) and use containers with drainage holes. A spray bottle or misting works best for delicate seeds like lettuce or basil.
Do seeds need light to germinate?
Most seeds germinate without light—focus on warmth and moisture instead. Once sprouts emerge (1–3 inches tall), move them to bright, indirect light. Exceptions: large seeds (like sunflower) or those prone to damping-off may benefit from early light exposure.
What can I do if my seeds won’t germinate at all?
Try these fixes:
- Soak hard-coated seeds (e.g., peas, beans) in warm water for 12–24 hours.
- Adjust temperature: Cool-season crops (spinach, carrots) need 60–70°F; warm-season (tomatoes, peppers) prefer 75–85°F.
- Check for rot—fuzzy mold means overwatering or poor drainage.
- Test seed freshness by scratching the seed coat; if it’s hard and unbroken, it may need scarification (lightly sanding).
Wrapping up and next steps
Understanding the seed germination requirements—moisture, temperature, and light—sets you up for success in growing vibrant, healthy plants. Whether you’re a seasoned gardener or just starting, these key factors are your foundation for turning tiny seeds into thriving sprouts. 🌱
Now that you’re equipped with the know-how, it’s time to roll up your sleeves and experiment! Start with a few easy-to-germinate seeds like beans or marigolds, and let your green thumb grow. Happy planting! 🌿