
Lawn
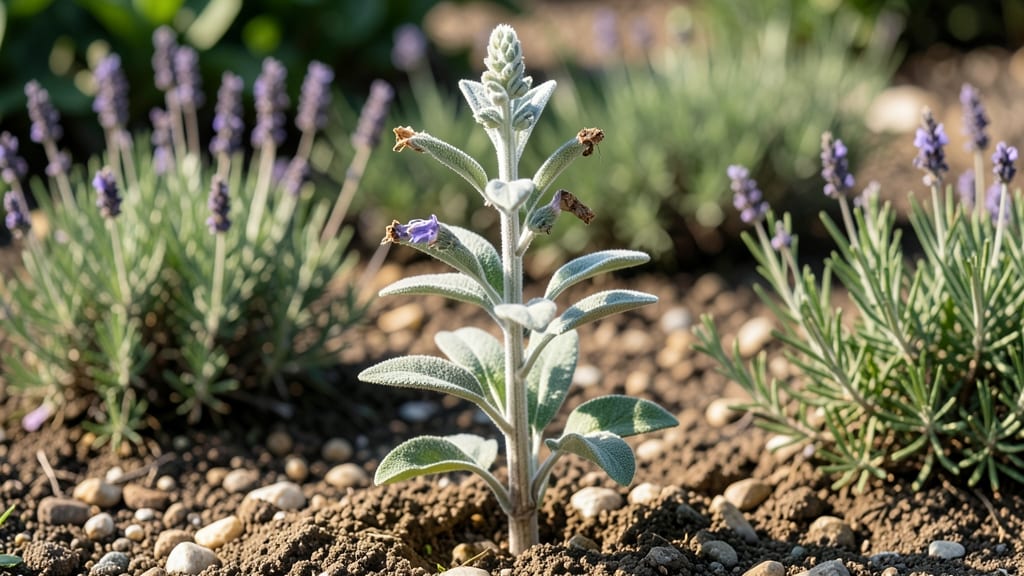
Harvesting sage seed pods at the right moment turns your garden into a self-sustaining herb factory. 🌿 The trick is knowing when those tiny brown pods are ready—too early and they won’t open, too late and the seeds scatter.
I’ve learned this the hard way after watching seeds rain onto my patio instead of landing in my seed-saving jar.
You’ll need just a few supplies: sharp scissors, paper bags for drying, and a cool, dark spot. The pods should be dry and turning brown but still firmly attached to the stems.
Once collected, spread them out on a tray and let them dry completely—this prevents mold and ensures better germination rates later.
Germination isn’t magic, but it’s close. Plant the dried seeds in well-draining soil, barely covering them, and keep the soil moist but not soggy. Within 2-3 weeks, you’ll see tiny green sprouts pushing through, ready to grow into your own sage plants.
The best part? These homegrown plants often thrive better than nursery-bought ones.
Watch for pests like aphids during drying and germination, and store extra seeds in a sealed container in a cool, dry place. With this method, you’ll have sage seeds ready for next season’s garden—no guesswork, just reliable results.
📚 In This Guide
- What you need
- Instructions
- Tips and common mistakes
- Wrapping up and next steps
What you need
- ● Sage seed pods: 5–10 fresh, plump pods (harvested from healthy Salvia officinalis plants). Pro tip: 💡 Collect them just as they begin to turn brown but haven’t fully dried!
- ● Seed-starting mix: 2–3 cups of sterile, well-draining potting soil (avoid garden soil—it can harbor pests or diseases).
- ○ Small containers: 2–4 biodegradable pots (3–4 inches wide) or a seed tray with individual cells. Optional: Use egg cartons or recycled containers if biodegradable isn’t available.
- ● Spray bottle: For gentle watering (a 16 oz bottle with a fine mist nozzle works perfectly).
- ● Plastic wrap or humidity dome: To create a mini greenhouse effect (a clear plastic bag or store-bought propagation lid works).
- ● Grow lights or sunny windowsill: A location with 6–8 hours of indirect light daily (south-facing windows or LED grow lights are ideal).
- ● Pencil or toothpick: For gently pressing seeds into the soil (no need to bury them deeply!).
- ● Heating mat: A seedling heat mat (set to 70–75°F) to speed up germination (especially useful in cooler climates).
- ● Fertilizer: A balanced, water-soluble fertilizer (diluted to half-strength) for when seedlings sprout 2–3 true leaves.
- ● Labels & markers: To track planting dates and varieties (trust us, it’s a lifesaver!).
- ● Tweezers: For handling tiny seeds with precision (if you’re feeling fancy!).
- ● Compost or worm castings: A handful mixed into the soil for extra nutrients.
Step-by-step instructions for growing sage from seed pods
Here's how I turn those tiny brown pods into thriving plants—no fancy tools, just patience and the right timing.
🌱 Step 1: Harvest and Dry the Seed Pods
Pick fully mature sage seed pods when they turn from green to deep brown and begin splitting open naturally. This usually happens in late summer or early fall, depending on your climate. I like to harvest them on a dry, sunny afternoon when the pods are crisp and ready to release their seeds.
Spread the pods on a clean, dry paper towel or mesh screen in a warm, well-ventilated spot. Avoid direct sunlight or high humidity, which can cause mold. Turn them gently every few days to ensure even drying. Once fully dry, the pods will crumble easily between your fingers—this is your signal they're ready for seed extraction.
🌱 Step 2: Extract and Prepare the Seeds
Gently crush the dried pods between your fingers or use a small hammer to break them open. Sage seeds are tiny and dark brown, so I spread them on a white plate to make them easier to see. Pick out any debris or empty pod fragments—clean seeds germinate better.
For faster germination, I soak the seeds in warm water for 12-24 hours before planting. This softens the tough outer coating and encourages even sprouting. After soaking, drain the seeds well and let them sit on a paper towel for another hour to dry slightly—this prevents them from rotting in the soil.
☀️ Step 3: Plant the Seeds Indoors
Fill small pots or seed trays with a sterile seed-starting mix (never garden soil—it’s too dense and can harbor diseases). Sage seeds need bright light and warmth to germinate, so I use a heat mat set to 70-75°F and place the trays under a grow light on a 14-hour daily cycle.
Sow the seeds ¼ inch deep, spacing them ½ inch apart in the tray. Lightly cover them with more seed-starting mix and mist the surface with water until evenly moist. Don’t overwater—sage seeds rot quickly in soggy soil. Place a clear plastic dome or plastic wrap over the tray to retain humidity, but remove it as soon as you see the first sprouts.
🌿 Step 4: Care for Germinating Seedlings
Sage seeds can take 2-4 weeks to germinate, depending on temperature and moisture. Keep the soil consistently moist but never waterlogged—tap the tray gently to check for dampness. Once the first true leaves appear (not the initial cotyledons), remove the plastic dome completely to prevent fungal issues.
Thin the seedlings to 1 plant per pot when they’re about 2 inches tall, using small scissors to snip the weaker stems at soil level. This reduces competition and gives your sage room to grow strong. Move the pots to a sunny windowsill or under the grow light for 6-8 hours of light daily—sage seedlings need plenty of brightness to avoid becoming leggy.
⏰ Step 5: Harden Off and Transplant Outdoors
After 6-8 weeks of indoor growth, when seedlings have 4-6 true leaves, it’s time to harden them off. Start by placing them outside in a shaded, sheltered spot for 1-2 hours the first day, gradually increasing their time outdoors over 7-10 days. This helps them adjust to wind, sun, and temperature fluctuations.
Transplant sage outdoors after the last frost when nighttime temperatures stay above 50°F. Choose a spot with full sun and well-draining soil. Space plants 18-24 inches apart to allow for bushy growth. Water deeply at the base after transplanting, and avoid wetting the leaves to prevent fungal diseases. Sage is drought-tolerant once established, but keep the soil moist for the first few weeks to help roots settle in.
Tips & tricks for perfect sage seed pod germination
These simple strategies will help you coax those stubborn little seeds into thriving plants without the frustration.
Pod Maturity Matters: Don't rush harvesting—wait until pods are fully brown and starting to split open naturally. Green pods contain immature seeds that won't germinate well. I've learned the hard way that harvesting too early means weeks of waiting for seeds that may never sprout. The crispness test is key: fully mature pods should crumble easily between your fingers.
Soaking Strategy: The 12-24 hour soaking period is your secret weapon for breaking through those tough seed coats. Use room temperature water—not hot—and change it after 12 hours to prevent bacterial growth. After draining, that extra hour on a paper towel is crucial—it prevents soggy seeds that would otherwise rot in the soil. I've seen germination rates jump from 30% to 80% just by following this step precisely.
Light and Heat Balance: Sage seeds need warmth (70-75°F) and bright light to germinate, but too much heat can dry them out. I place my trays on a heat mat under grow lights, but I keep them about 6 inches from the bulbs to prevent overheating. A simple thermometer on the mat helps me monitor temperature—anything above 80°F can stress the seeds before they even sprout.
Harden Off Gradually: The 1-2 hour outdoor introduction might seem short, but it's about acclimation, not duration. I start with just an hour on the first day, protecting the seedlings from direct wind. Each subsequent day, I add 30 minutes to their outdoor time while keeping them in shade. This slow adaptation prevents shock that could kill tender young plants. Think of it as a trust-building exercise between you and your seedlings!
Pro Tips for Sage Seed Pods
- These simple strategies will help you coax those stubborn little seeds into thriving plants without the frustration.
- Pod Maturity Matters: Don't rush harvesting—wait until pods are fully brown and starting to split open naturally. Gre...
- Soaking Strategy: The 12-24 hour soaking period is your secret weapon for breaking through those tough seed coats. Us...
Frequently asked questions
Got questions about growing sage from seed pods?
You’re not alone! Here are answers to the most common queries to help you get started—no guesswork required.
Can I grow sage from seed pods I find in my garden?
Sage seed pods (Salvia officinalis) are a great way to propagate new plants. Just ensure they’re fully mature (brown and dry) and store them in a cool, dry place until ready to plant. If you’re harvesting from your own garden, this is a free, sustainable method!
How long does it take for sage seed pods to germinate?
Patience is key—sage seeds can take 2–4 weeks (or even longer!) to sprout. Keep the soil consistently moist and warm (around 70°F) for the best results. A humidity dome or plastic wrap can speed up the process by retaining moisture.
Do sage seed pods need stratification to germinate?
Nope! Unlike some seeds, sage seed pods don’t require cold stratification. Simply scatter them on well-draining soil (or start indoors 8–10 weeks before the last frost) and keep them lightly covered with soil. Easy-peasy!
What’s the best alternative if my seed pods won’t sprout?
If germination fails, try these backup plans:
- Cutting propagation: Snip healthy sage stems, remove lower leaves, and root them in water or moist soil.
- Buy seedlings: Nurseries often sell young sage plants ready for transplanting.
- Layering: Bend a low-growing stem to the ground, cover it with soil, and let it root naturally.
Why are my sage seedlings turning yellow or leggy?
Yellowing or stretched seedlings usually mean too much light or poor soil drainage. Move them to a spot with bright but indirect light and ensure pots have drainage holes. Overwatering can also cause rot—let the top inch of soil dry out between waterings.
Wrapping up and next steps
From soaking to planting, growing sage from seed pods is a rewarding journey that connects you to nature’s rhythms. 🌱 With the right patience and care, you’ll soon enjoy fragrant, drought-resistant sage thriving in your garden or containers. Ready to turn those tiny pods into lush plants?
🌱 Next Steps:
- Grab your supplies—seed pods, pots, and soil—and start soaking today!
- Join a gardening community to share tips or ask questions as you go.
- Experiment! Try growing sage in different light conditions to see what works best.
Your green thumb is about to level up—let’s grow that sage! 🌿