
Lawn
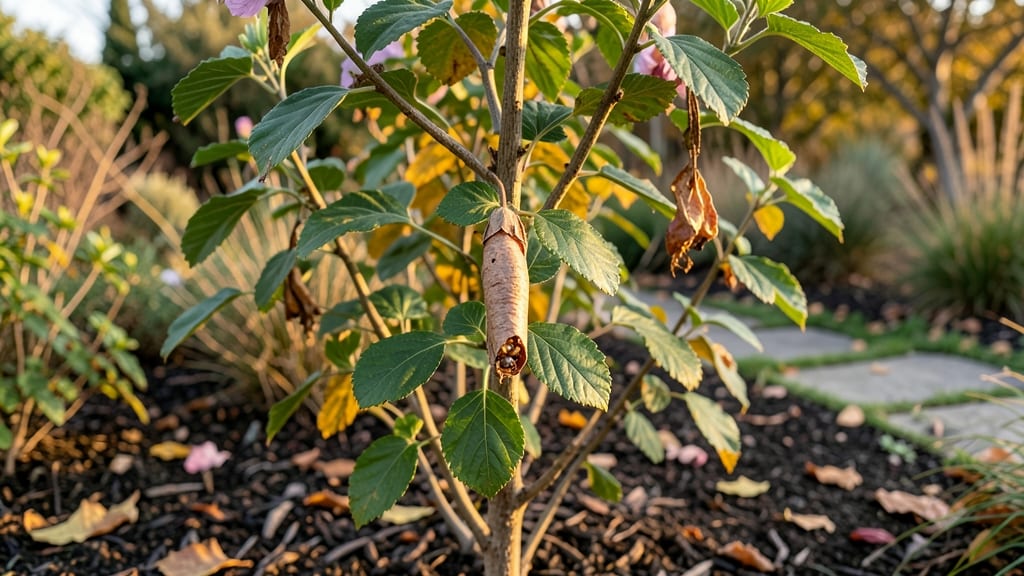
Those rose of Sharon seed pod pictures capture the plant’s quiet magic—where the next generation waits inside papery, seed-filled pods. 🌿 After blooms fade, the pods swell and turn brown—this is your cue to collect them before they split open.
The transformation from flower to seed pod tells the plant’s story, and understanding it unlocks propagation secrets most gardeners miss.
Look for pods clustered where last year’s blooms were—usually along the plant’s upper branches. They’re about the size of a large pea pod when mature, with a slightly woody texture that makes them easy to spot against the green foliage.
Harvesting them at the right stage ensures viable seeds for starting new plants.
Once collected, dry the pods completely before cracking them open to reveal the tiny, flat seeds inside. With proper stratification (a quick cold treatment), these seeds can germinate in as little as 60 days, giving you a head start on next season’s shrubs.
The real magic happens when you see those first sprouts—proof that patience and a little plant biology pay off. Whether you’re saving seeds for heirloom varieties or just curious about the plant’s lifecycle, this is where gardening gets personal.
📚 In This Guide
- What you need
- Instructions
- Tips and common mistakes
- Wrapping up and next steps
What you need
- ● Dried Rose of Sharon seed pods – Collect at least 10-15 mature pods (ensure they’re fully dried and slightly papery to the touch).
- ● Scissors or pruning shears – For carefully opening the pods without damaging the seeds.
- ● Small bowls or containers – 2-3 shallow dishes (ceramic or plastic) to separate seeds from chaff.
- ● Paper towels or coffee filters – 2-3 sheets for seed stratification (moisture control).
- ● Plastic zip-top bags – 1-2 resealable bags (quart-sized) for creating a humid environment.
- ● Seed-starting mix – 1 small bag (1-2 quarts) of lightweight, sterile potting soil (avoid garden soil—it’s too dense!).
- ● Small seed trays or pots – 6-12 cell packs or 3-4 4-inch pots with drainage holes.
- ● Spray bottle – For gently misting seeds and soil (avoid over-saturating!).
- ○ Clear plastic wrap or dome lid – To retain humidity during germination (optional but highly recommended).
- ● Grow lights or sunny windowsill – A full-spectrum LED grow light (or a south-facing window) for 6-8 hours of daily light.
- ● Labeling tags – To mark seed trays with dates and varieties (if applicable).
- ● Heating mat – Speeds up germination by 5-10 days (set to 70-75°F).
- ● Humidity dome – Keeps moisture levels ideal without plastic wrap.
- ● Fertilizer (diluted) – A balanced liquid fertilizer (5-5-5) for post-germination care.
- ● Camera or phone – To capture progress pictures of your seed pods transforming!
Step-by-Step guide to growing Rose of Sharon from seed pods
Here's how I transform dried seed pods into thriving seedlings in just two months.
🌱 Step 1: Harvest and Prepare the Seed Pods
Collect mature brown, dry seed pods from your Rose of Sharon shrub in late fall or early winter. The pods should rattle when shaken—this means they're fully dried and ready for seed extraction. I like to work on a clean sheet of newspaper to catch the tiny seeds and chaff.
Open each pod carefully with a pair of scissors or your fingers. You'll find flat, dark brown seeds inside that look almost like tiny beans. Remove any remaining pod fragments and set the seeds aside in a dry container. Don't wash them—the natural oils help protect the seed during germination.
💧 Step 2: Stratify Seeds for Better Germination
Rose of Sharon seeds need cold stratification to break dormancy. Place the seeds in a sealed plastic bag with a damp paper towel. I add 2-3 tablespoons of damp sand to the bag to help maintain moisture without making it soggy. Seal the bag and refrigerate for 4-6 weeks.
Check the seeds weekly. If the paper towel feels dry, mist it lightly with water and reseal. You'll know stratification is working when the seeds look slightly plump and the paper towel stays damp but not wet. This cold treatment mimics winter conditions and tricks the seeds into thinking spring has arrived.
☀️ Step 3: Sow Stratified Seeds in Starting Mix
Fill small seed trays or 2-inch pots with a light, well-draining seed-starting mix. I press the mix down gently to create a firm surface, then make small furrows about ¼ inch deep with my finger. Place 2-3 seeds in each furrow, spacing them 1 inch apart.
Cover the seeds lightly with additional mix, then mist the surface with water until evenly moist. Place the trays in a warm spot—70-75°F is ideal—under a grow light or in a sunny window. Keep the soil consistently moist but never soggy. You should see tiny sprouts in 4-6 weeks, though some seeds may take longer.
🌿 Step 4: Transplant Seedlings When Ready
Once seedlings have developed 2-3 sets of true leaves and are about 3-4 inches tall, it's time to transplant. Gently remove each seedling from the tray, being careful not to damage the delicate roots. I use a small spoon to loosen the soil around the roots first—this makes the transition easier.
Plant each seedling in its own 4-inch pot filled with fresh potting mix. Bury the stem up to the first set of leaves to encourage strong root growth. Water thoroughly after transplanting, and place the pots in a bright, indirect light spot. Avoid direct sunlight at this stage—it can scorch the tender new leaves.
⏰ Step 5: Harden Off and Prepare for Outdoor Planting
After 4-6 weeks of growth in pots, your seedlings should be ready for their first taste of outdoor conditions. Start by placing them in a sheltered spot outside for 1-2 hours on the first day. Gradually increase their time outdoors over 10-14 days, until they're spending full days in the garden.
Watch for signs of stress like wilting or yellowing leaves—these mean your seedlings aren't ready yet. Once they're thriving outdoors, you can transplant them to their permanent spot in the garden. Choose a location with full sun to partial shade and well-draining soil. Plant in early spring or fall for the best results.
Tips & tricks for perfect Rose of Sharon seedling growth
Transforming dried seed pods into thriving seedlings takes patience—but these tricks will help you avoid common pitfalls and maximize success.
Pod Selection Matters: In Step 1, when harvesting those brown, dry seed pods, focus on ones that are completely dry and rattly. I learned this the hard way—moist pods won't yield viable seeds. If you're unsure, split open a few test pods to check for the flat, dark brown seeds. These should be your target for successful germination.
Stratification Success: During the 4-6 week cold stratification in Step 2, consistency is key. I place a small piece of tape on the outside of the bag with the date to track progress. The goal is to keep that paper towel damp but not soaked—think of it like a wrung-out sponge. If the towel feels dry during your weekly check, give it a light mist and reseal immediately. This mimics natural winter conditions perfectly.
Sowing Strategy: When sowing in Step 3, don't be tempted to plant seeds too deeply. That ¼-inch furrow is critical—any deeper and they may struggle to emerge. I find using a toothpick helps create precise furrows without disturbing the soil surface too much. After covering, give the mix a gentle press with your fingers to ensure good seed-to-soil contact. This small step makes all the difference in germination rates.
Transplanting Technique: In Step 4, when transplanting those 3-4 inch seedlings, focus on the roots. Before removing from the tray, run a small spoon around the edges to loosen the soil. This prevents root damage and makes the transition to individual pots much smoother. When repotting, burying the stem up to the first leaves actually encourages stronger root development—it's not a mistake!
Pro Tips for Rose Of Sharon Seed Pod Pictures
- Transforming dried seed pods into thriving seedlings takes patience—but these tricks will help you avoid common pitfa...
- Pod Selection Matters: In Step 1, when harvesting those brown, dry seed pods, focus on ones that are completely dry a...
- Stratification Success: During the 4-6 week cold stratification in Step 2, consistency is key. I place a small piece ...
Frequently asked questions
Got questions about Rose of Sharon seed pods? You’re not alone! Here are answers to the most common queries—whether you’re curious about harvesting, germination, or troubleshooting.
What do Rose of Sharon seed pods look like, and when are they ready to harvest?
Seed pods resemble small, dried, papery capsules (about ½-inch long) that form after the flowers fade. They’re ready to harvest when they turn brown and split open—usually late fall to early winter. Collect them before they release seeds to the ground!
How long does it take for Rose of Sharon seeds to germinate?
With proper care, seeds typically sprout in 30–60 days. Keep them moist and warm (70–75°F) in a seed-starting mix. Patience is key! Some seeds may take longer, especially if stored improperly.
Can I plant Rose of Sharon seeds directly outside, or should I start them indoors?
For best results, start seeds indoors 6–8 weeks before the last frost. They’re sensitive to cold and may struggle if planted directly in chilly soil. Use seed trays with well-draining soil for optimal growth.
What should I do if my Rose of Sharon seeds aren’t germinating?
Try these fixes:
- Check moisture—keep soil consistently damp (not soggy).
- Test seed viability—soak seeds in warm water for 24 hours; if they sink, they’re likely viable.
- Adjust temperature—use a heat mat if your home is too cool.
- Scarify seeds—lightly sandpaper the hard outer shell to help water penetrate.
Will Rose of Sharon grow back every year from seed, or is it a perennial?
While the plant itself is perennial, seeds may not always produce true-to-type offspring. For reliable regrowth, plant multiple seeds or use cuttings. Mature plants often self-seed, but germination rates vary!
Wrapping up and next steps
Transforming Rose of Sharon seed pods into thriving plants in just 60 days is a rewarding journey—whether you're a gardening newbie or a seasoned green thumb! 🌱 From collecting dried pods to nurturing seedlings, each step unlocks the beauty of this hardy shrub.
With patience and care, you’ll soon enjoy vibrant blooms and a lush landscape.
Ready to take the next step? Grab your supplies, follow the guide, and share your progress with fellow gardeners! 📸 Whether you’re experimenting with germination or admiring your first blooms, every seedling is a testament to your dedication. Happy gardening!