
Lawn
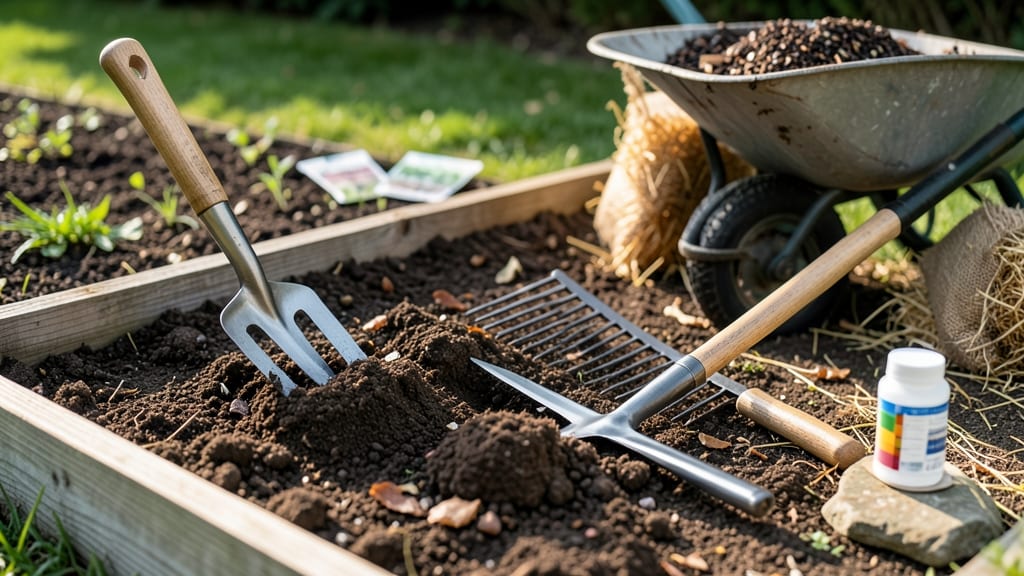
Preparing the perfect seed bed turns your garden from a guessing game to a foolproof germination factory. ✨ The first time I saw seeds pop up in three days instead of two weeks, I knew I'd cracked the code—loose, crumbly soil with just the right moisture and nutrients.
Most people overlook the prep work, thinking seeds will just "figure it out." Wrong. You need a fine-textured bed that's weed-free, amended with compost, and kept evenly moist. This isn't about digging a hole—it's about creating the ideal environment where roots can spread freely and sprouts break through effortlessly.
By the time you're done, you'll have a bed so perfect that even finicky seeds like parsley or carrots germinate reliably. The payoff? Stronger plants that outpace their neighbors and resist disease better from day one.
Works for vegetables, flowers, and even lawn seed—just adjust the soil mix based on what you're planting. Let's get that soil ready!
📚 In This Guide
- What you need
- Instructions
- Tips and common mistakes
- Wrapping up and next steps
What you need
- ● Garden fork or broadfork: 1 (for loosening compacted soil without turning it over).
- ● Garden rake: 1 (preferably a bow rake with 6–8" tines for smoothing soil).
- ● Hand trowel: 1 (for precision work in smaller areas or seed placement).
- ○ Hoe (optional but helpful): 1 (for weeding or breaking up clods).
- ● Wheelbarrow or bucket: 1 (for amending soil with compost or fertilizer).
- ● Compost: 2–3 inches (well-aged, nutrient-rich for loose texture).
- ○ Peat moss or coconut coir (optional): 1–2 inches (for moisture retention in sandy soils).
- ○ Sand (optional): Fine-grain, 1–2 inches (for improving drainage in clay-heavy soil).
- ● Balanced fertilizer (e.g., 10-10-10): 1–2 lbs per 100 sq ft (follow package rates).
- ● Test your soil’s pH (ideal range: 6.0–7.0 for most seeds). Use a soil test kit or send a sample to a local extension office.
- ● Clear the area of weeds, rocks, and debris (use a garden sieve if needed for fine soil).
- ● Choose a sunny location with at least 6–8 hours of sunlight daily (check seed packet requirements).
- ● Water access nearby (a hose with adjustable nozzle or watering can works).
Step-by-Step instructions for preparing a loose seed bed
Here's my go-to method for creating the perfect loose soil foundation—it's what helps my seeds germinate in half the time.
🌱 Step 1: Clear and Loosen the Existing Soil
Start by removing any weeds, rocks, or debris from your planting area. I like to use a small hand fork to gently lift out weeds rather than pulling them, which can disturb the soil structure too much. Once the area is clear, use a broadfork or digging fork to loosen the top 6-8 inches of soil. Work the fork in vertically, then rock it back and forth to break up compacted layers.
You'll know you're doing it right when the soil feels light and crumbly, almost like cake batter. If it feels dense or resists the fork, keep working it—this is where roots will grow, and they need space to spread. Avoid walking on the bed once you start loosening, as foot traffic will compact it again.
💧 Step 2: Amend the Soil for Better Drainage and Nutrition
Now's the time to mix in organic matter. I typically add a 2-3 inch layer of compost or well-rotted manure, then work it into the top 4-6 inches of soil using a garden fork or tiller. This improves drainage and adds nutrients that seeds will use to grow strong roots. If your soil is particularly heavy clay, mix in 10-20% perlite or coarse sand to help it aerate better.
For a 4-foot by 4-foot bed, I use about 2-3 gallons of compost spread evenly. You'll see the soil darken and feel lighter as you work—this is your signal that the amendments are well incorporated. Avoid over-amending with fresh manure, as it can burn seeds with excess nitrogen.
☀️ Step 3: Level and Create a Fine Seed Bed Surface
Use a rake to level the soil, creating a smooth, even surface. I like to drag the rake in one direction first, then perpendicular to it, to break up any remaining clumps. The goal is a texture similar to fine crumbs—just loose enough for seeds to push through easily. If you see large clods, break them up by hand or with the back of a fork.
For small seeds, I like to create a slightly raised ridge about 1 inch high in the center of the bed. This helps prevent water from pooling and washing seeds away when I water. Run your fingers across the surface—it should feel soft and uniform, with no sharp edges or hard spots that could damage delicate seedlings.
⏰ Step 4: Water Gently Before Planting
Give the bed a thorough watering 1-2 days before planting. This allows the soil to settle slightly and ensures seeds have moisture available immediately after sowing. Water until the soil is damp 6 inches deep, then let it dry out slightly before planting—this prevents seeds from rotting before they germinate. I use a gentle sprinkler or soaker hose to avoid disturbing the surface.
You'll know the timing is right when the top inch of soil feels slightly damp but not wet to the touch. This creates the perfect environment for seeds to germinate quickly. Avoid walking on the bed again after watering, as it can compact the soil and reduce germination rates.
Tips & tricks for perfect loose soil preparation
Here's what I've learned after years of trial and error to help you create the ideal foundation for seed germination.
Tool Selection: A broadfork is your best friend for Step 1, but if you don't have one, a sturdy digging fork works too. The key is to work vertically first, then rock the fork back and forth to create those air pockets roots need. I've tried hand tools, but they just don't get the job done as efficiently—especially in compacted soil. The goal is to break up those dense layers without turning the soil into a mess.
Amendment Ratio: When adding compost in Step 2, think of it like this: for every 3 parts existing soil, you want 1 part compost. That's why I recommend that 2-3 inch layer spread evenly. For heavy clay soils, the 10-20% perlite or sand is crucial—it's what transforms that dense, brick-like soil into something light and crumbly. I've seen people skip this step with clay and wonder why their seeds struggle to push through.
Surface Texture Check: In Step 3, when you're raking, run your fingers across the surface—it should feel like fine sandpaper, not like you're running your fingers over a brick wall. That's the perfect texture for seeds to push through easily. If you see large clods, break them up immediately rather than trying to rake over them. Those clods can create air pockets that prevent seeds from making good contact with moist soil.
Watering Timing: The 1-2 days before planting watering in Step 4 is crucial because it lets the soil settle just enough to create a stable foundation. I've made the mistake of watering right before planting and ended up with seeds floating on the surface or getting washed away. That slight drying out period after watering is what creates that perfect balance—just damp enough at the top inch but not soggy underneath.
Pro Tips for Prepare Seed Bed
- Here's what I've learned after years of trial and error to help you create the ideal foundation for seed germination.
- Tool Selection: A broadfork is your best friend for Step 1, but if you don't have one, a sturdy digging fork works to...
- Amendment Ratio: When adding compost in Step 2, think of it like this: for every 3 parts existing soil, you want 1 pa...
Frequently asked questions
Got questions about preparing the perfect seed bed?
You’re not alone! Here are some of the most common concerns—and straightforward answers—to help you get started with confidence.
What’s the best time of year to prepare a seed bed?
The ideal window depends on your climate, but spring and early fall are usually best. In cooler regions, aim for 4–6 weeks before your last frost—soil warms enough for seeds to germinate but isn’t scorching. For warm-season crops (like tomatoes or peppers), prep the bed 2–3 weeks before planting when soil temps hit at least 60°F (15°C). Pro tip: Test soil moisture—it should crumble like a damp sponge, not stick or dry out.
How long does it take to prepare a seed bed?
Most DIYers finish in 1–3 hours, depending on bed size and soil condition. Breaking it down:
- Loosening soil: 30–60 mins (hand tools) or 15–30 mins (rototiller).
- Removing debris: 15–45 mins (raking or screening).
- Amending soil: 20–60 mins (mixing compost/fertilizer).
- Leveling: 10–20 mins (final touch).
Can I use a rototiller instead of hand tools?
A rototiller speeds up the process, especially for large beds, but use it wisely:
- Tiller only for the top 6–8 inches—deep tilling can disrupt soil structure.
- Avoid tilling when soil is wet (it compacts easily).
- Hand-finish edges and level the bed—tillers leave uneven spots.
What if my soil is rocky or full of weeds?
Don’t let tough soil stop you! Here’s how to tackle it:
- Rocky soil: Hand-pick large rocks, then till or fork the remaining soil. Add compost or aged manure to improve texture over time.
- Weeds: Smother them first with cardboard or black plastic for 4–6 weeks before tilling. Solarize stubborn weeds in hot climates.
- Clay-heavy soil: Mix in sand or peat moss (1 part amendment to 3 parts soil) to loosen it.
How do I know if my seed bed is ready?
A perfect seed bed passes the three tests:
- Texture: Soil should crumble easily when squeezed—like a damp sponge.
- Moisture: Damp but not soggy (stick your finger in; if it holds a shape, it’s too wet).
- Temperature: At least 50°F (10°C) for cool-season crops; 60°F+ (15°C+) for warm-season.
Wrapping up and next steps
A well-prepared seed bed is the foundation of a thriving lawn—loose, nutrient-rich soil ensures faster sprouts and roots that stand strong against challenges.
Whether you’re a seasoned gardener or just starting, taking the time to till, level, and amend your soil pays off in lush, vibrant growth. Your hard work today will reward you with a healthier lawn tomorrow!
Ready to take the next step? Grab your tools, pick your favorite seed mix, and get ready to watch your lawn transform. Happy planting! 🌱