
Lawn
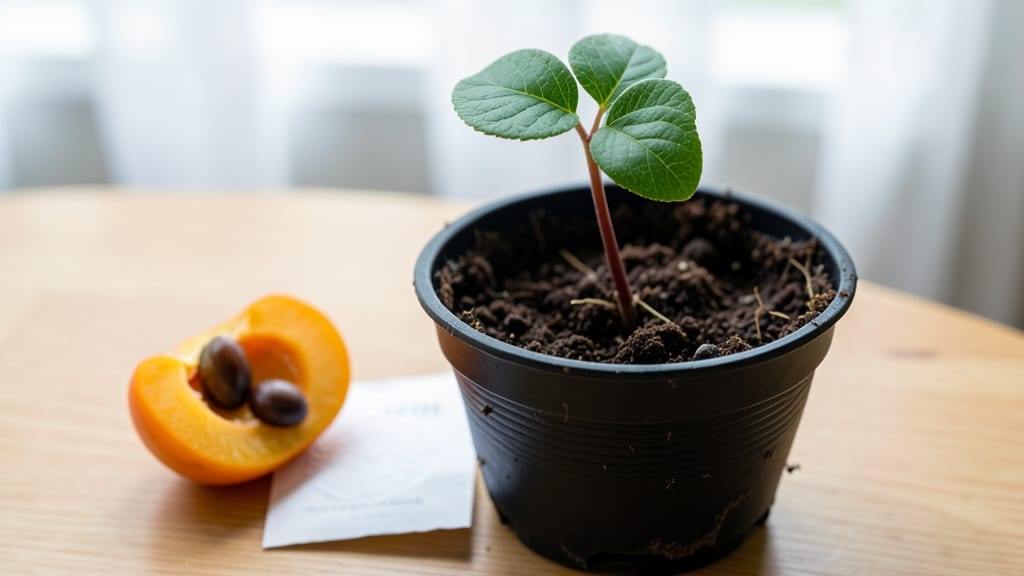
Winterizing persimmon seeds is the secret to next spring’s vibrant trees. 🌱 I’ve learned that skipping proper cold treatment means weeks of waiting for germination—or no sprouts at all. The key is mimicking nature’s freeze-thaw cycle, which breaks seed dormancy and jumpstarts growth.
You’ll need a damp paper towel, a sealed plastic bag, and your refrigerator’s crisper drawer. Place the seeds between the towel layers, seal them tightly, and store them for 6-8 weeks at 35-40°F.
This cold stratification tricks the seeds into thinking winter’s over, so they’ll burst into life as soon as soil warms in spring. By the time you plant in early spring, you’ll see strong, uniform seedlings ready to thrive.
The trees grow faster, resist disease better, and produce fruit sooner than seeds planted without stratification. No more guessing whether your seeds will germinate—just reliable, predictable results. Works in USDA Zones 5-9, but adjust timing if you’re in colder areas.
Start stratification 8-10 weeks before your last frost for best success. Here’s how to do it right the first time!
📚 In This Guide
- What you need
- Instructions
- Tips and common mistakes
- Wrapping up and next steps
What you need
- ● Persimmon seeds: 10–20 fresh, fully ripe seeds (harvested from a non-hybrid persimmon, like Fuyu or Hachiya). Pro tip: 💡 Let them dry for 2–3 days before starting.
- ● Stratification medium: Option 1: 1–2 cups of moist potting soil (sterilized, seed-starting mix preferred).
- ● Option 2: 1 cup of sphagnum peat moss or coconut coir (holds moisture well).
- ● Option 3: A damp paper towel (for quick indoor stratification).
- ● Containers: Small seed trays (with drainage holes) or
- ● Plastic ziplock bags (for paper towel method) or
- ● A sealed jar with a lid (for peat moss/soil mix).
- ● Spray bottle: For gentle moisture control (avoid soaking!).
- ● Refrigerator or cold frame: A space to maintain 35–45°F (2–7°C) for 6–12 weeks. Pro tip: 🌡️ Use the crispier drawer for precise temps!
- ● Plastic wrap or breathable lid: To retain humidity (if using soil/peat).
- ● Patience! Stratification takes time—think of it as a slow-cooker for seeds. ⏳
- ● Seedling heat mat (70–75°F) for post-stratification germination.
- ● Grow lights or sunny windowsill for early sprouts.
- ● Labeling tags to track seed varieties (if experimenting!).
- ● Humidity dome for trays (speeds up germination).
How to stratify persimmon seeds for spring planting
This is the foolproof method I use to break dormancy and ensure strong, healthy persimmon seedlings next spring.
🌱 Step 1: Extract and Clean the Seeds
Open a ripe persimmon and scoop out the seeds, removing any fruit pulp still clinging to them. Rinse the seeds gently under cool water to remove all residue—leftover fruit sugars can attract mold during stratification. Lay them on a paper towel to dry completely for 24 hours.
Persimmon seeds have a hard outer shell that needs to soften slightly before stratification. I like to rub them between two sheets of sandpaper for 30 seconds each—just enough to scratch the surface without damaging the seed inside. This tiny abrasion helps water penetrate later.
💧 Step 2: Cold-Moist Stratification
Place the prepared seeds in a resealable plastic bag with a damp paper towel. The towel should feel like a wrung-out sponge—moist but not dripping. Seal the bag and label it with the date and "persimmon seeds." Store it in your refrigerator's crisper drawer where temperatures stay consistently between 35-45°F.
Check the seeds weekly for moisture. If the towel feels dry, mist it lightly with water and reseal. The goal is to keep the seeds consistently moist but never soggy. After 6-8 weeks, the seeds will begin to sprout—you'll see tiny white roots emerging from the ends.
☀️ Step 3: Prepare Growing Medium and Pots
While seeds stratify, fill 3-inch diameter pots with a mix of 50% potting soil and 50% perlite. This lightweight blend prevents compaction and ensures good drainage—persimmon seedlings hate soggy roots. Moisten the mix until it holds together when gently squeezed but doesn't form a muddy ball.
Persimmon seeds germinate best in warmth, so place the pots in a seedling heat mat set to 70-75°F. Keep the soil surface lightly moist but never waterlogged. The moment you see the first green shoot (1-2 weeks after sprouting), move the pots to a sunny window or under grow lights for 12-14 hours daily.
🌿 Step 4: Transplant and Harden Off Seedlings
When seedlings develop 2-3 sets of true leaves (about 8-10 weeks after sowing), transplant them into larger 5-gallon containers filled with a well-draining soil mix. Persimmon trees grow large, so giving them room now prevents root-bound stress later. Water deeply after transplanting to settle the soil around the roots.
Two weeks before your last frost date, begin hardening off the seedlings. Start by placing them outside in a sheltered spot for 1 hour daily, gradually increasing exposure over 7-10 days. Watch for leaf curling or wilting—these are signs they're not ready for full sun yet. Once they tolerate a full day outdoors without stress, they're ready for the garden.
⏰ Step 5: Plant Outdoors and Mulch
Choose a sunny location with well-draining soil—persimmons thrive in full sun and 60-80°F temperatures. Dig a hole twice as wide as the root ball but no deeper. Gently remove the seedling from its container, loosen the roots if they're circling, and place it in the hole at the same depth it was growing in the pot.
Backfill with soil and water deeply to eliminate air pockets. Spread 2-3 inches of organic mulch around the base, keeping it 6 inches away from the trunk to prevent rot. Mulch helps retain moisture and regulates soil temperature—critical for young persimmon trees in their first growing season.
Tips & tricks for perfect persimmon seed stratification
These little-known tricks will help you maximize your persimmon seed success rate and avoid common pitfalls that waste months of waiting.
Seed Shell Prep: The 30-second sandpaper rub in Step 1 isn't just about scratching the surface—it's about creating microscopic cracks that let moisture penetrate. I use medium-grit sandpaper (around 120-grit) because finer grits won't create enough abrasion while coarser ones risk damaging the seed. After sanding, wipe away any dust with a damp cloth before drying to prevent contamination during the 24-hour drying period.
Stratification Temperature: While the 35-45°F range works perfectly in most refrigerators, some models run warmer. If your fridge's crisper drawer feels warmer than 45°F, move the bag to the main fridge compartment where temperatures are more consistent. The goal is to mimic natural winter conditions—too warm and the seeds may sprout prematurely, too cold and they won't break dormancy at all. A fridge thermometer is worth the investment for peace of mind.
Moisture Management: The damp paper towel in Step 2 should feel like a wrung-out sponge—if it drips when squeezed, the seeds will suffocate. I like to fold the towel into quarters before placing it in the bag to create more surface area for moisture distribution. Check weekly by gently squeezing between your fingers; if it feels dry on the outside, the seeds are getting too little moisture. The key is to keep the towel consistently damp without creating a soggy environment.
Sprouting Timeline: While most seeds sprout within 6-8 weeks, some may take up to 12 weeks—patience is crucial. I mark my calendar with the start date and add 10 weeks as a reminder to check for sprouts. If you don't see any roots after 8 weeks, gently open the bag to check for mold (which would mean too much moisture) or dried seeds (which would mean too little). The first sign of success is a tiny white root about 1/8-inch long—this is when you know stratification worked!
Pro Tips for Persimmon Seed Winter
- These little-known tricks will help you maximize your persimmon seed success rate and avoid common pitfalls that wast...
- Seed Shell Prep: The 30-second sandpaper rub in Step 1 isn't just about scratching the surface—it's about creating mi...
- Stratification Temperature: While the 35-45°F range works perfectly in most refrigerators, some models run warmer. If...
Frequently asked questions
Got questions about saving persimmon seeds for winter? You’re not alone! Here are the most common queries—and straightforward answers—to help you master frost-proof stratification like a pro.
1. Why do persimmon seeds need cold stratification before planting?
Persimmon seeds require cold stratification to mimic winter conditions, which breaks seed dormancy. Without it, seeds may not sprout—even if planted in spring. Think of it as a "wake-up call" for the seed’s growth hormones!
2. How long should I stratify persimmon seeds in the fridge?
For best results, stratify seeds for 6–8 weeks in a damp paper towel or moist sand, kept at 35–45°F (2–7°C). Check weekly to ensure they stay evenly moist (not soggy!). Patience pays off—this mimics a natural winter chill.
3. Can I stratify persimmon seeds outside in winter instead of using a fridge?
Yes! Bury seeds 4–6 inches deep in a well-draining pot or garden bed in late fall. Cover with mulch to protect from extreme temps. Just ensure they’re in a spot that won’t freeze solid—zone 5+ climates work well. Nature does the work for you!
4. What if my persimmon seeds mold or rot during stratification?
Mold or rot usually means too much moisture or poor airflow. If you spot fuzz or a foul smell, discard the batch and start fresh with dry seeds. Use a sterilized container and a paper towel (not plastic) to prevent this. Safety first!
5. How do I know when stratified persimmon seeds are ready to plant?
Ready seeds will sprout tiny roots (1/4–1/2 inch long) or show a green tip when gently prodded. Plant them shallowly (1/2 inch deep) in well-draining soil, keeping it moist but not waterlogged. Spring’s your best bet for outdoor planting!
Wrapping up and next steps
Harvesting and stratifying persimmon seeds this winter is your secret weapon for vibrant blooms next spring! 🌱 By mimicking nature’s chilly patience, you’re not just preserving seeds—you’re nurturing the promise of future fruit. Whether you’re a seasoned gardener or a curious beginner, this process is rewarding and straightforward.
Ready to plant the seeds of success? Grab those stratified seeds in early spring and give them their first taste of sunlight—your garden’s transformation starts now! 🌿