
Propagation
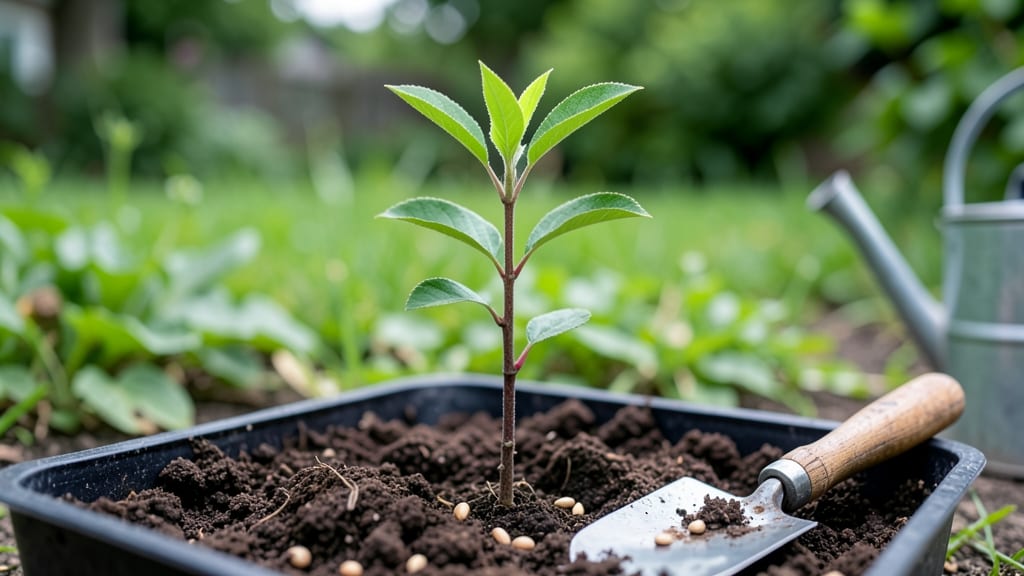
Peach tree seed germination starts with a trick nature uses: cold stratification. 🌱 This winter process mimics how seeds survive in the soil until spring, dramatically improving your chances of seeing those first green shoots next year. Without it, you might wait months—or never see germination at all. I’ve tried both ways, and the difference is night and day.
First, you’ll need fresh peach pits (not store-bought), a damp paper towel, a plastic bag, and a fridge. The key is patience—stratification takes 6-8 weeks in the fridge, but it’s the only way to break the seed’s dormancy. Too impatient?
Some gardeners speed it up with a moisture meter to keep the medium just right—never soggy, never dry. The goal is to trick the seed into thinking it’s winter, so it’ll wake up ready for spring planting.
When you finally plant the stratified seeds in well-draining soil (or a seed-starting mix), keep them warm—70-75°F is ideal—and expect germination in 2-4 weeks. The first leaves might look strange (they’re called cotyledons), but once true leaves appear, you’ve won the battle.
These young trees will need bright light and gentle watering to avoid damping-off, but the payoff—homegrown peaches—is worth every step.
Here’s the secret no one tells you: not all peach seeds will grow true to the parent tree. What you will get is a hardy, disease-resistant seedling that thrives in your climate—exactly the kind of tree you’d never find at a nursery.
Start now, and by next summer, you could be harvesting your own fruit. (Yes, it takes years, but the wait is part of the magic.)
📚 In This Guide
- What you need
- Instructions
- Tips and common mistakes
- Wrapping up and next steps
What you need
- ● Peach pit/seeds: 3–5 fresh, plump pits (harvested from ripe, organic peaches—avoid store-bought if possible).
- ● Paper towels or coffee filters: 2–3 sheets (unbleached, seedling-safe).
- ● Plastic zip-top bag: 1 quart-sized (with a sealable closure).
- ● Spray bottle: 8 oz (with water) for gentle misting.
- ● Refrigerator: A standard fridge (35–40°F / 2–4°C) for cold stratification.
- ● Planting container: 1 small pot (4–6" diameter) or seedling tray with drainage holes.
- ● Potting mix: 1 bag of sterile, well-draining seed-starting mix (e.g., 50% perlite + 50% peat moss or coco coir).
- ● Plastic wrap or dome: 1 (to retain humidity during germination).
- ● Grow lights or sunny windowsill: Access to 6+ hours of indirect light daily.
- ● Seedling heat mat: 1 (to maintain warmth post-stratification, ~70°F / 21°C).
- ● Humidity tray: 1 (for extra moisture control).
- ● Fungicide: 1 bottle (e.g., hydrogen peroxide 3% or mycorrhizal powder to prevent rot).
- ● Label maker: 1 (to track seed varieties and dates).
- ● Thermometer/hygrometer: 1 (to monitor fridge temps and humidity).
Step-by-step instructions for germinating peach tree seeds with cold stratification
Here's how to break dormancy and coax peach seeds into strong, viable sprouts for next spring.
🌱 Step 1: Extract and Clean the Seeds
Start by removing seeds from the peach pit—this is the most critical first step. Use a sharp knife to carefully slice open the hard shell while avoiding the seed itself. The seed will be nestled inside like a small, flat bean. Rinse seeds thoroughly under cool water to remove any remaining fruit residue, which can attract mold.
Here's the thing—peach seeds have a hard outer coating that naturally resists water absorption. Soaking them first is essential. Place seeds in a clean glass jar and cover completely with lukewarm water for 24 hours. This softens the seed coat and kickstarts the germination process. I like to label the jar with the date to track the soaking period precisely.
❄️ Step 2: Perform Cold Stratification
Cold stratification mimics winter conditions and breaks seed dormancy. After soaking, drain the water and wrap the seeds in a damp paper towel. Fold the towel to contain the seeds without crushing them—think of it like a seed burrito. Place this bundle in a sealed plastic bag with a few ice cubes to maintain moisture and keep temperatures stable.
Store the bag in your refrigerator's crisper drawer, where temperatures hover around 35-40°F. This is the magic temperature range for peach seeds. Check the towel weekly—it should stay moist but not soggy. If it dries out, mist lightly with water and reseal. After 8-12 weeks, your seeds will have completed stratification and be ready for planting.
🪴 Step 3: Plant Stratified Seeds in Germination Medium
Fill small, 2-3 inch deep pots with a sterile seed-starting mix—never garden soil, as it's too dense and may harbor pathogens. Press the mix down lightly so it's firm but not compacted. Plant each seed ½ inch deep, spacing them about 1 inch apart in the pot. You'll want to plant 4 seeds total to account for potential losses.
Cover the pots loosely with plastic wrap or a humidity dome to trap warmth and moisture. Place them in a warm spot, ideally 70-75°F, away from direct sunlight. This warmth encourages the seeds to break dormancy and begin sprouting. You'll see the first signs of life in 2-4 weeks, though some seeds may take longer—patience is key here.
☀️ Step 4: Provide Light and Monitor Growth
Once the first green shoots appear, remove the plastic cover immediately. Move the pots to a bright, indirect light source—a south-facing window works well, but avoid harsh midday sun, which can scorch tender seedlings. If natural light is insufficient, supplement with a grow light positioned 4 inches above the seedlings for 12-14 hours daily.
Watch for first true leaves—these will be small and serrated, signaling that the seedling is establishing its photosynthetic machinery. Keep the soil evenly moist but never waterlogged. Overwatering at this stage is a common mistake that leads to damping-off, a fungal disease that causes seedlings to collapse. Water only when the top inch of soil feels dry to the touch.
⏰ Step 5: Transplant and Harden Off Seedlings
When seedlings reach 4-6 inches tall and have 4-5 true leaves, they're ready for their first transplant. Choose 4-inch pots filled with a well-draining potting mix and transplant carefully, ensuring the root ball stays intact. Peach seedlings are sensitive to root disturbance, so handle them gently—this is where your patience pays off.
Over the next 2 weeks, gradually acclimate the seedlings to outdoor conditions. Start by placing them outside in a shaded, sheltered spot for 1-2 hours the first day, then slowly increase their time outdoors by 1 hour daily. This process, called hardening off, prepares them for the garden. Once they tolerate full sun without wilting, they're ready to plant in the ground—though it's best to wait until spring to give them time to establish before winter.
Tips & tricks for reliable peach seed germination
Here's what I wish I knew when I first tried germinating peach seeds—these tricks will save you time and frustration.
Seed Extraction Precision: When slicing open the peach pit, work slowly near the seed to avoid damaging it. The seed's delicate inner membrane is easily pierced—use a sharp knife and make clean, controlled cuts. I've ruined seeds by being too aggressive, so take your time here. The goal is to expose the seed without compromising its integrity for the 24-hour soak that follows.
Stratification Temperature Consistency: That 35-40°F range in your fridge's crisper drawer is critical—any warmer and the stratification process slows dramatically. If your fridge runs hotter, move the bag to the coldest section or place it on the bottom shelf where temps are most stable. I've seen seeds fail to sprout when kept at 45°F instead of the ideal range—don't let small temperature variations sabotage your efforts.
Germination Medium Sterility: The sterile seed-starting mix in Step 3 isn't just about pathogen prevention—it's about creating the perfect environment for those delicate roots to establish. If you're using a mix from a bag, check the expiration date; older mixes can harbor dormant fungi. I've had better success with coconut coir-based mixes that retain moisture without compacting like peat can. The ½-inch planting depth is perfect for maintaining consistent moisture while allowing oxygen to reach the seed.
Light Transition Strategy: When moving seedlings from the warm, dark germination spot to light in Step 4, do it gradually over 2-3 days rather than all at once. Sudden light exposure can shock tender seedlings. Start with 2 hours of indirect light daily, then increase by 1 hour each day until they're getting full 12-14 hours. This mimics natural spring conditions and prevents the leggy growth that occurs when seedlings stretch too quickly toward light.
Pro Tips for Peach Tree Seed Germination
- Here's what I wish I knew when I first tried germinating peach seeds—these tricks will save you time and frustration.
- Seed Extraction Precision: When slicing open the peach pit, work slowly near the seed to avoid damaging it. The seed'...
- Stratification Temperature Consistency: That 35-40°F range in your fridge's crisper drawer is critical—any warmer and...
Frequently asked questions
How long does cold stratification take for peach tree seeds?
Cold stratification typically requires 6–12 weeks in the refrigerator (around 35–40°F). Some seeds may sprout sooner, while others need the full duration. Patience is key—don’t rush the process! Monitor moisture levels to avoid mold. If no sprouts appear after 12 weeks, try repeating the stratification or testing seed viability with a simple water float test.
Can I skip cold stratification and still germinate peach seeds?
While possible, skipping stratification drastically reduces success rates (often below 20%). Peach seeds have a hard outer shell that requires cold treatment to break dormancy. If you’re impatient, try soaking seeds in warm water for 24 hours before planting in a warm, humid environment—but expect slower or inconsistent germination. For best results, always stratify!
What’s the best temperature for germinating peach seeds after stratification?
Once stratified, aim for 70–75°F (21–24°C) during the day and slightly cooler at night. Use a seedling heat mat if your home runs cooler. Avoid extreme heat (above 85°F/29°C), which can dry out seeds. A clear plastic bag over the pot creates a mini greenhouse effect—just remove it daily for airflow to prevent fungal issues.
Why aren’t my peach seeds sprouting after stratification?
Several factors might be at play: old seeds (viability drops after 1–2 years), improper stratification (wrong temps/moisture), or poor planting conditions (too dry/wet, lack of light). Try these fixes:
- Test seed viability by cutting open a few—look for a firm, white embryo.
- Re-stratify seeds for another 4–6 weeks.
- Plant deeper (½ inch) in moist, sterile potting mix.
- Use a grow light if natural light is weak.
Will peach tree seedlings grow true to the parent tree?
No—seeds from store-bought peaches (or most commercial varieties) won’t replicate the parent tree’s traits. Seedlings may produce small, tart fruit or even wild-type peaches with different colors/shapes. For consistent results, graft a scion from your desired peach tree onto a seedling rootstock. Grafting ensures the tree stays true to the original cultivar!
Wrapping up and next steps
Germinating peach tree seeds with cold stratification isn’t just a science—it’s an art of patience and care that rewards you with the promise of future fruit.
By following the right steps, you’ve taken the first leap toward growing your own peach tree, and with time, dedication, and a little luck, those tiny seeds could blossom into a thriving orchard. Now’s the time to plant those seeds and watch nature work its magic!
🌱 Your Next Step: Plant & Wait
Once your seeds are stratified and ready, plant them in well-draining soil and keep them moist. Stay consistent—check on them regularly, and soon, you’ll see those first signs of life! Happy growing! 🌱