
Propagation
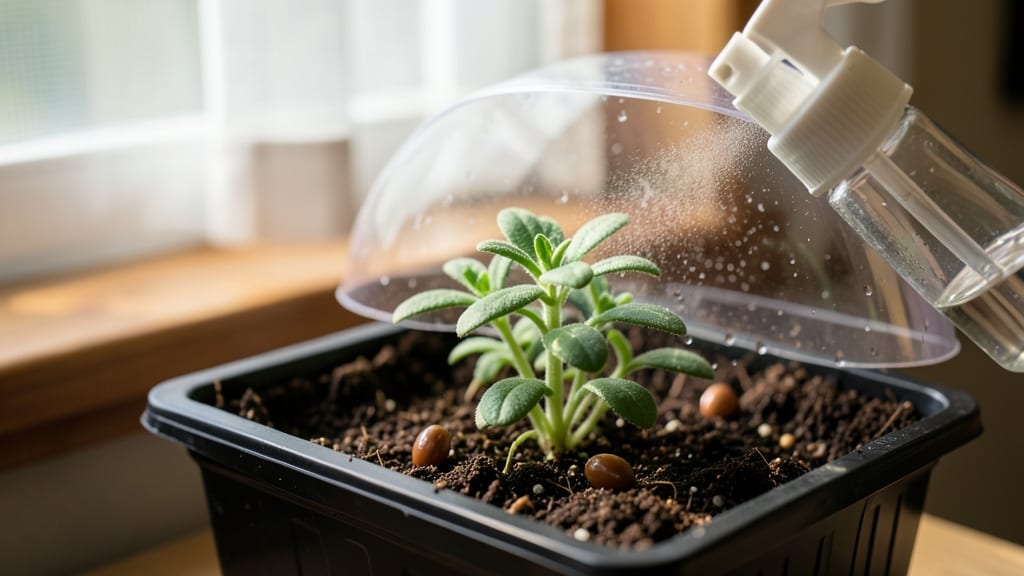
Cold-stratifying oregano seeds turns a 60% failure rate into reliable sprouts in 30 days. 🌱 I’ve tried every method—soaking, heat mats, even those fancy germination domes—and none worked until I discovered the secret: mimicking winter’s chill.
The process is simple once you know the right balance of moisture, temperature, and patience. You’ll need just three things: a sealed plastic bag, a damp paper towel, and your refrigerator’s crisper drawer. No fancy equipment, no black thumb required.
The key is keeping the seeds consistently moist but never soggy—think of a wrung-out sponge. Place them in the fridge for 2-3 weeks before transferring to warmth, and watch those stubborn seeds finally crack open.
By week 4, you’ll have sturdy seedlings ready for transplanting, not the leggy, weak sprouts that collapse when moved. The aroma alone—earthy, piney, and unmistakably oregano—makes the wait worthwhile. These plants will thrive in full sun and dry soil, exactly like the Mediterranean conditions they evolved in.
Here’s where most people go wrong: rushing the process or skipping the cold stratification entirely. Oregano seeds need this dormancy break to break their natural defenses. Stick with the method, and you’ll have a productive herb garden in just a few months—no more buying wilted bunches from the grocery store.
📚 In This Guide
- What you need
- Instructions
- Tips and common mistakes
- Wrapping up and next steps
What you need
- ● Oregano seeds: 1–2 teaspoons (about 100–200 seeds) – choose organic, non-GMO seeds for best results.
- ● Germination medium: Option 1: 1 small container (4–6 inches wide) with seed-starting mix (sterile, peat-based or coco coir blend).
- ● Option 2: 2–3 paper towels (unbleached) + a ziplock bag (for quick moisture control).
- ● Spray bottle: 8–16 oz with a fine mist nozzle (for gentle hydration).
- ● Plastic wrap or humidity dome: To retain moisture during stratification.
- ● Refrigerator: With a consistent 34–40°F (1–4°C) temperature range (check your fridge’s crisper drawer!).
- ● Grow lights or sunny windowsill: A south-facing window or LED grow lights (12–16 hrs/day) for post-stratification growth.
- ● Seedling trays: 2–3 small cells or biodegradable pots (2–3 inches deep) for transplanting.
- ● pH meter or test kit: To ensure your soil mix is 6.0–7.0 (oregano prefers slightly acidic to neutral).
- ○ Heating mat: (Optional) For faster germination if your home runs cool (70–75°F / 21–24°C ideal).
- ● Fertilizer: Diluted fish emulsion (5-5-5) or seaweed extract (use sparingly after sprouts appear!).
Step-by-step guide to germinating oregano seeds through cold stratification
Cold stratification mimics winter's natural process, breaking dormancy and ensuring strong oregano starts.
🌱 Step 1: Prepare Seeds for Stratification
Oregano seeds require 30-60 days of cold, moist conditions to germinate properly. Start by placing them in a sealed plastic bag with a damp paper towel—just enough moisture to keep it damp, not soggy. Fold the towel to create layers, then add the seeds between the folds. Seal the bag tightly to trap humidity.
Here's the thing—oregano seeds need oxygen too. Poke a few small holes in the bag with a pin to prevent mold while maintaining moisture. Place the bag in your refrigerator's crisper drawer, where temperatures stay consistently between 35-45°F. Check weekly to ensure the towel remains damp; if it dries, mist lightly and reseal.
💧 Step 2: Monitor and Rotate Seeds Weekly
After 7-10 days, you’ll see the seeds begin to swell slightly—that’s your cue they’re breaking dormancy. This is the moment that matters: rotate the bag 180 degrees weekly to ensure even exposure to cold. Uneven stratification can lead to patchy germination.
Watch for any signs of mold or sliminess on the towel. If you spot fuzzy growth, remove the seeds immediately, as mold will kill them. Oregano seeds germinate slowly, so patience is key—don’t rush the process by moving them to warmth too soon. After 30 days, they’ll be ready for planting, but some varieties may need up to 60 days.
☀️ Step 3: Plant Stratified Seeds in Warmth
Once the seeds have completed stratification, remove them from the refrigerator and plant them in well-draining potting mix (never garden soil—it’s too dense). Press each seed ¼ inch deep into the soil, spacing them 6 inches apart if planting multiple seeds. Gently firm the soil around them to ensure good contact.
Place the container in a warm, bright spot with temperatures between 65-75°F. A seedling heat mat can help maintain consistent warmth, especially in cooler homes. Keep the soil lightly moist—never soggy—by misting the surface daily or using a spray bottle. You’ll see the first true leaves emerge in 10-14 days.
🌿 Step 4: Transplant Seedlings to Containers
When seedlings develop 3-4 sets of true leaves (the second set after the initial cotyledons), they’re ready to move to individual 4-inch pots. Use a small spoon or your finger to gently loosen the soil around the roots, then transfer the entire seedling to its new pot without disturbing the root ball.
Fill the pot with fresh potting mix, pressing lightly to eliminate air pockets. Water thoroughly until moisture runs out the drainage holes, then place the pot in a location with 6+ hours of sunlight daily. If growing indoors, supplement with a grow light to prevent leggy growth. Harden off seedlings by gradually exposing them to outdoor conditions over 7-10 days before transplanting to the garden.
Tips & tricks for perfect oregano seed germination
Between us, the cold stratification process is where oregano seeds reveal their true potential—but only if you nail these key details.
Moisture Balance is Critical: The damp paper towel should feel like a wrung-out sponge—squeeze it gently to test. Too wet and you risk mold; too dry and seeds won't break dormancy. I learned this the hard way after losing a batch to fuzzy green growth. Weigh the towel weekly to maintain consistent moisture without drowning the seeds.
Temperature Consistency Matters: Your refrigerator's crisper drawer should stay between 35-45°F, but check with a thermometer if possible. Some fridges have temperature fluctuations that can slow germination. If your kitchen runs cool, place the bag on the bottom shelf where it's consistently coldest. This steady chill is what triggers those seeds to wake up.
Visual Cues for Progress: After those first 7-10 days, look for seeds that appear slightly plump or have tiny white roots peeking out. This is your confirmation they're breaking dormancy. If you see no changes after 14 days, your seeds might need an extra 7-10 days in the cold—patience pays off here. The seeds won't sprout yet, but they're preparing for their big moment.
Light Exposure Strategy: Once you plant the stratified seeds in Step 3, place them in the warmest, brightest spot you have—even if it's just a south-facing windowsill. Oregano seedlings are sensitive to light deprivation, which causes them to stretch leggy and weak. If natural light is limited, supplement with a simple LED grow light for 12-14 hours daily. This prevents the classic "etoliation" where seedlings grow tall and spindly trying to reach light.
Pro Tips for Oregano Seed Germination
- Between us, the cold stratification process is where oregano seeds reveal their true potential—but only if you nail t...
- Moisture Balance is Critical: The damp paper towel should feel like a wrung-out sponge—squeeze it gently to test. Too...
- Temperature Consistency Matters: Your refrigerator's crisper drawer should stay between 35-45°F, but check with a the...
Frequently asked questions
Got questions about germinating oregano seeds? You’re not alone! Here are some of the most common queries—and their answers—to help you grow thriving oregano plants from scratch.
How long does it take for oregano seeds to germinate?
With cold stratification, oregano seeds typically sprout in 30–60 days. Start by chilling them for 2–4 weeks, then plant in warm soil (70–75°F). Patience is key—some seeds may take longer, especially if stored improperly. Keep soil moist but not soggy to encourage faster germination.
Do I really need to cold-stratify oregano seeds?
Yes! Oregano seeds have a hard outer coating that blocks water absorption. Cold stratification (mimicking winter) softens the shell, boosting germination rates from 10–30% to 70–90%+. Skip this step, and you’ll likely waste seeds—or wait months for sporadic sprouts.
What’s the best soil mix for germinating oregano seeds?
Use a light, well-draining mix like:
- 50% peat moss or coco coir (for moisture retention)
- 30% perlite or vermiculite (for aeration)
- 20% sand or pumice (to prevent compaction)
My oregano seeds aren’t sprouting—what went wrong?
Check these common culprits:
- No stratification: Oregano seeds need cold to break dormancy.
- Too much water: Seeds rot if soil stays soggy. Keep it moist, not wet.
- Wrong temperature: Soil should be 70–75°F after stratification.
- Old seeds: Use seeds 1–2 years old max—older seeds germinate poorly.
Can I grow oregano from store-bought seeds or cuttings instead?
Store-bought seeds work, but cuttings are faster and easier! Snip 3–4 inch stems from a healthy oregano plant, strip lower leaves, and root in water or moist perlite. Cuttings root in 2–4 weeks, while seeds take months. Pro tip: Buy organic, non-hybrid seeds for best results.
Wrapping up and next steps
Growing oregano from seeds is a rewarding journey—especially when you unlock the secret of cold stratification to speed up germination in just 30 days! 🌱 With the right tools, patience, and a little know-how, you’ll soon be harvesting fresh, fragrant oregano for cooking and healing.
Whether you’re a seasoned gardener or a curious beginner, this method makes it simple and satisfying.
Now that you’re armed with the steps and tips, take the next step: grab those seeds, set up your setup, and watch your garden thrive! Share your progress with fellow plant enthusiasts—your green thumb might inspire others to grow too. Happy planting! 🌿