
Lawn
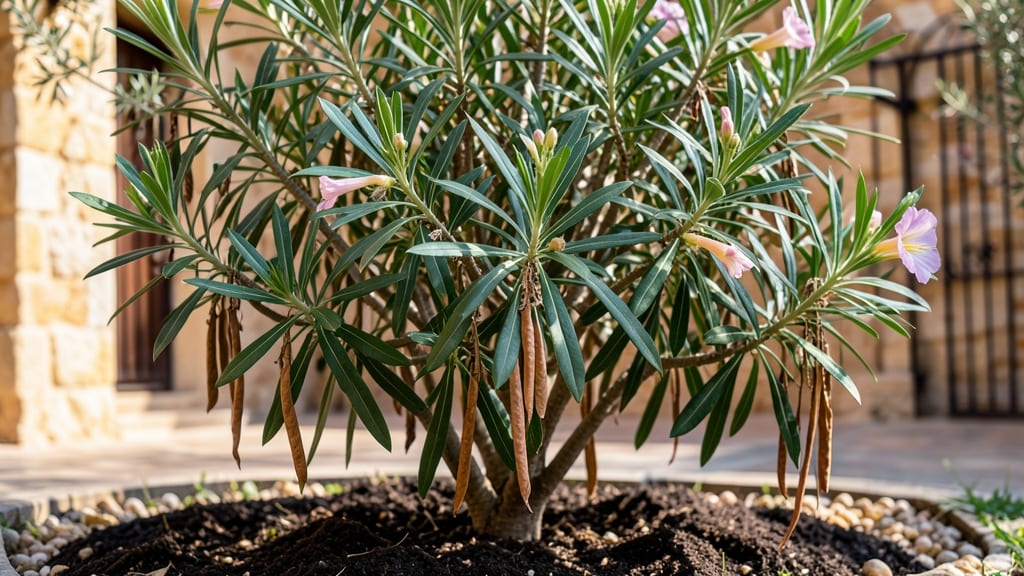
Growing oleander from seed pods transforms your garden into a sculptural masterpiece year after year. 🌿 The process starts with harvesting those distinctive, velvety pods—each one packed with potential for dramatic, glossy foliage and fragrant blooms.
Unlike cuttings, seeds let you experiment with colors and forms that might not exist in your local nursery.
Timing matters most: collect pods when they turn from green to brown and begin splitting open, usually in late summer or early fall. Inside, you'll find flat, winged seeds that need a brief cold treatment to break dormancy—simply mix them with damp sand and refrigerate for 4-6 weeks.
This mimics winter conditions and tricks the seeds into germinating when you want them to.
Once planted, seedlings emerge slowly but steadily, with dark green leaves that develop the signature oval shape. Keep them in bright, indirect light at first, then gradually introduce full sun as they strengthen.
The real magic happens when they mature—oleander's arching branches and clustered flowers create a focal point that thrives even in drought conditions.
Fair warning: oleander is toxic if ingested, so wear gloves when handling seeds and keep plants away from pets and children. With proper care, though, your seed-grown oleander will reward you with decades of low-maintenance beauty—and the satisfaction of growing something truly unique from scratch.
📚 In This Guide
- What you need
- Instructions
- Tips and common mistakes
- Wrapping up and next steps
What you need
- ● Oleander seed pods: 10–20 mature, dried pods (harvested from healthy Nerium oleander plants; ensure they’re fully brown and split open naturally).
- ● Well-draining potting mix: 5–10 gallons (blend equal parts cactus/succulent soil, perlite, and coarse sand for aeration).
- ● Containers: Shallow trays (for germination: 12"x16" with drainage holes).
- ● Individual pots (4–6" diameter, for seedlings: terracotta or fabric pots preferred).
- ● Decorative planters or sculptural vessels (if designing arrangements).
- ● Seed-starting tools: Sterilized tweezers (for handling tiny seeds).
- ● Spray bottle (with room-temperature water).
- ● Fine-mesh sieve (to separate seeds from chaff).
- ● Grow lights or sunny windowsill: 12–16 hours of indirect light daily (or a 40W LED grow bulb for artificial light).
- ● Humidity dome or plastic wrap: To maintain moisture during germination.
- ● Slow-release fertilizer: 5–10-5 NPK ratio (mix 1 tsp per gallon of soil at planting).
- ● Decorative elements: Gravel, moss, or driftwood for sculptural designs.
- ○ Heat mat (optional): For faster germination (set to 70–75°F).
- ● Pruning shears: For trimming mature plants to encourage bushier growth.
- ● Label markers: To track seed pod sources or varieties.
Step-by-Step guide to cultivating oleander seed pods for year-round design
Transforming those striking seed pods into lasting garden art is simpler than you’d think—just follow this precise process.
🌱 Step 1: Harvest and Clean the Seed Pods
Collect mature oleander seed pods when they turn a deep brown and begin splitting open naturally. Use clean, sharp pruning shears to snip the pods from the plant, leaving a small stem attached. This prevents damage to the plant and makes handling easier later.
Remove any dried leaves or debris clinging to the pods by gently brushing them with a soft-bristled brush. Avoid water pressure—wet pods can crack prematurely. Lay them on a clean, dry towel to air-dry completely for 3-5 days in a shaded spot. You’ll know they’re ready when the outer husk feels papery and cracks easily when bent.
🪴 Step 2: Prepare the Drying and Preservation Setup
Choose a well-ventilated area with steady, indirect light—direct sun can cause the pods to warp or split. Arrange the dried pods on a mesh screen or elevated tray to allow airflow on all sides. This prevents mold and ensures even drying.
For long-term preservation, lightly spray the pods with a 50/50 water and white vinegar solution using a fine mist. This natural preservative slows decay without altering color. Let them dry again for 24 hours before handling. Store them in a sealed container with silica gel packets to maintain dryness and structural integrity.
☀️ Step 3: Design and Assemble Sculptural Arrangements
Group pods by size and shape for balanced visual impact. Use floral wire or twine to bind clusters together—start with the largest pods as anchors, then weave smaller ones around them. For a natural look, mimic the plant’s branching pattern by positioning pods at 45-degree angles where stems would grow.
Embed the wired clusters into a sculptural base like driftwood, clay pots, or even repurposed garden stakes. Secure with hot glue or strong craft adhesive, ensuring the pods remain upright. For outdoor displays, seal the base with weatherproof varnish to protect against moisture and pests.
⏰ Step 4: Maintain and Refresh Display Pieces
Inspect stored pods every 3 months for signs of moisture or pests. If any pods feel damp or develop dark spots, isolate them and dry them again under indirect light. Replace silica gel packets as needed to maintain dry conditions.
Outdoor arrangements should be brought inside during heavy rain or snow to prevent water damage. Dust them lightly with a soft cloth every 2 weeks—oleander pods hold dust like a magnet, which dulls their natural sheen. Rotate displays seasonally to extend their visual appeal and prevent uneven wear.
Tips & tricks for perfect oleander seed pod preservation
Here's what nobody tells you about keeping those striking seed pods looking fresh for years.
Harvesting Timing: The 3-5 day drying period in Step 1 is critical—don't rush it! I learned this the hard way after trying to speed up the process and ending up with pods that cracked prematurely. Test readiness by gently bending a pod; if it splits easily with a papery sound, it's ready. Place a small fan nearby to circulate air without creating drafts that could damage delicate pods.
Preservation Solution: That 50/50 water and white vinegar spray in Step 2 works wonders, but here's the secret: use a fine mist setting on your spray bottle to avoid oversaturating the pods. After spraying, let them air-dry for exactly the 24 hours specified—any longer and you risk moisture retention. This step extends shelf life by preventing mold while keeping those rich brown hues vibrant.
Design Stability: When assembling your sculptural pieces in Step 3, use floral wire that's slightly thicker than the pods themselves. The 45-degree angle positioning creates natural-looking branches, but make sure to secure each pod with at least two wraps of wire to prevent shifting. For extra durability, I recommend using a hot glue gun to reinforce the base attachment points before adding the weatherproof sealant.
Pro Tips for Oleander Seed Pods
- Here's what nobody tells you about keeping those striking seed pods looking fresh for years.
- Harvesting Timing: The 3-5 day drying period in Step 1 is critical—don't rush it! I learned this the hard way after t...
- Preservation Solution: That 50/50 water and white vinegar spray in Step 2 works wonders, but here's the secret: use a...
Frequently asked questions
Got questions about oleander seed pods?
You’re not alone! Here are some of the most common inquiries—plus straightforward answers to help you navigate growing, styling, and troubleshooting these striking botanical sculptures.
When do oleander seed pods appear after flowering?
Oleander seed pods typically form 8–12 weeks after the plant blooms, depending on climate and care. In warmer regions, you may see them as early as late summer, while cooler areas might delay them until fall. Prune spent flowers in early spring to encourage stronger pod development later in the season.
Are oleander seed pods safe to handle?
No!
Every part of the oleander plant—including seed pods—is highly toxic if ingested or even handled with broken skin. Wear gloves and avoid crushing pods. Keep them out of reach of pets and children. For design use, opt for non-toxic alternatives like dried seed pods from non-poisonous plants.
How long do oleander seed pods last in arrangements?
When dried properly, oleander seed pods can last 1–3 years in arrangements, retaining their shape and texture. Store them in a cool, dry place away from direct sunlight. For longer viability, spray with a light coat of hairspray to preserve their papery texture.
Can I grow new oleander plants from seed pods?
Yes, but it’s not recommended due to the plant’s toxicity. If you still want to try, extract seeds, soak them in water for 24 hours, then plant in well-draining soil. Germination can take 4–8 weeks. For safer alternatives, consider propagating from cuttings or purchasing certified non-toxic plants.
Why aren’t my oleander seed pods forming?
Missing pods often stem from poor pollination, nutrient deficiencies, or over-pruning. Hand-pollinate flowers with a soft brush, ensure the plant gets full sun and balanced fertilizer, and avoid aggressive trimming during blooming season. If issues persist, check for pests or disease.
Wrapping up and next steps
Oleander seed pods aren’t just striking additions to your landscape—they’re a year-round statement piece that blends beauty with practicality. Whether you’re drawn to their sculptural charm or their resilience, growing them is a rewarding way to elevate your outdoor space.
Now that you’ve got the know-how, why not take the next step?
🌱 Next steps:
- Start with a single pod or a small cluster to test your setup.
- Experiment with companion plants for a cohesive garden design.
- Share your progress with fellow gardening enthusiasts for inspiration!